A vegan nail polish blog. A celebration of colour and light, as well as of justice for nonhuman animals.

Posts tagged ‘multi glitter’

Authority Cosmetics Swatches and Review

Today I have four polishes to show you from the relatively-new brand of vegan polishes, Authority Cosmetics. Two cremes, a slight duochrome shimmer, and a glitter topper – let’s get started with the swatches, shall we? πŸ˜€

Authority Cosmetics Disco

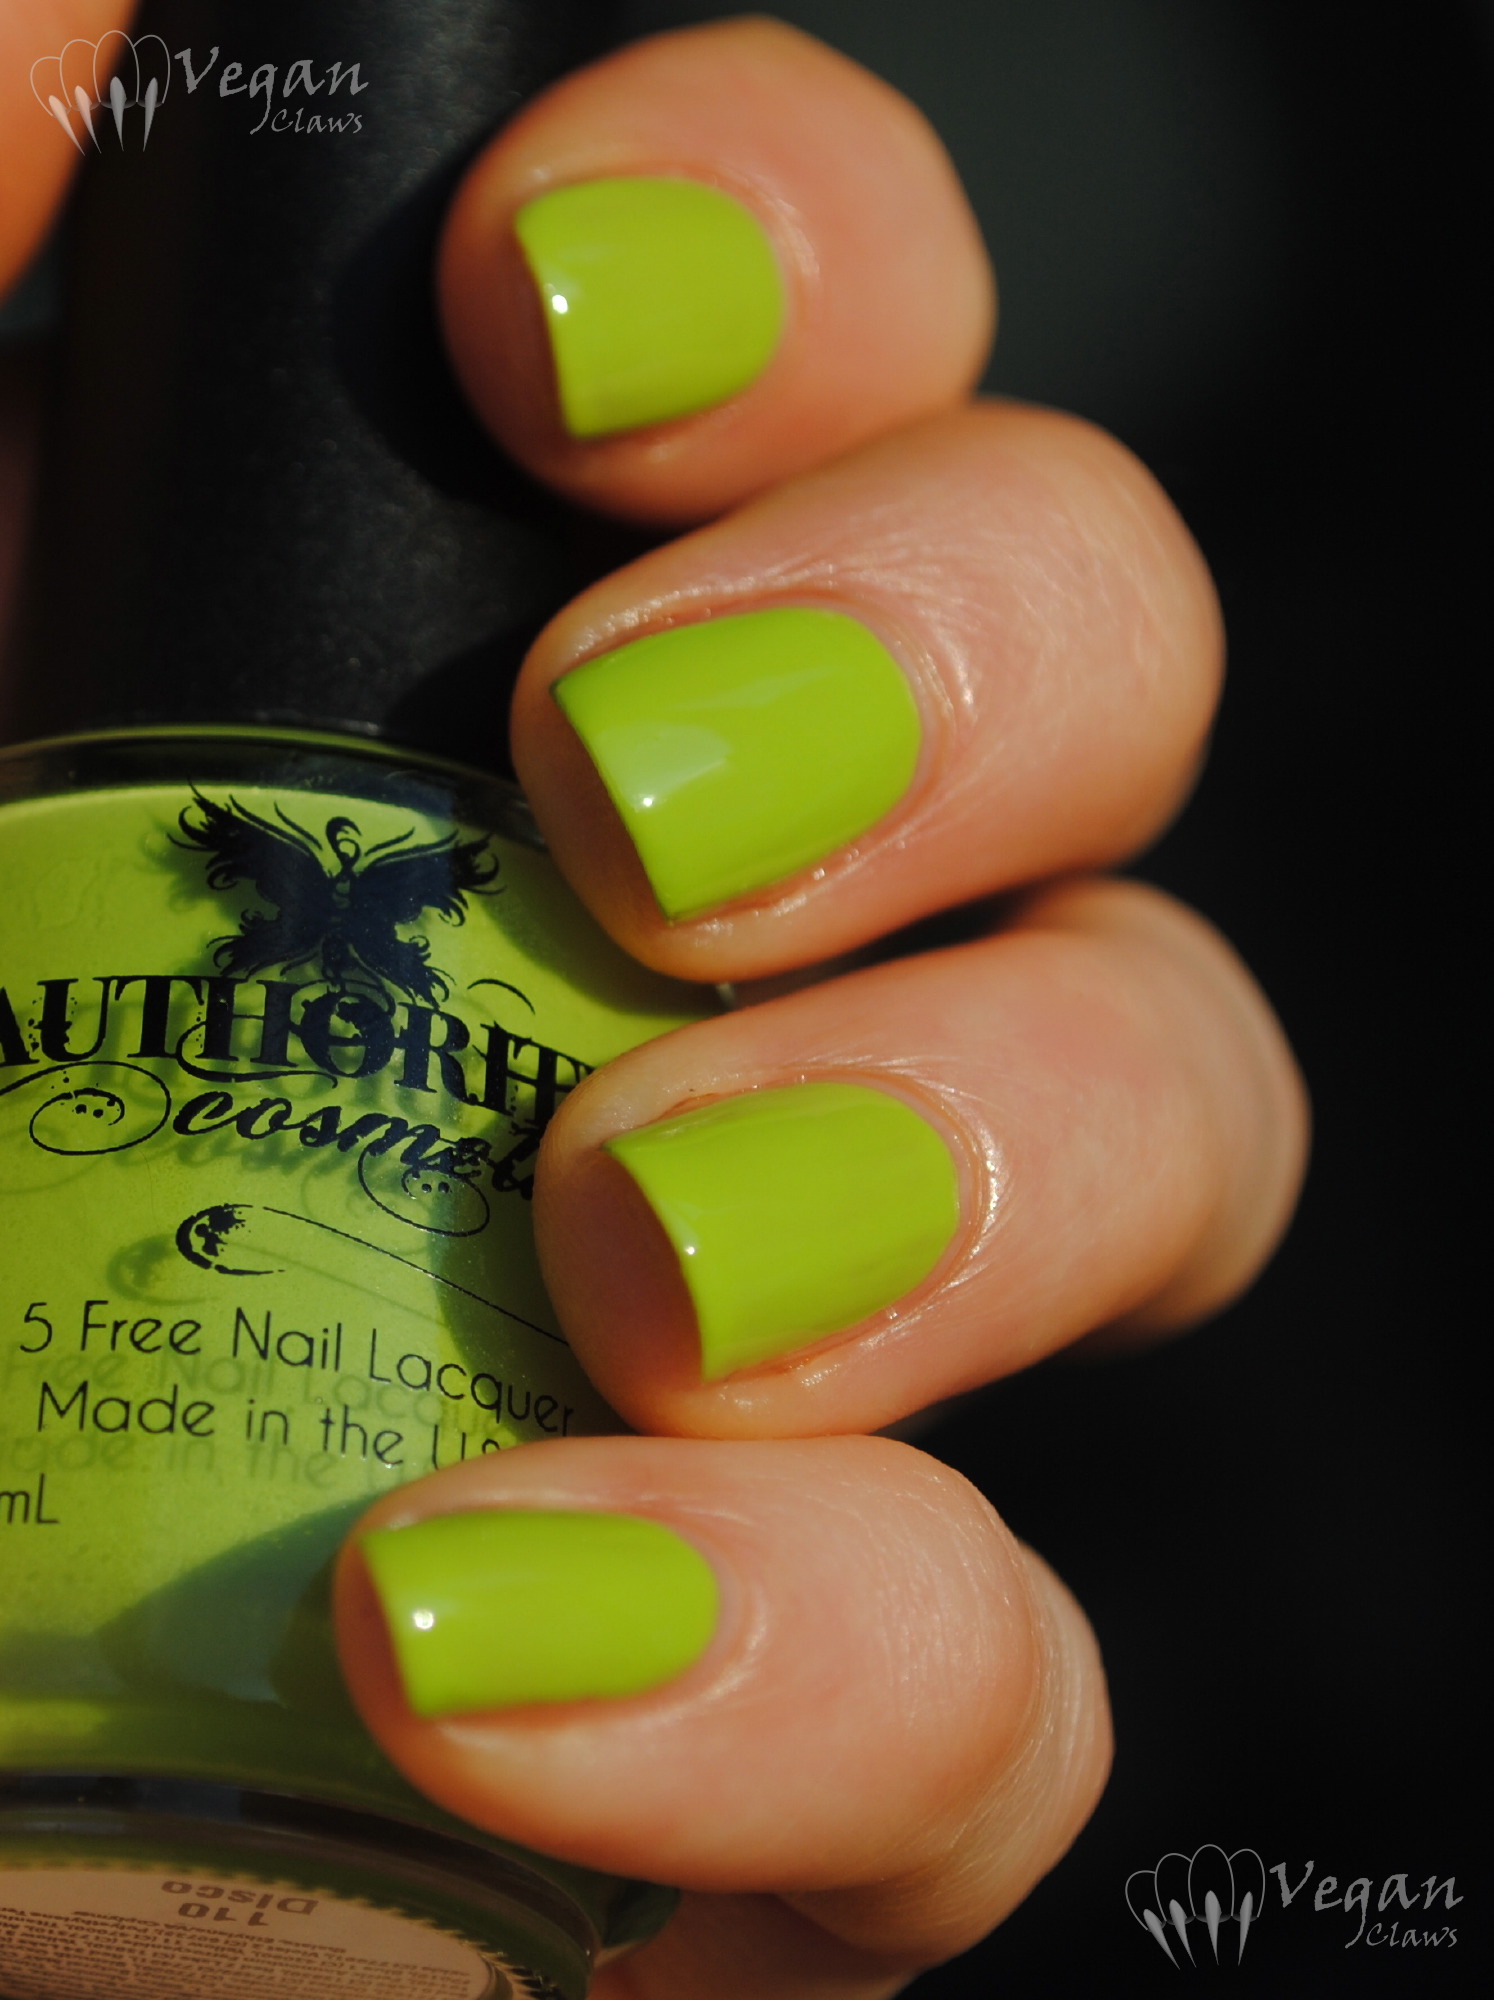
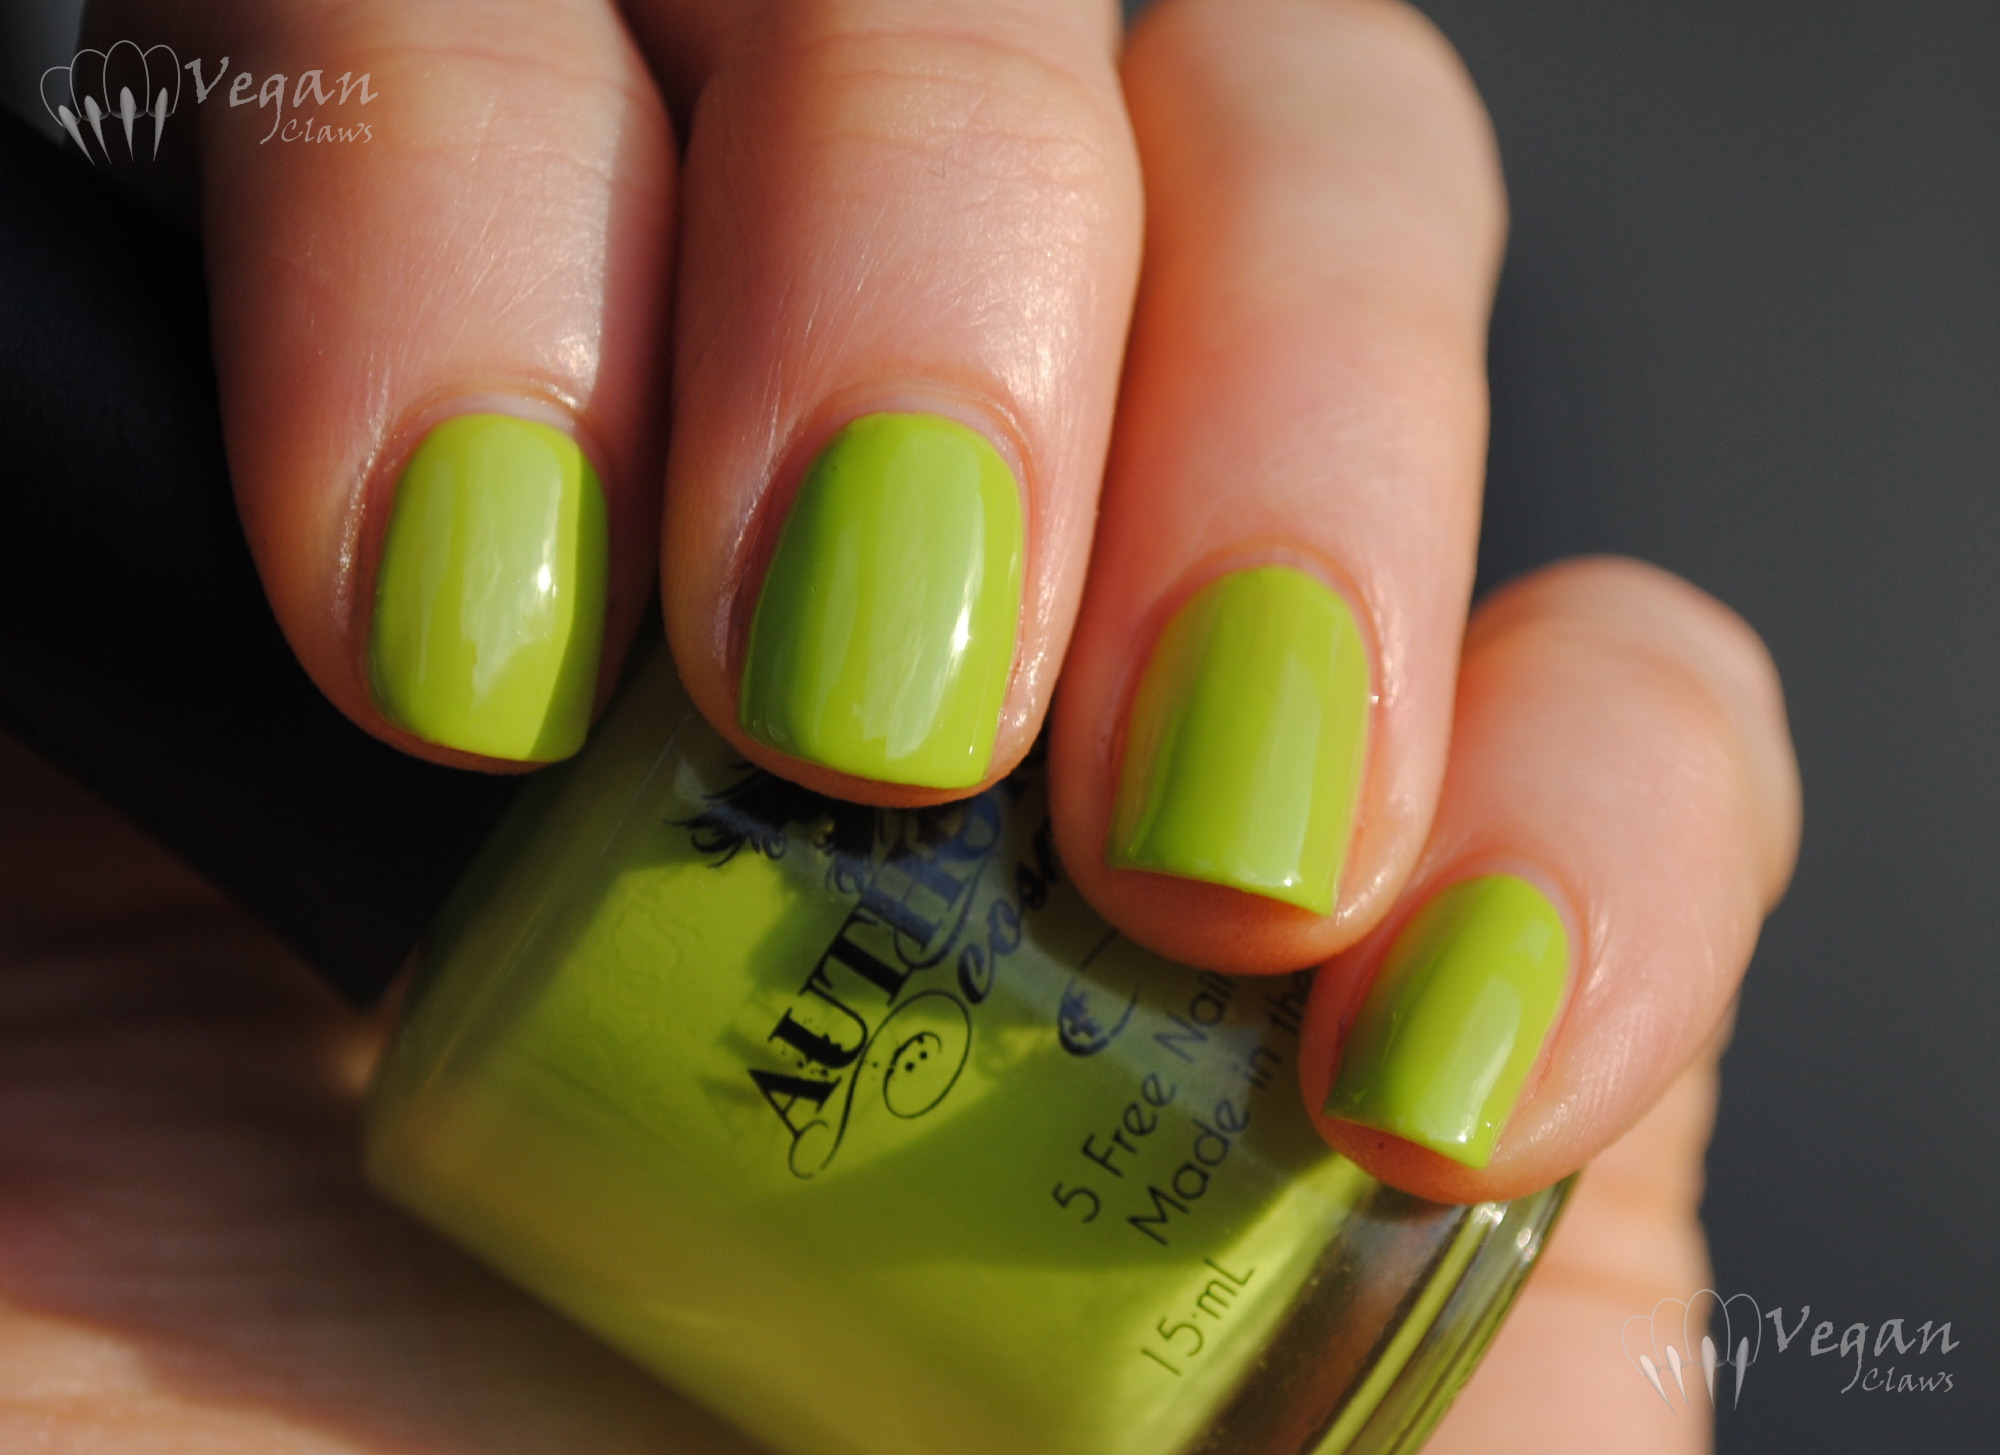
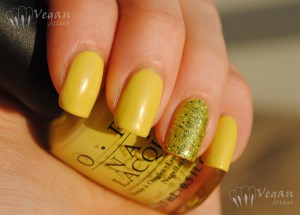
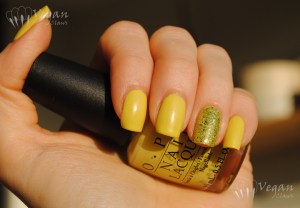
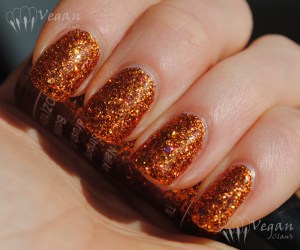
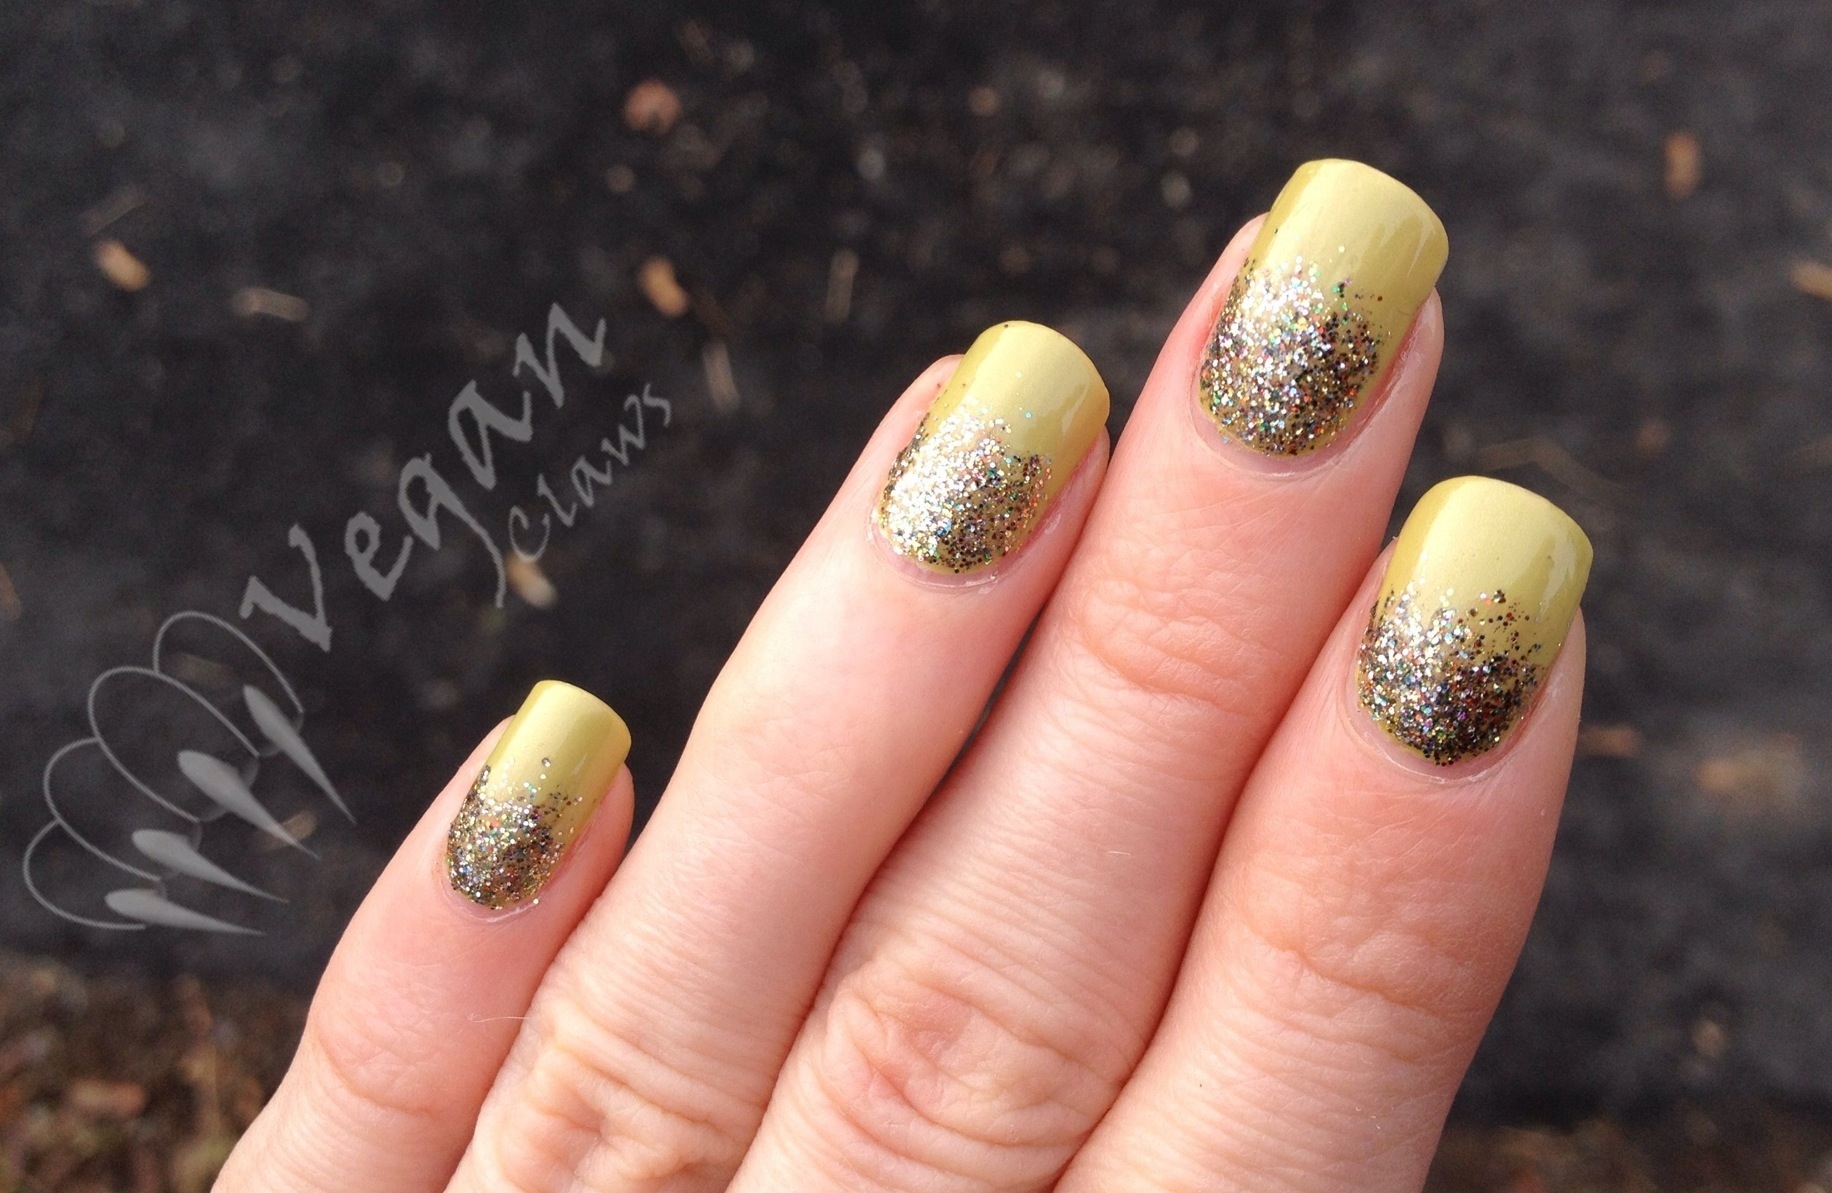
This great lime green creme is Disco. I used two coats.

Authority Cosmetics Disco

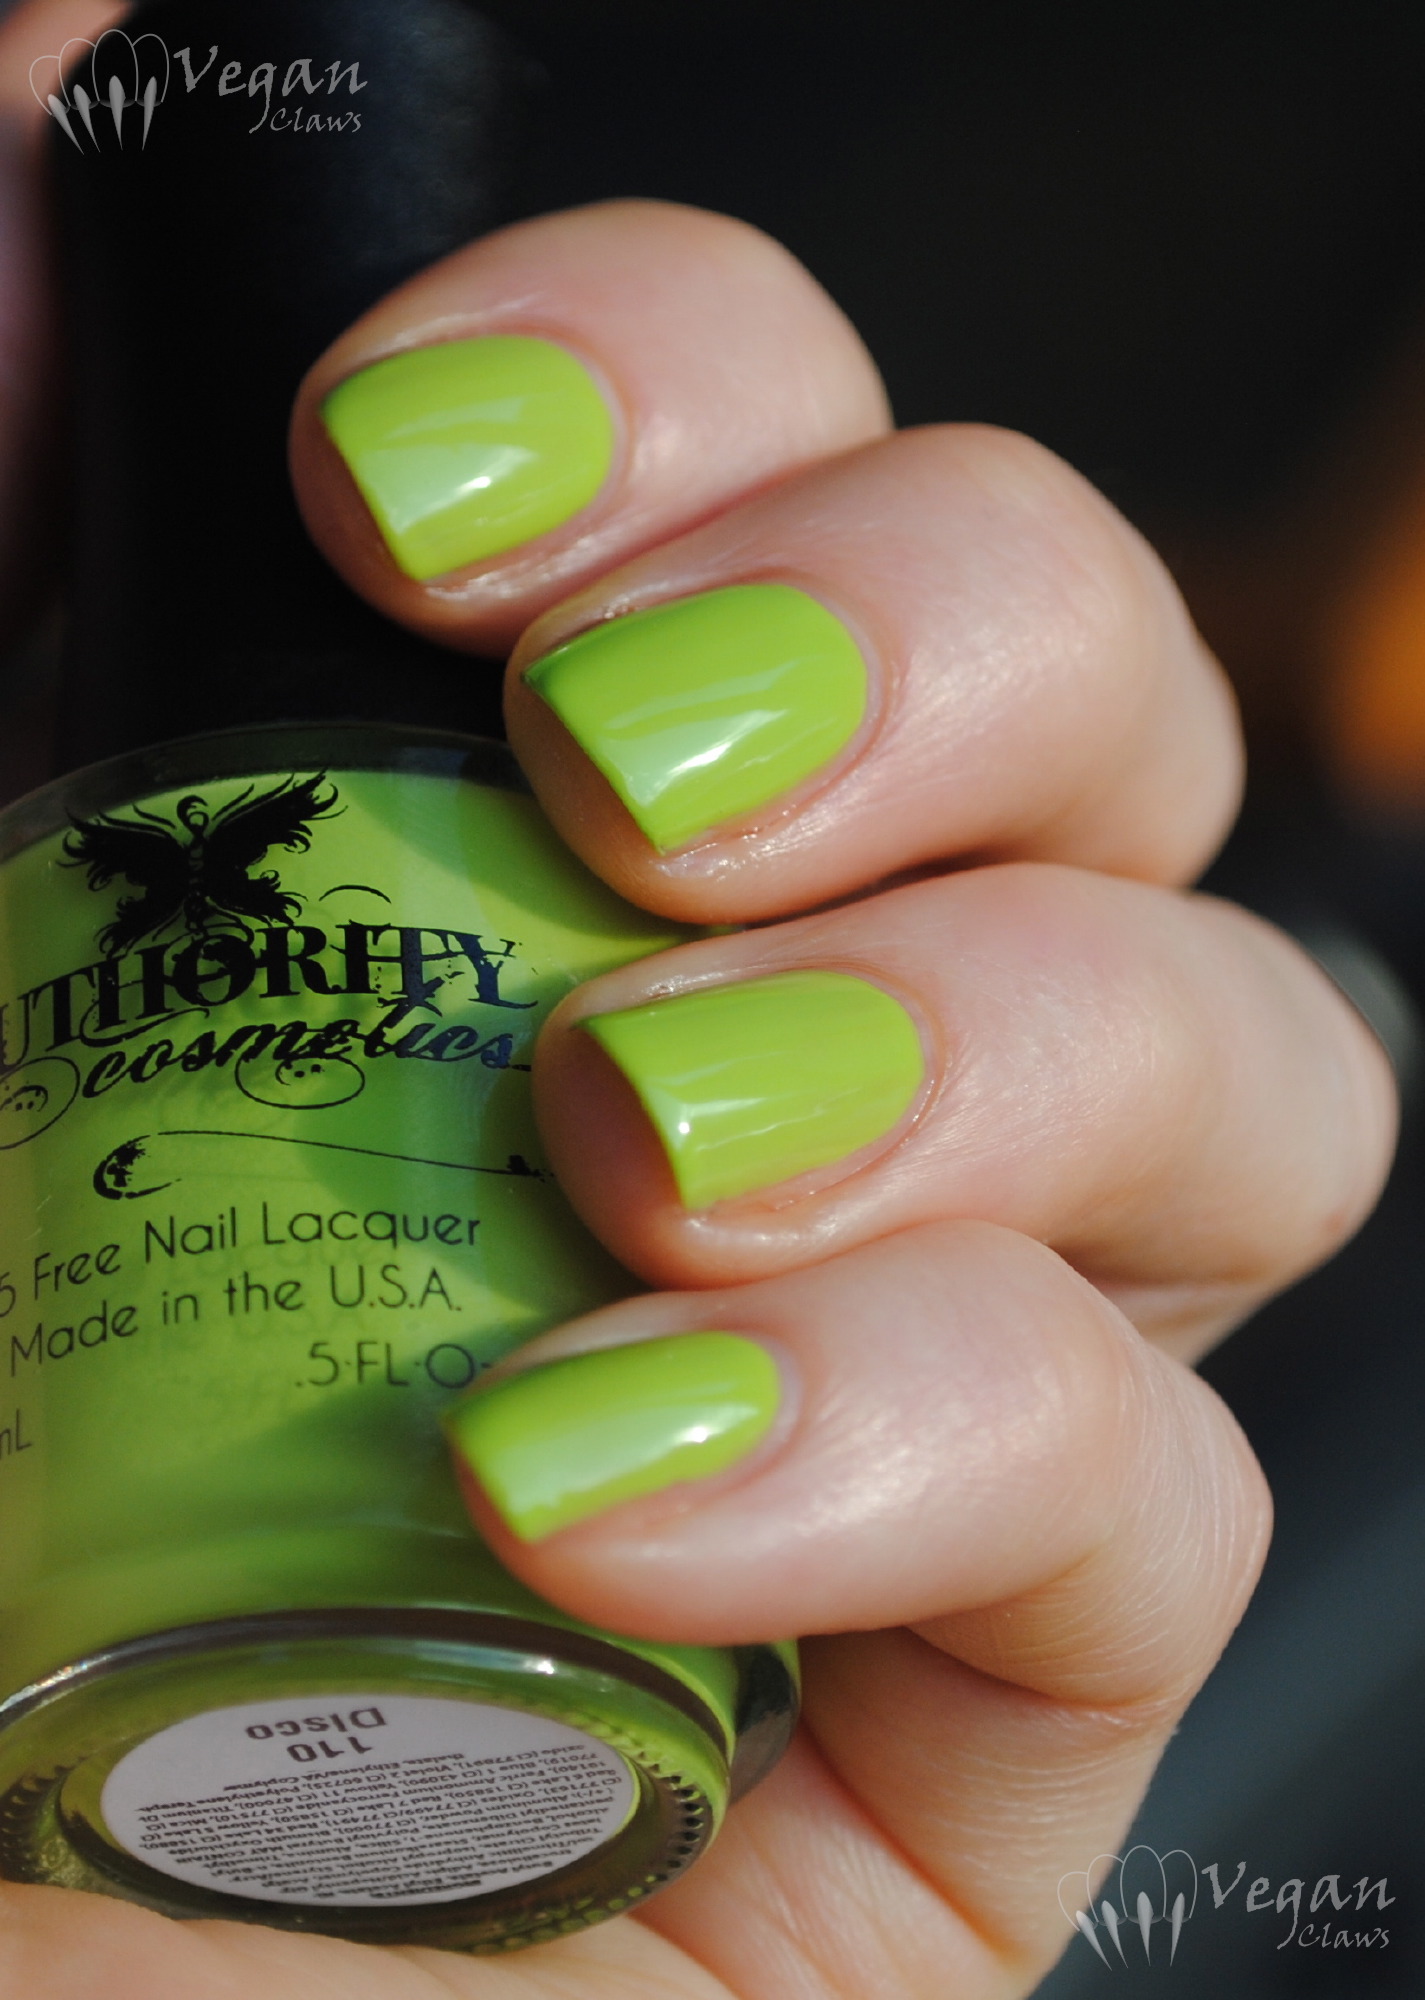
The formula was thick and pigmented and went on without streaks; I was really impressed!

Authority Cosmetics Disco

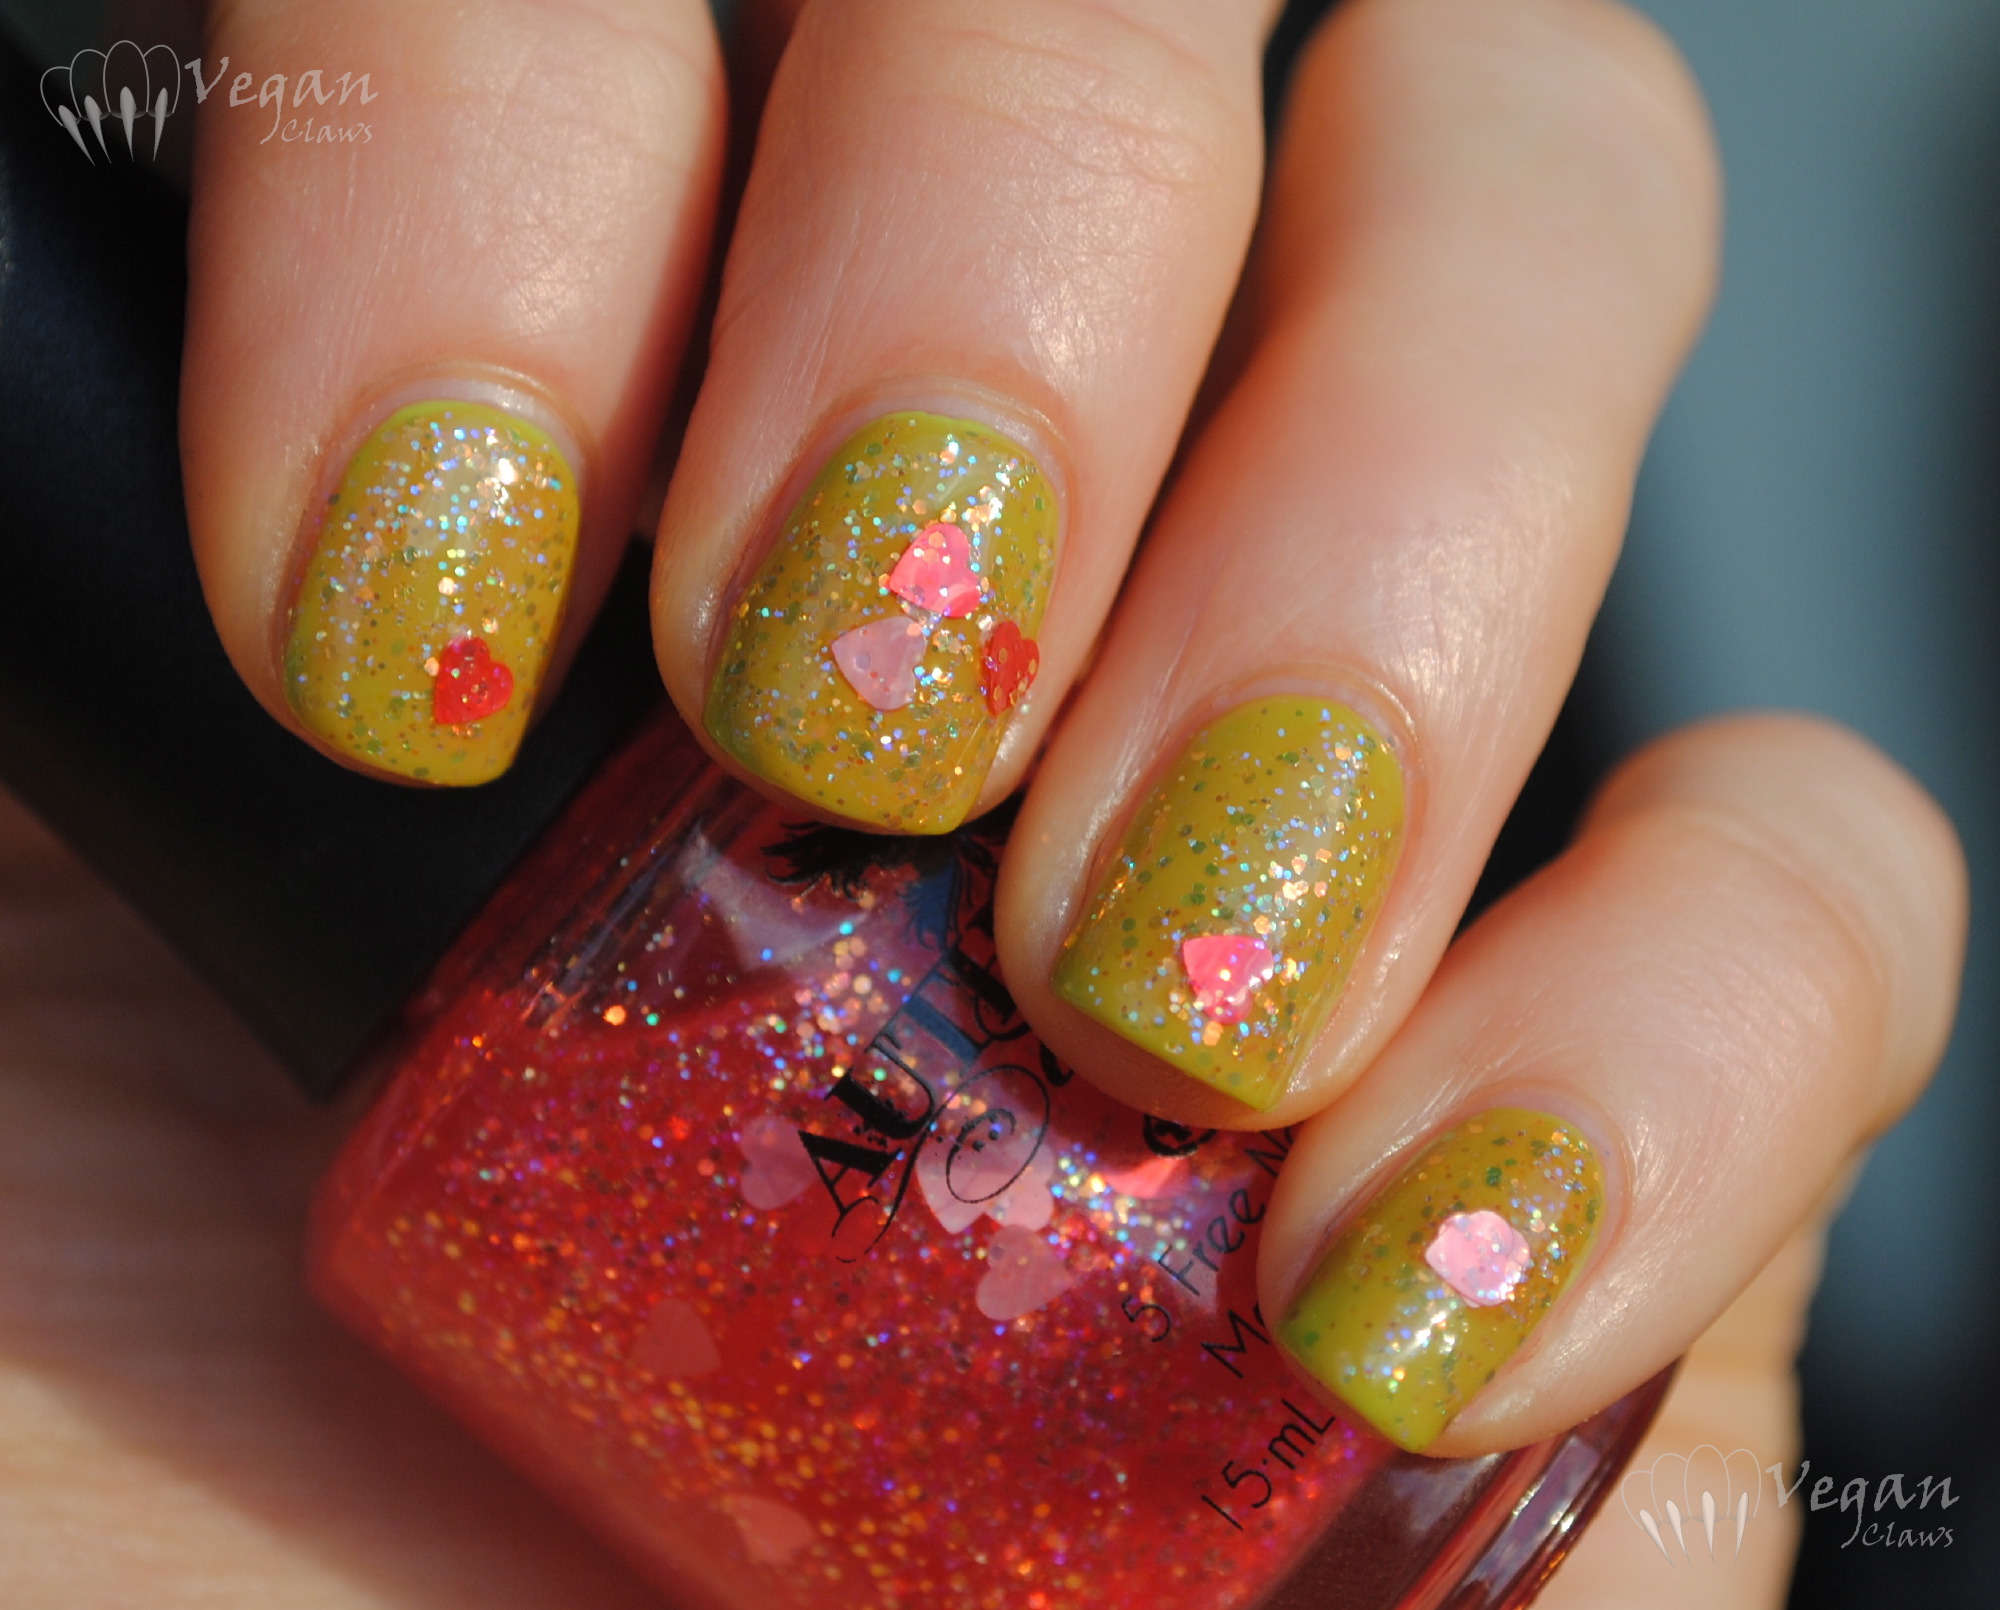
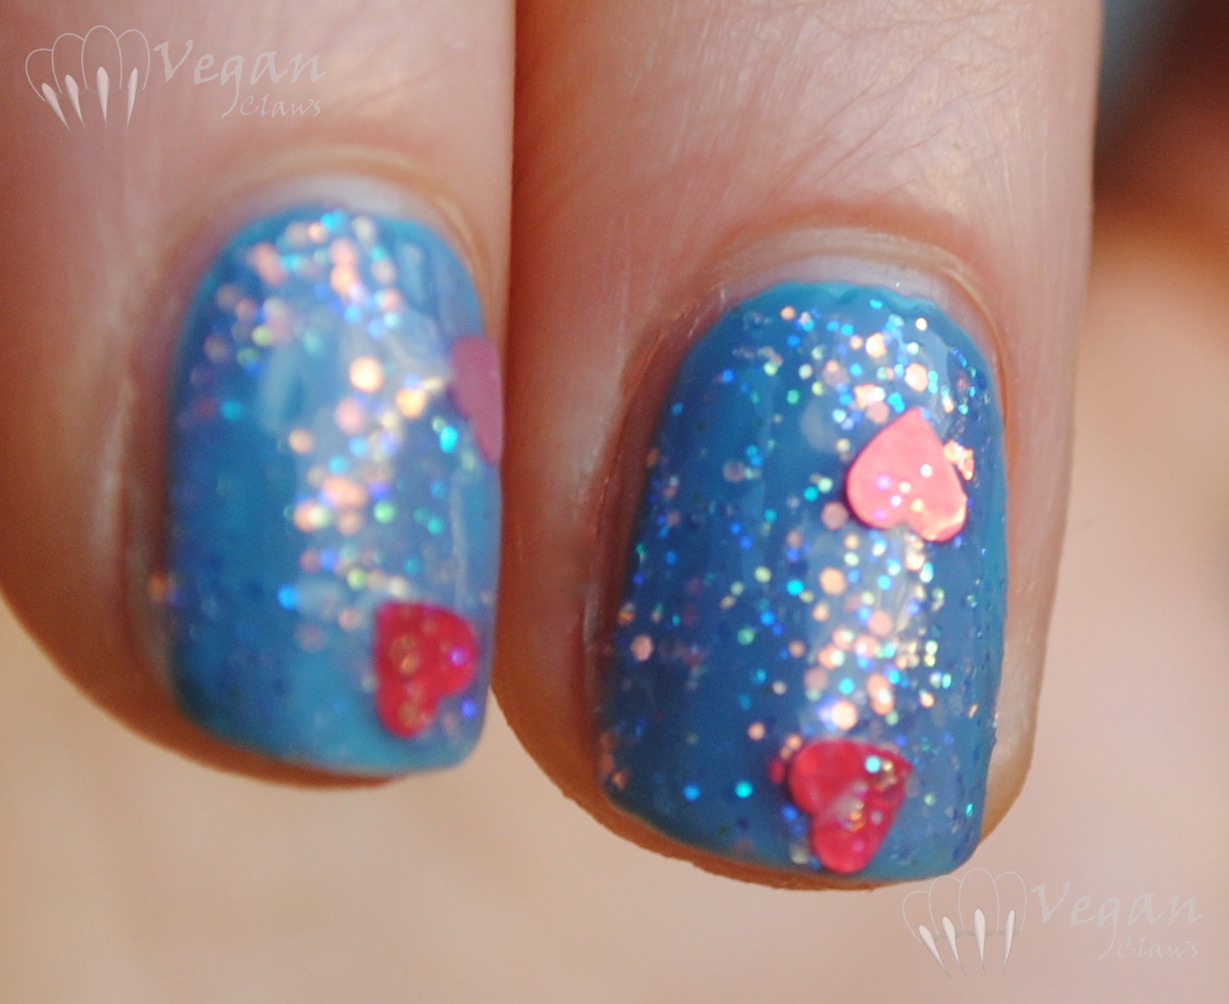
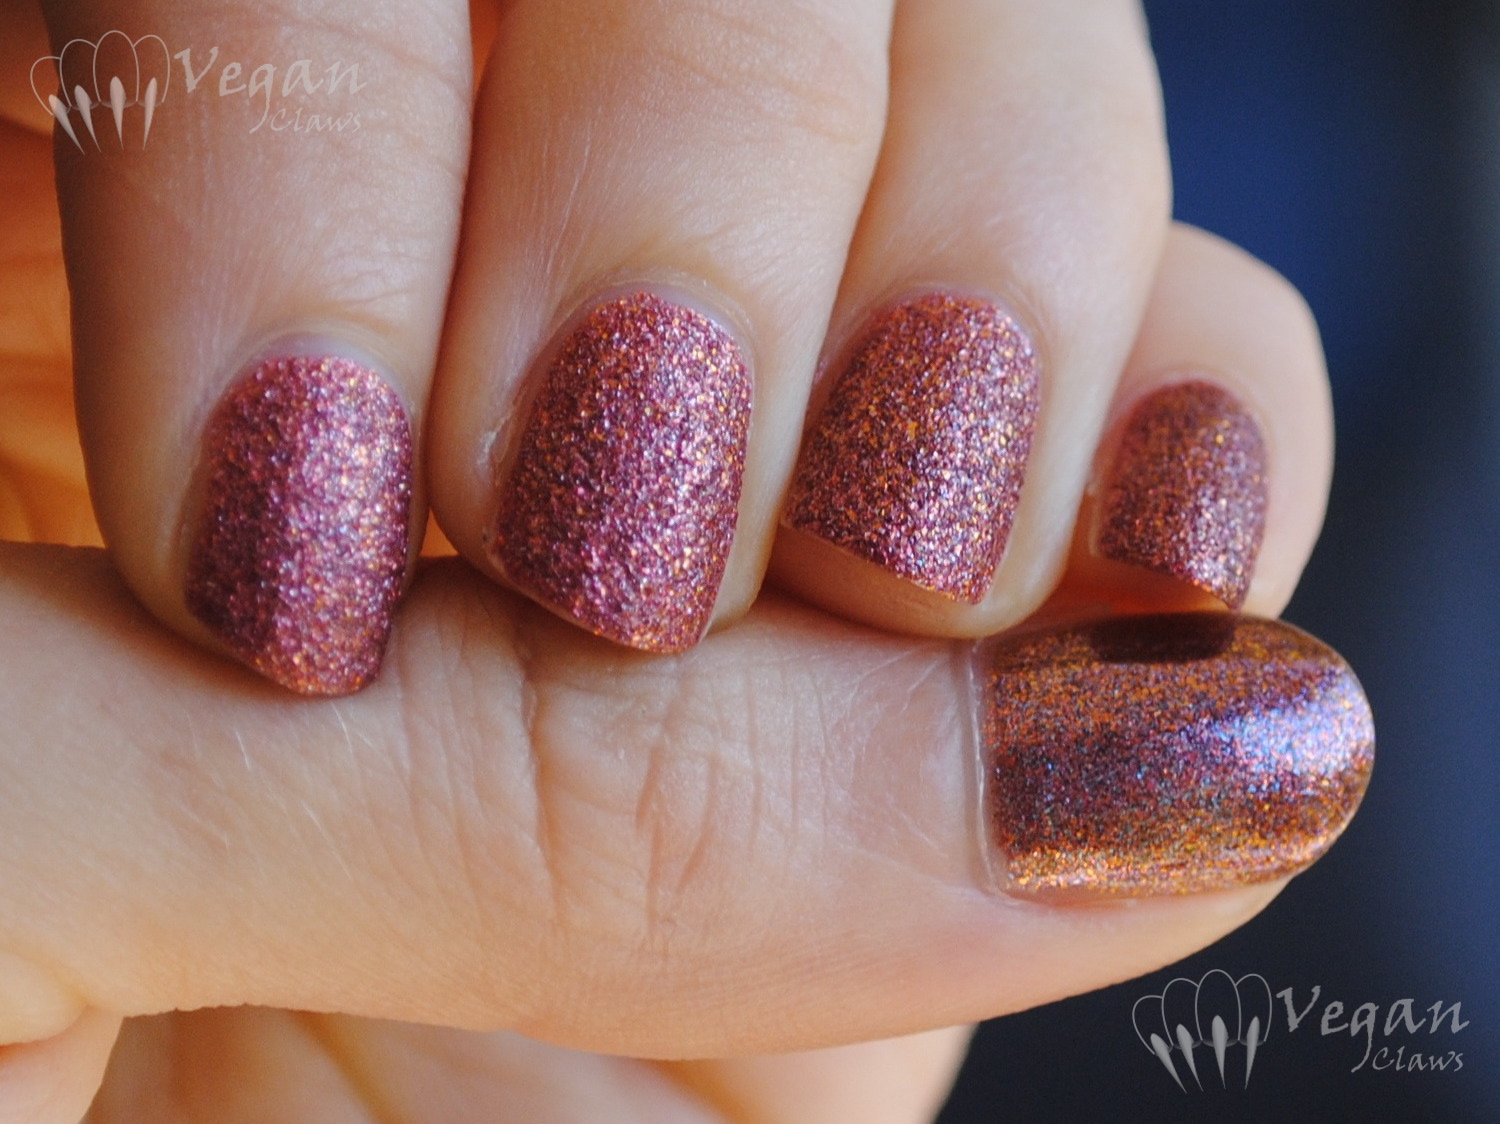
The glitter topper, I Heart You, has a clear pink base and is filled with small iridescent glitter and pink and red heart-shaped glitter. I applied one thick coat over Disco and wasn’t sure if it would work out with the green and pink layered, but it turned into a really great olive green shade! I think it actually ended up being my favourite combo with I Heart You! A couple of swirls of the brush generally brought out 1-3 hearts from the bottle without trouble, and there was a little placement of hearts involved to get them distributed evenly on the nail.

Authority Cosmetics Disco and I Heart You

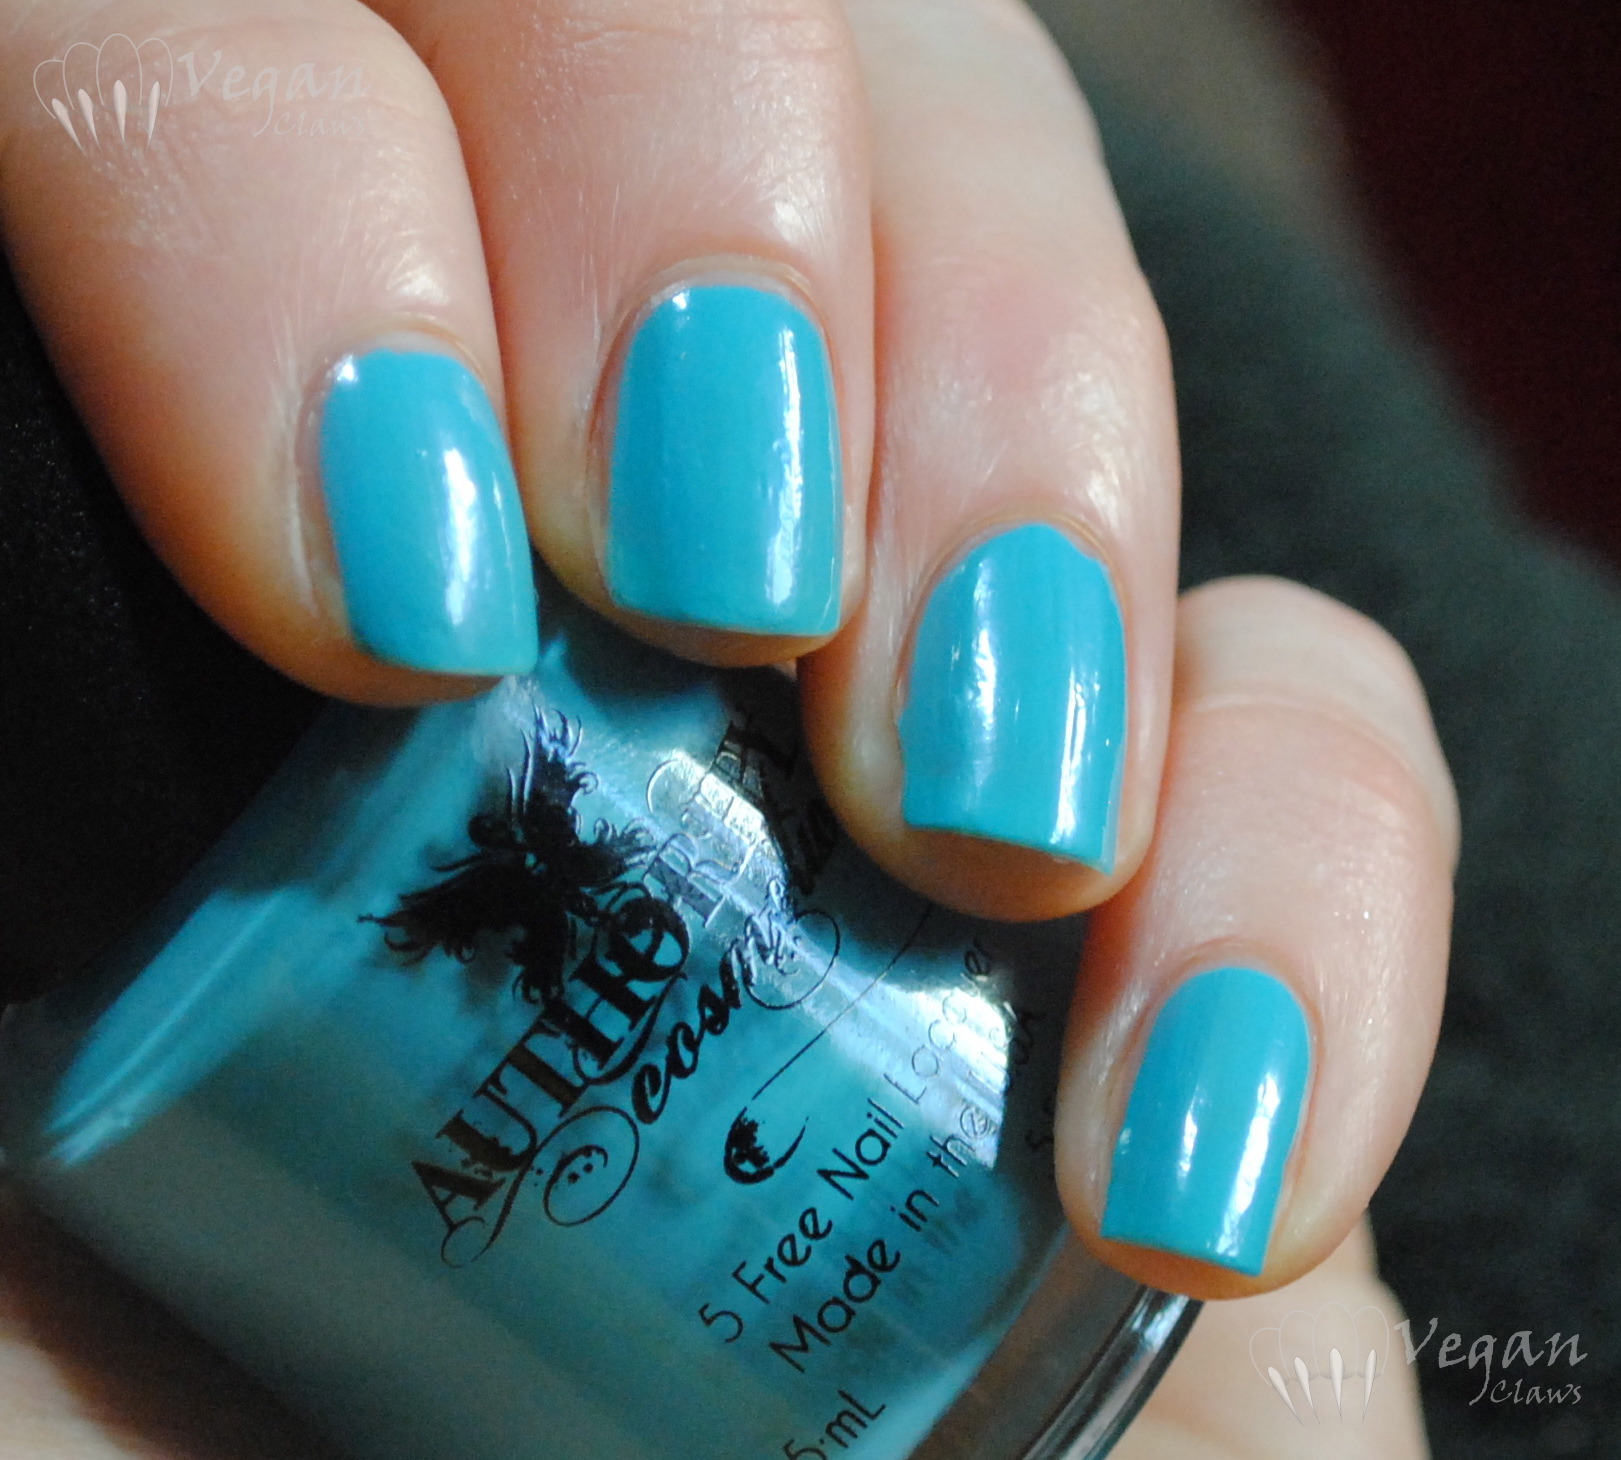
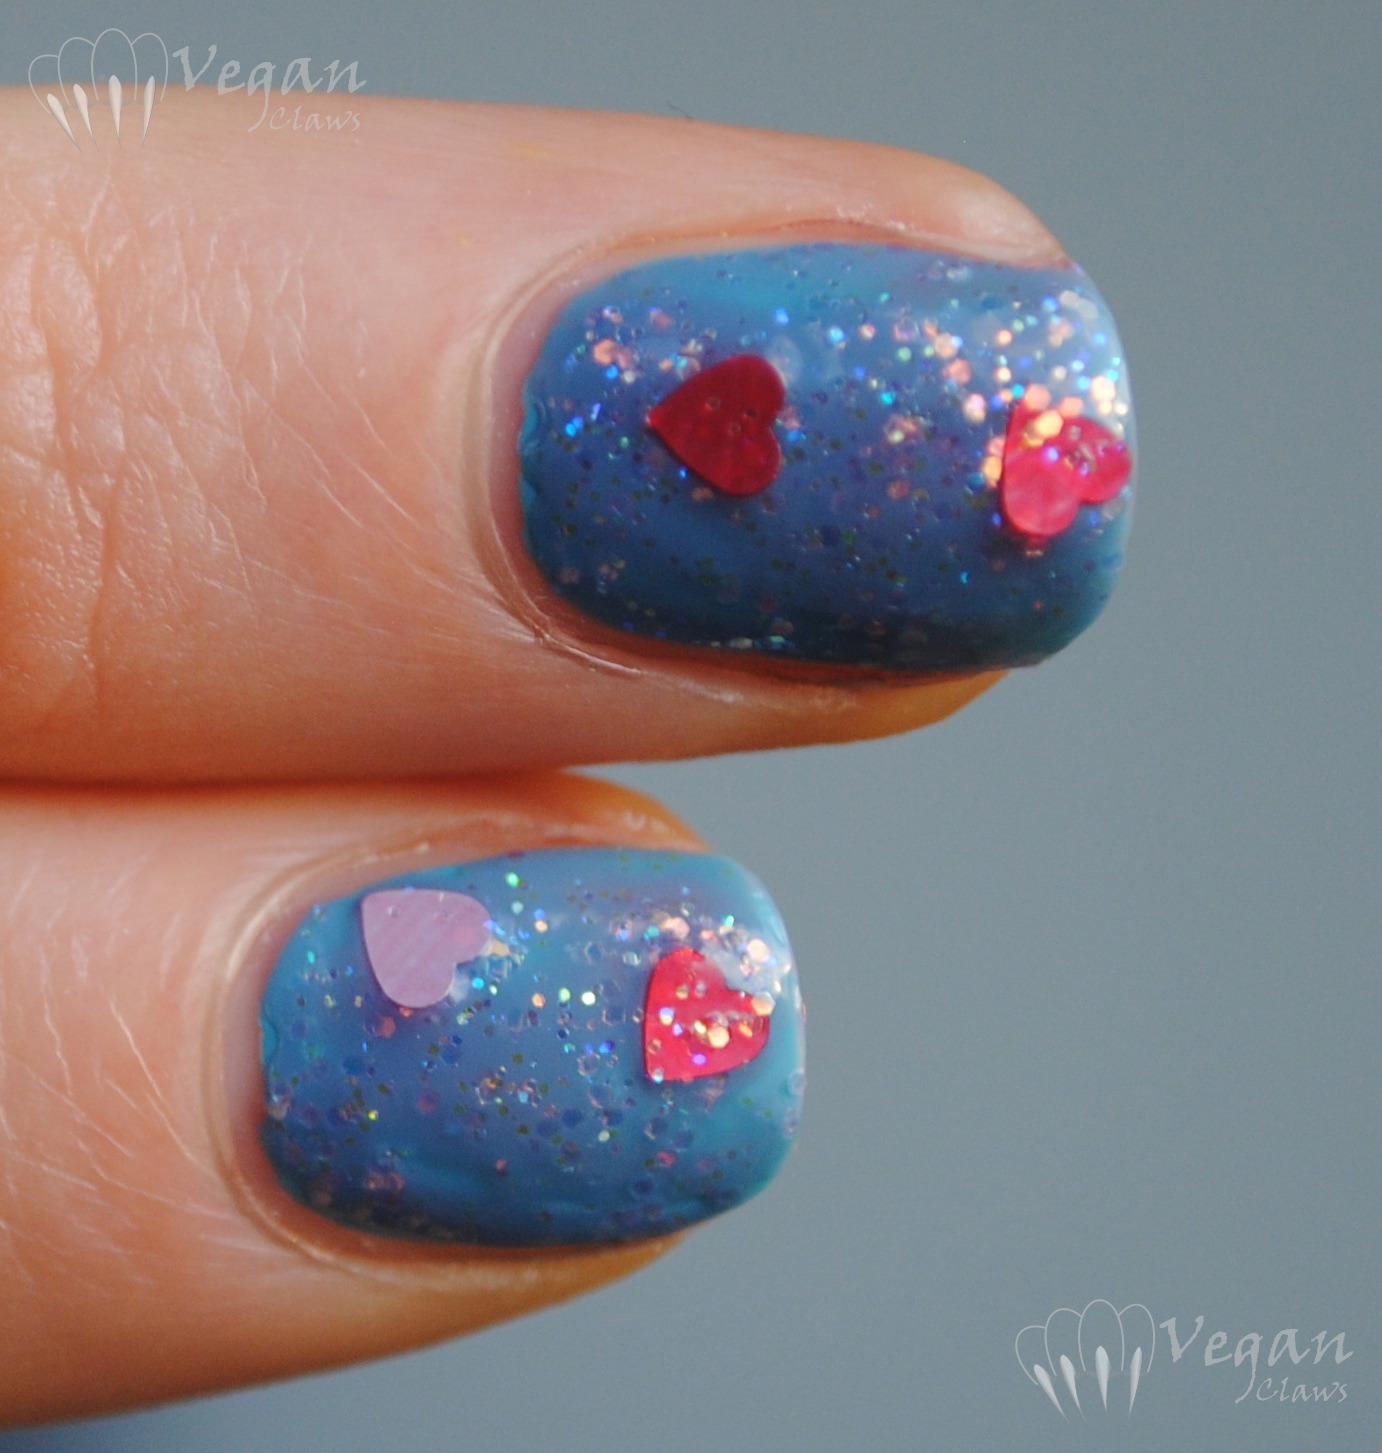
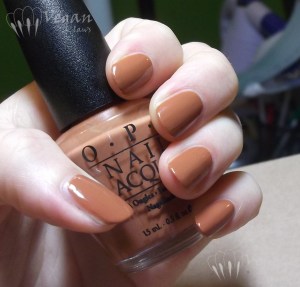
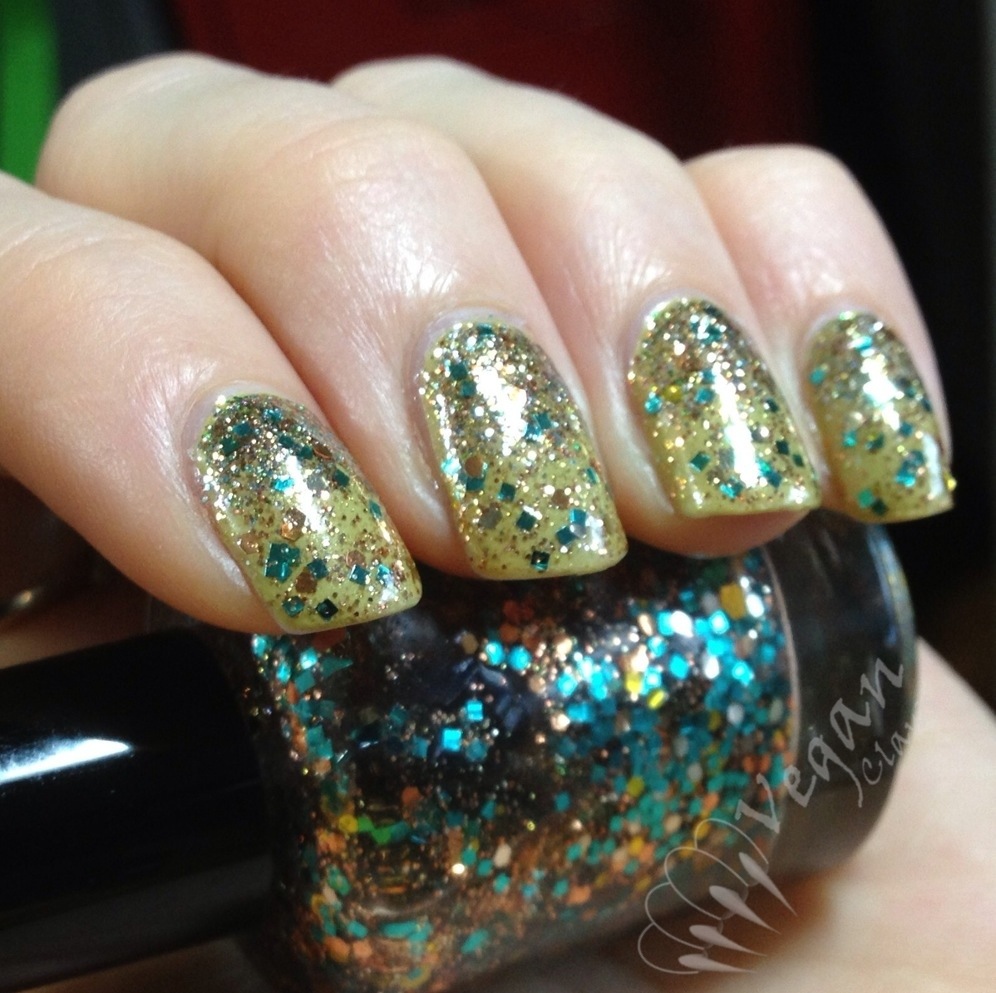
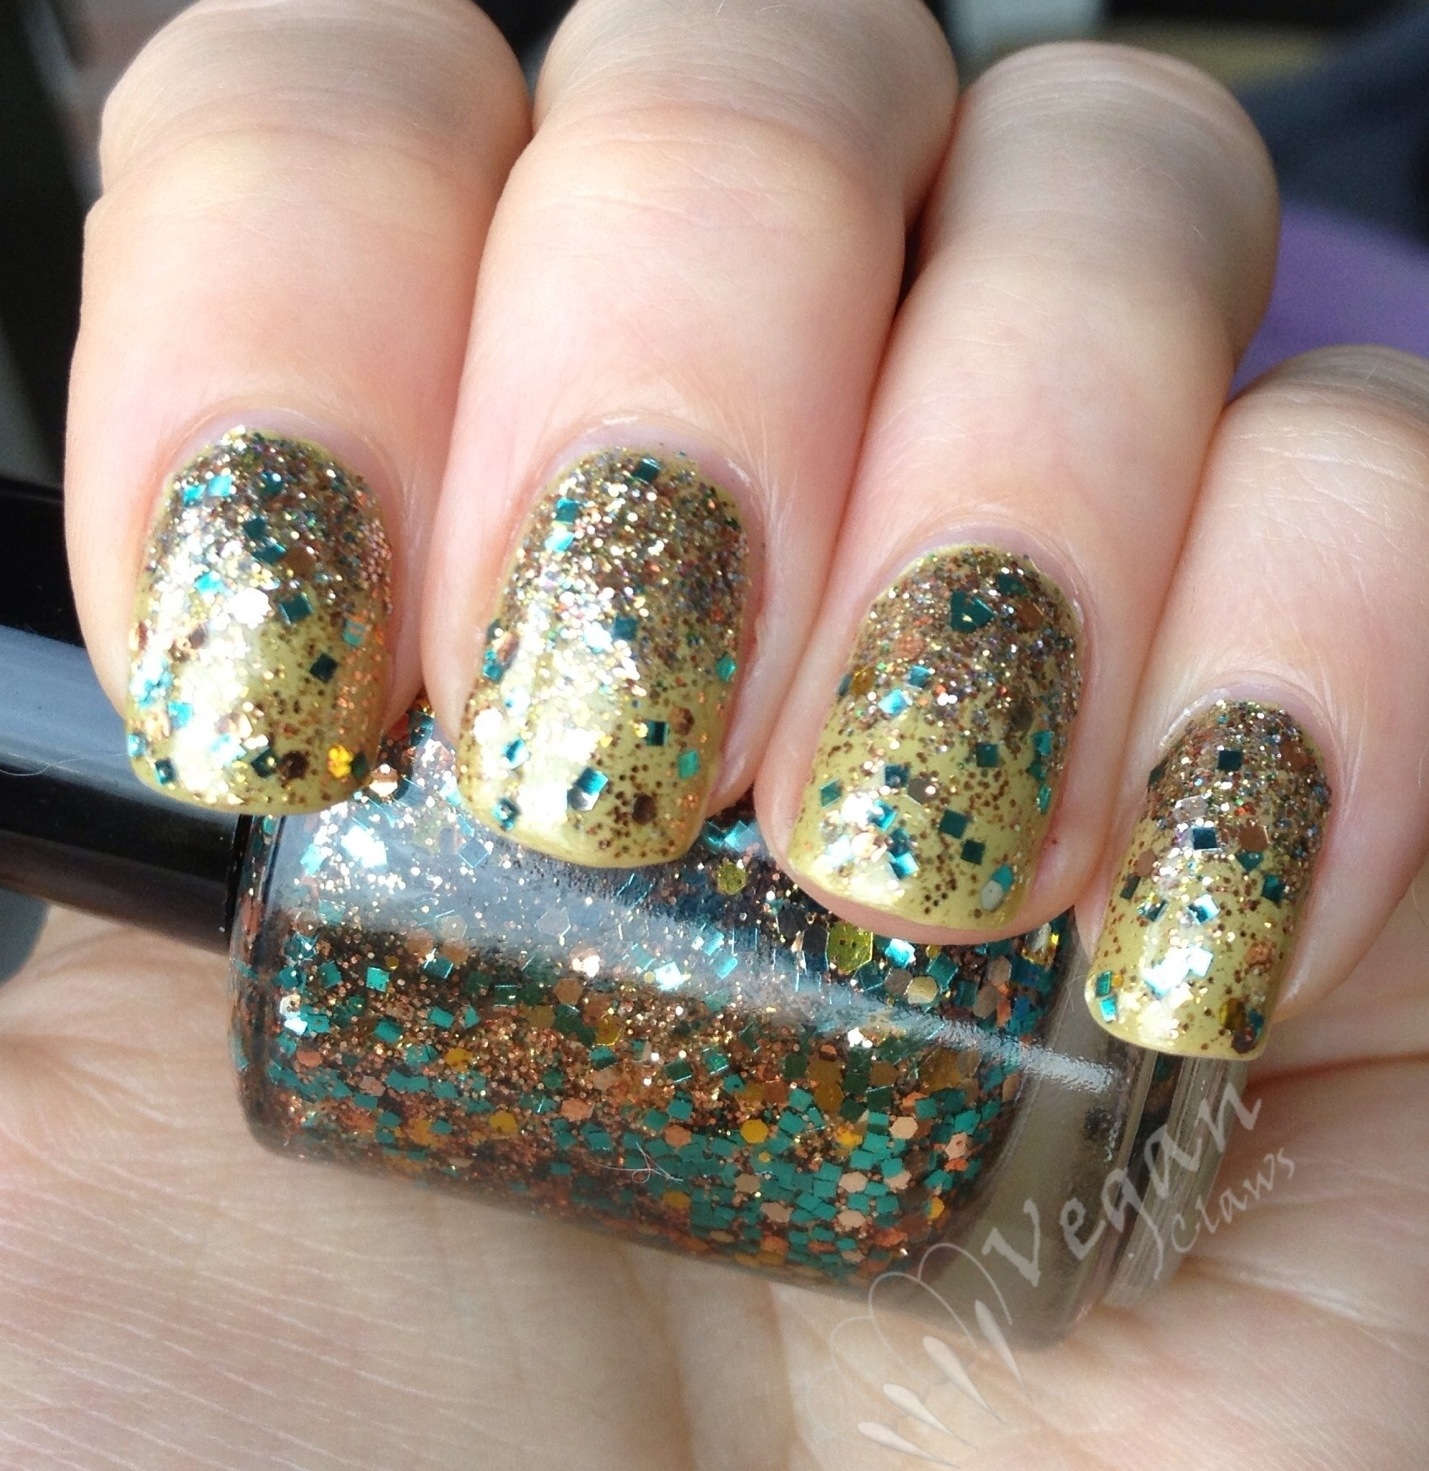
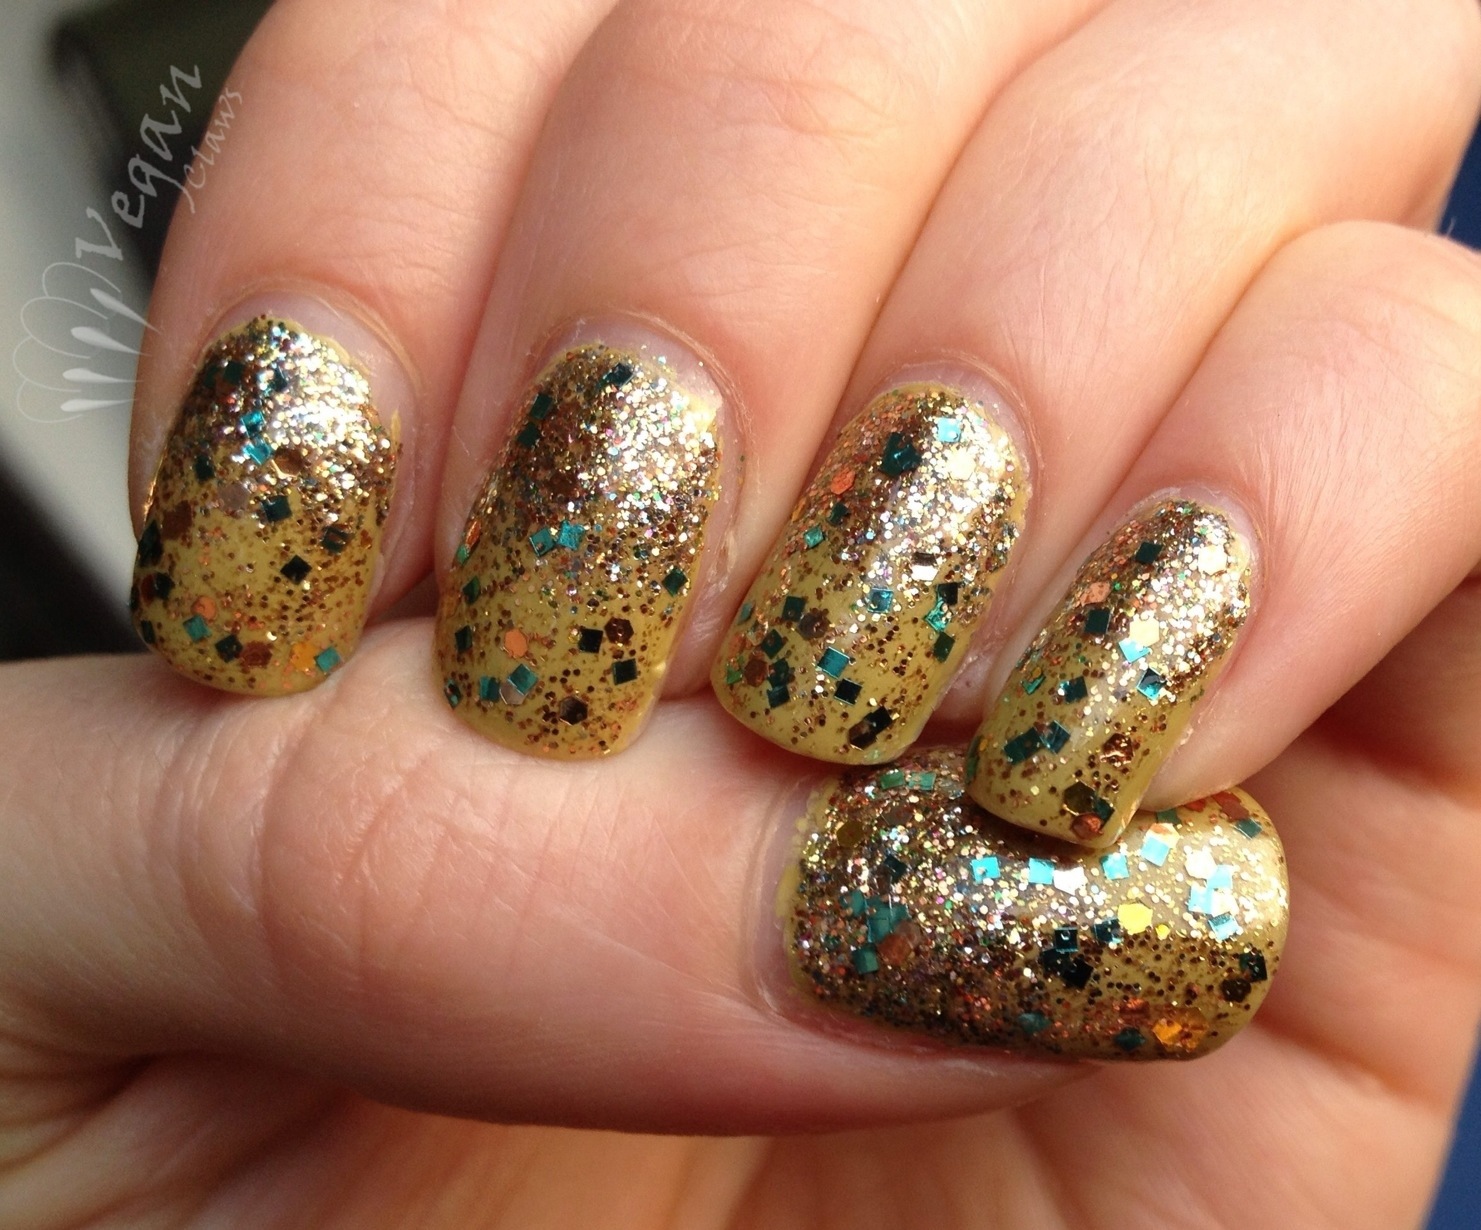
The second shade, Paradise, is a medium bright blue creme, also thick and pigmented like Disco. In fact, this swatch shows just one thick coat.

Authority Cosmetics Paradise

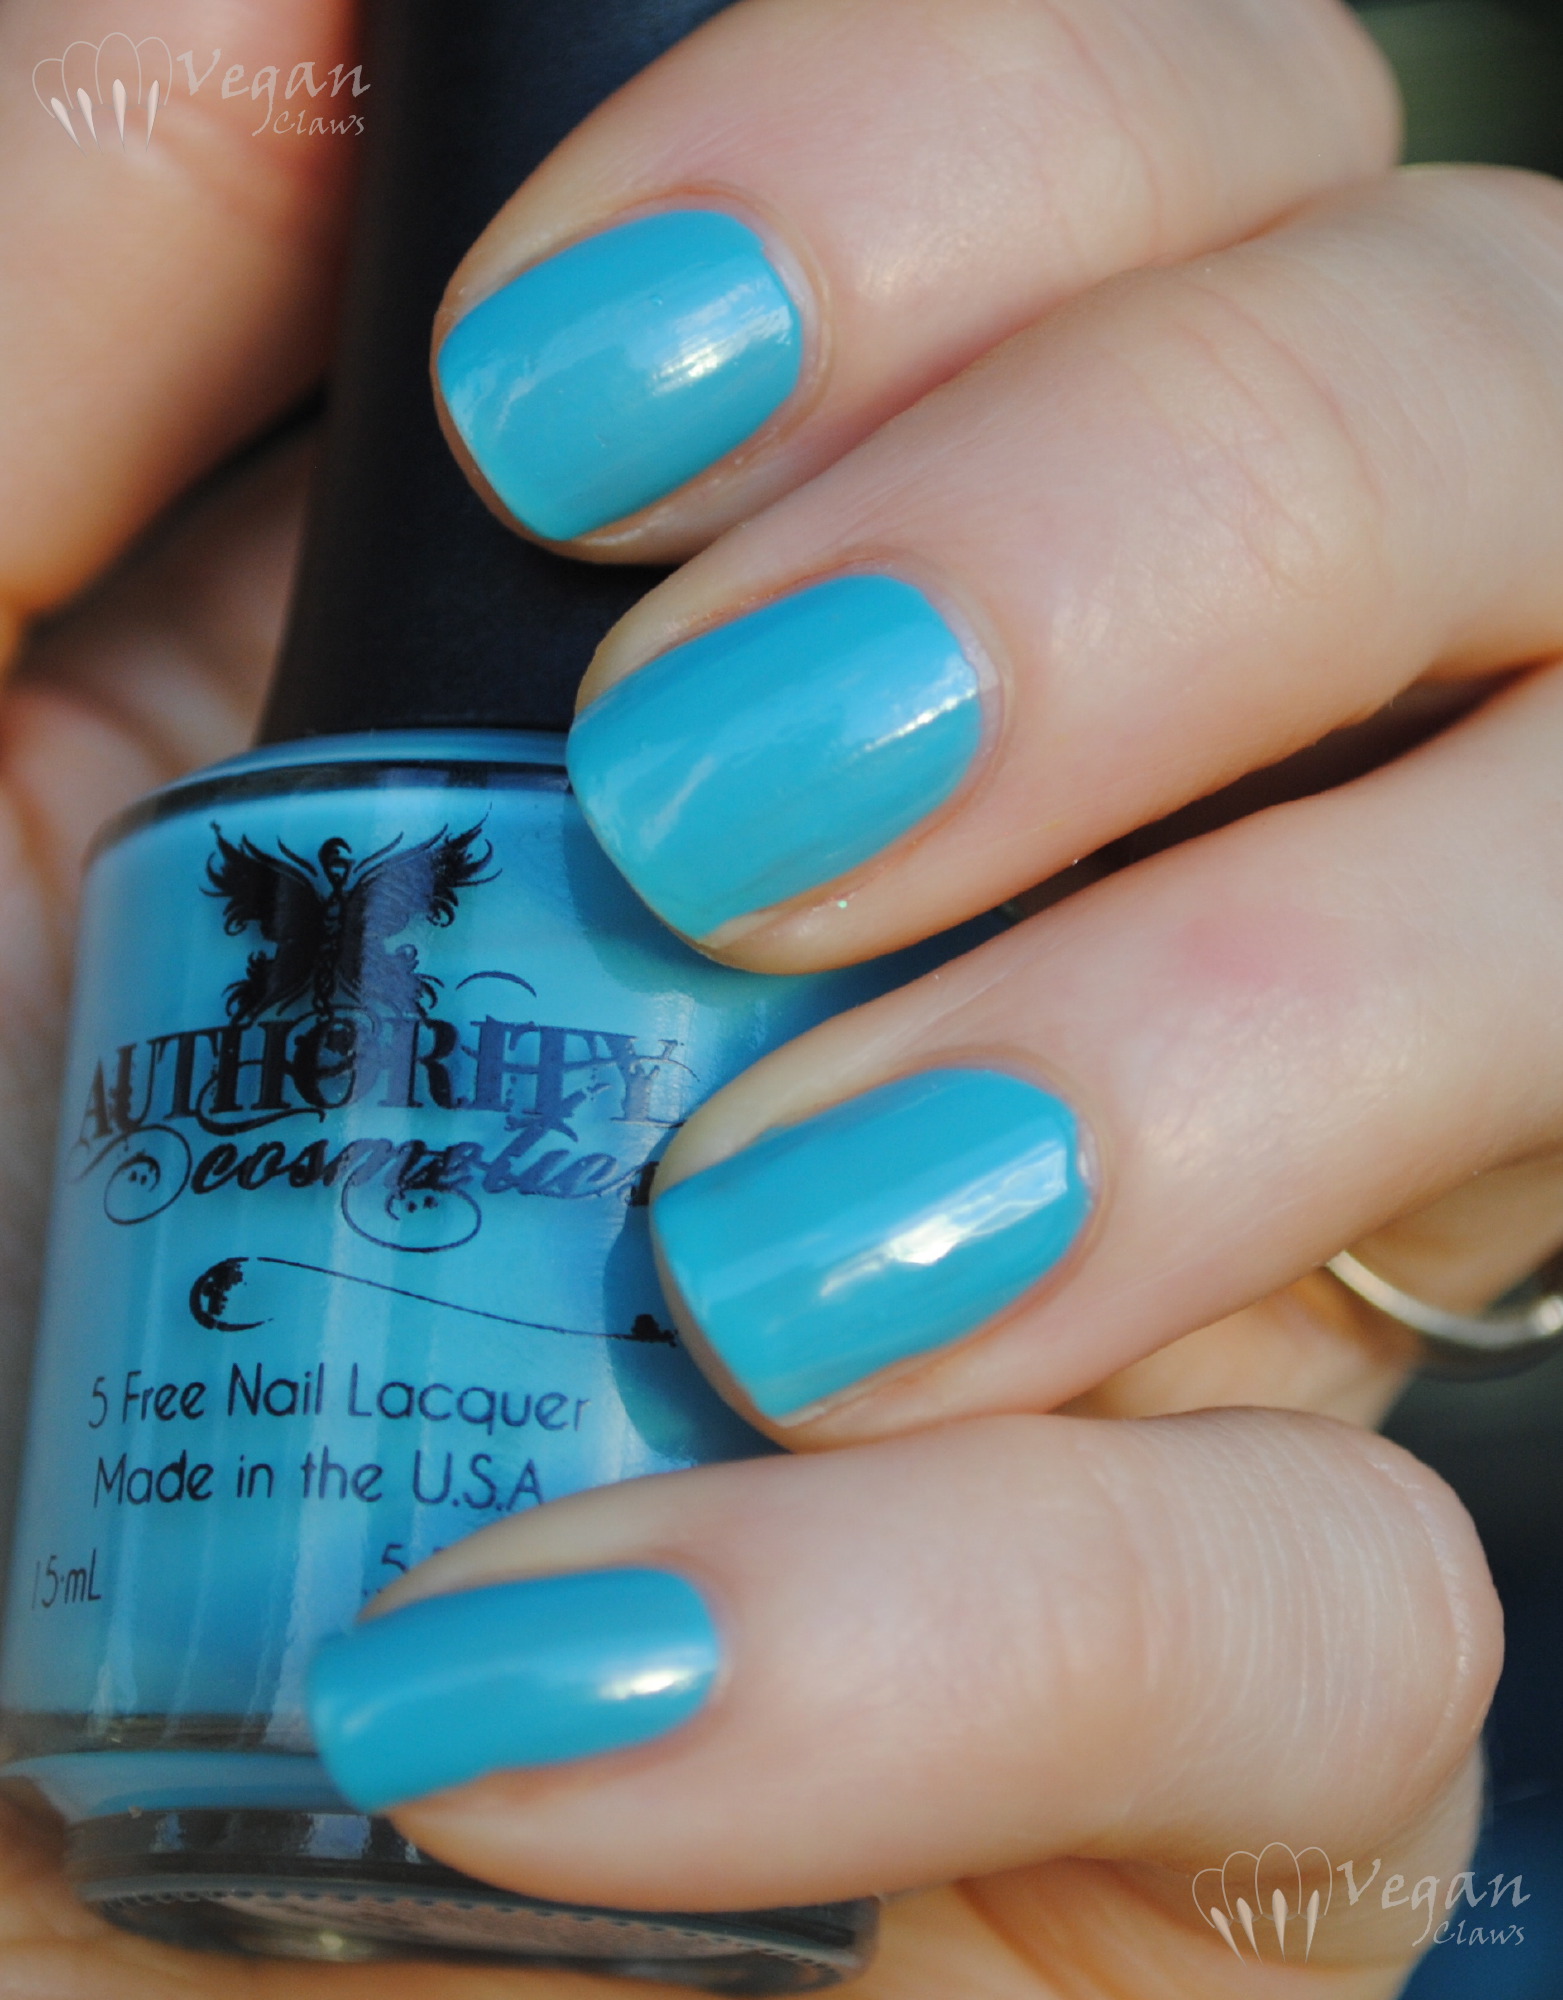
I probably should have done two thinner coats instead of one thick, since I ended up getting a few tiny bubbles as it dried, but I wanted to see if it covered in a single layer.

Authority Cosmetics Paradise

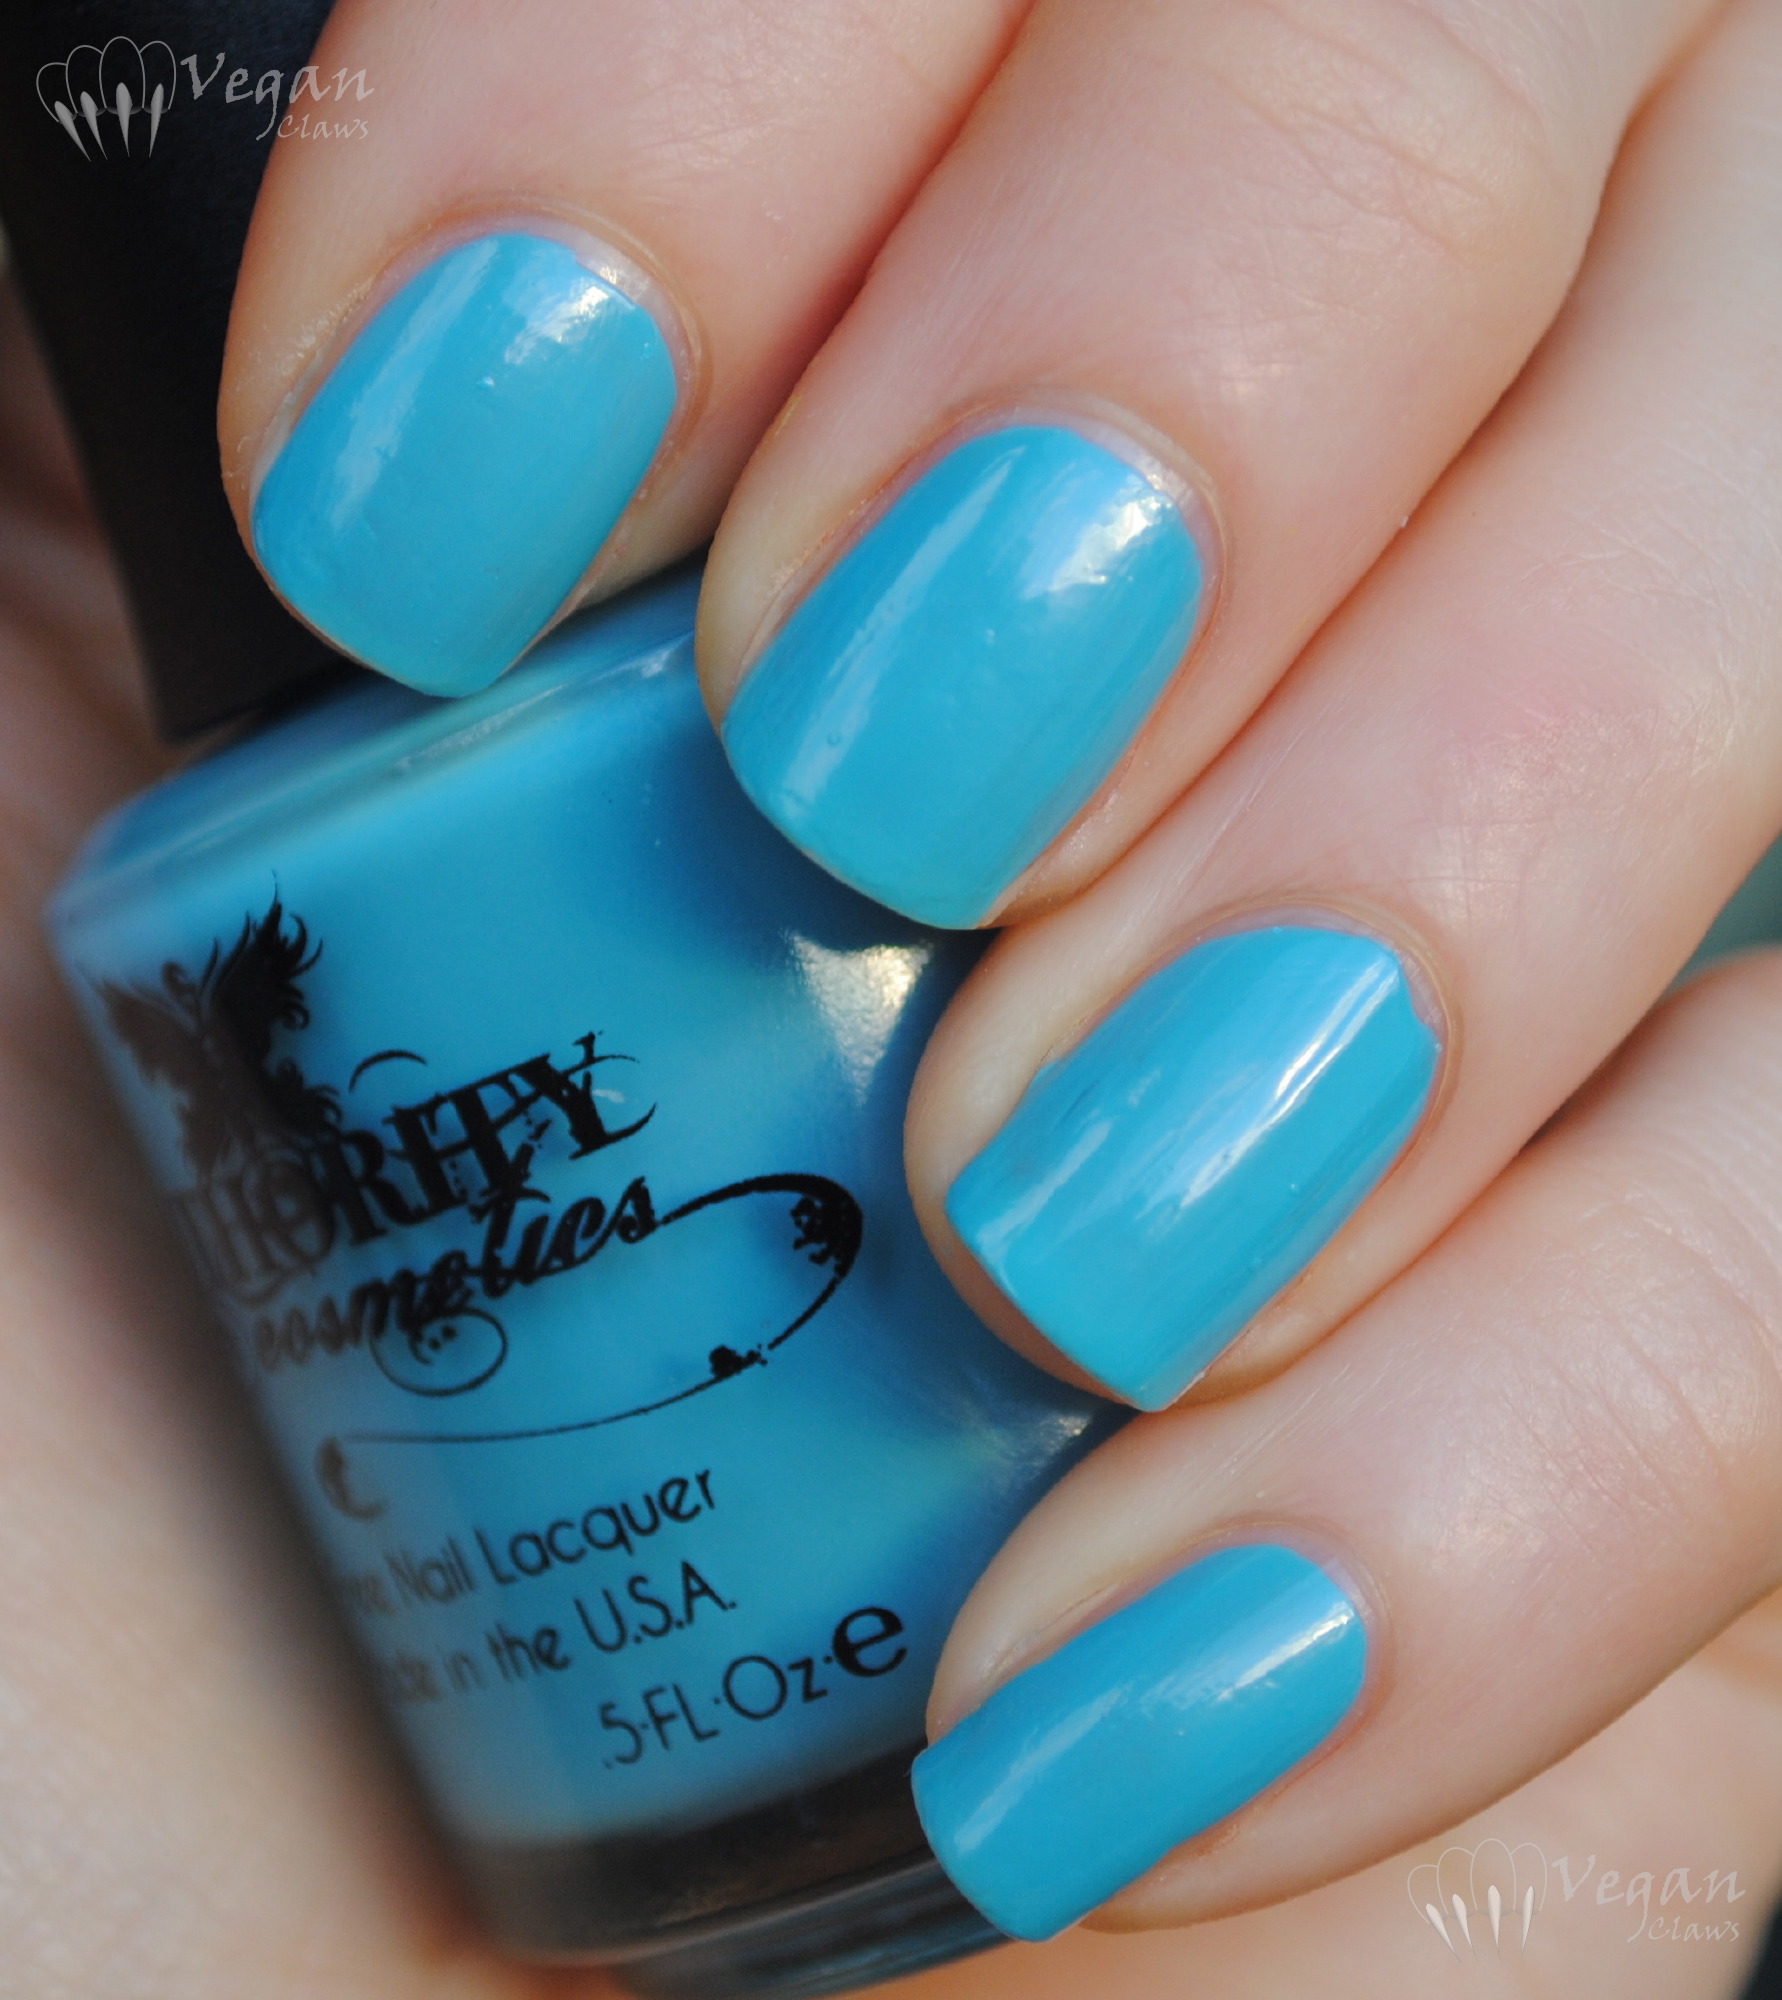
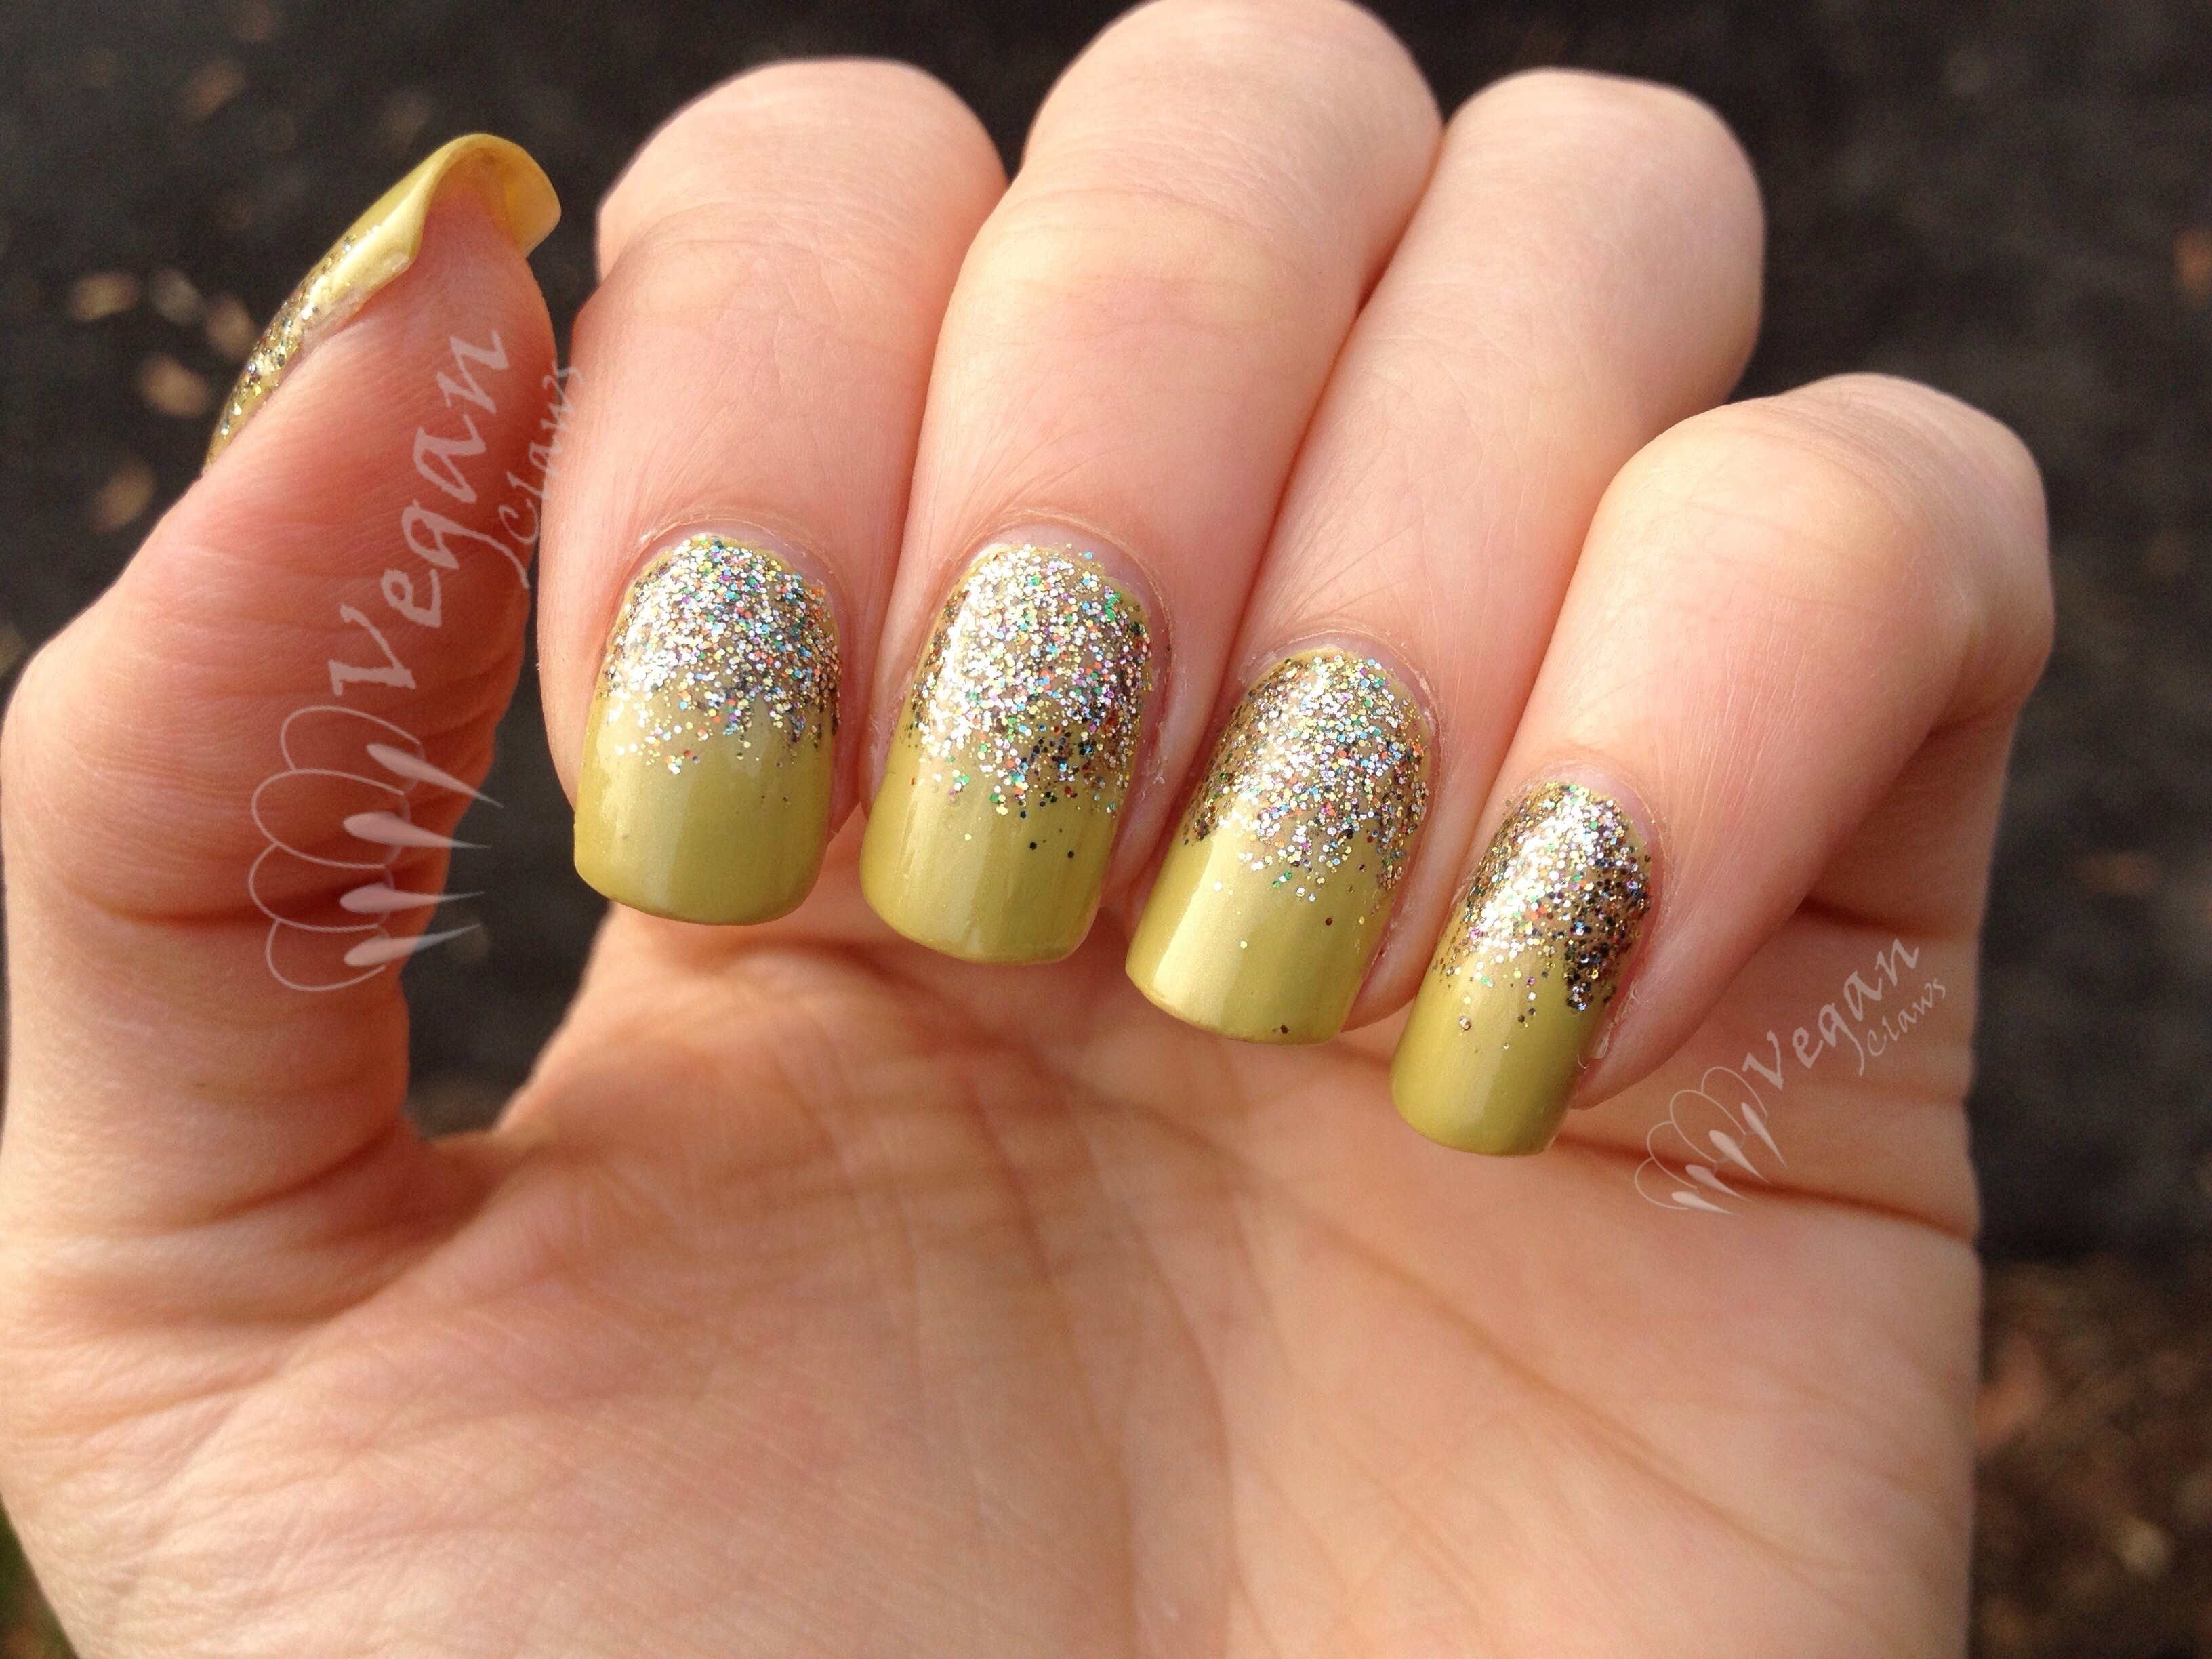
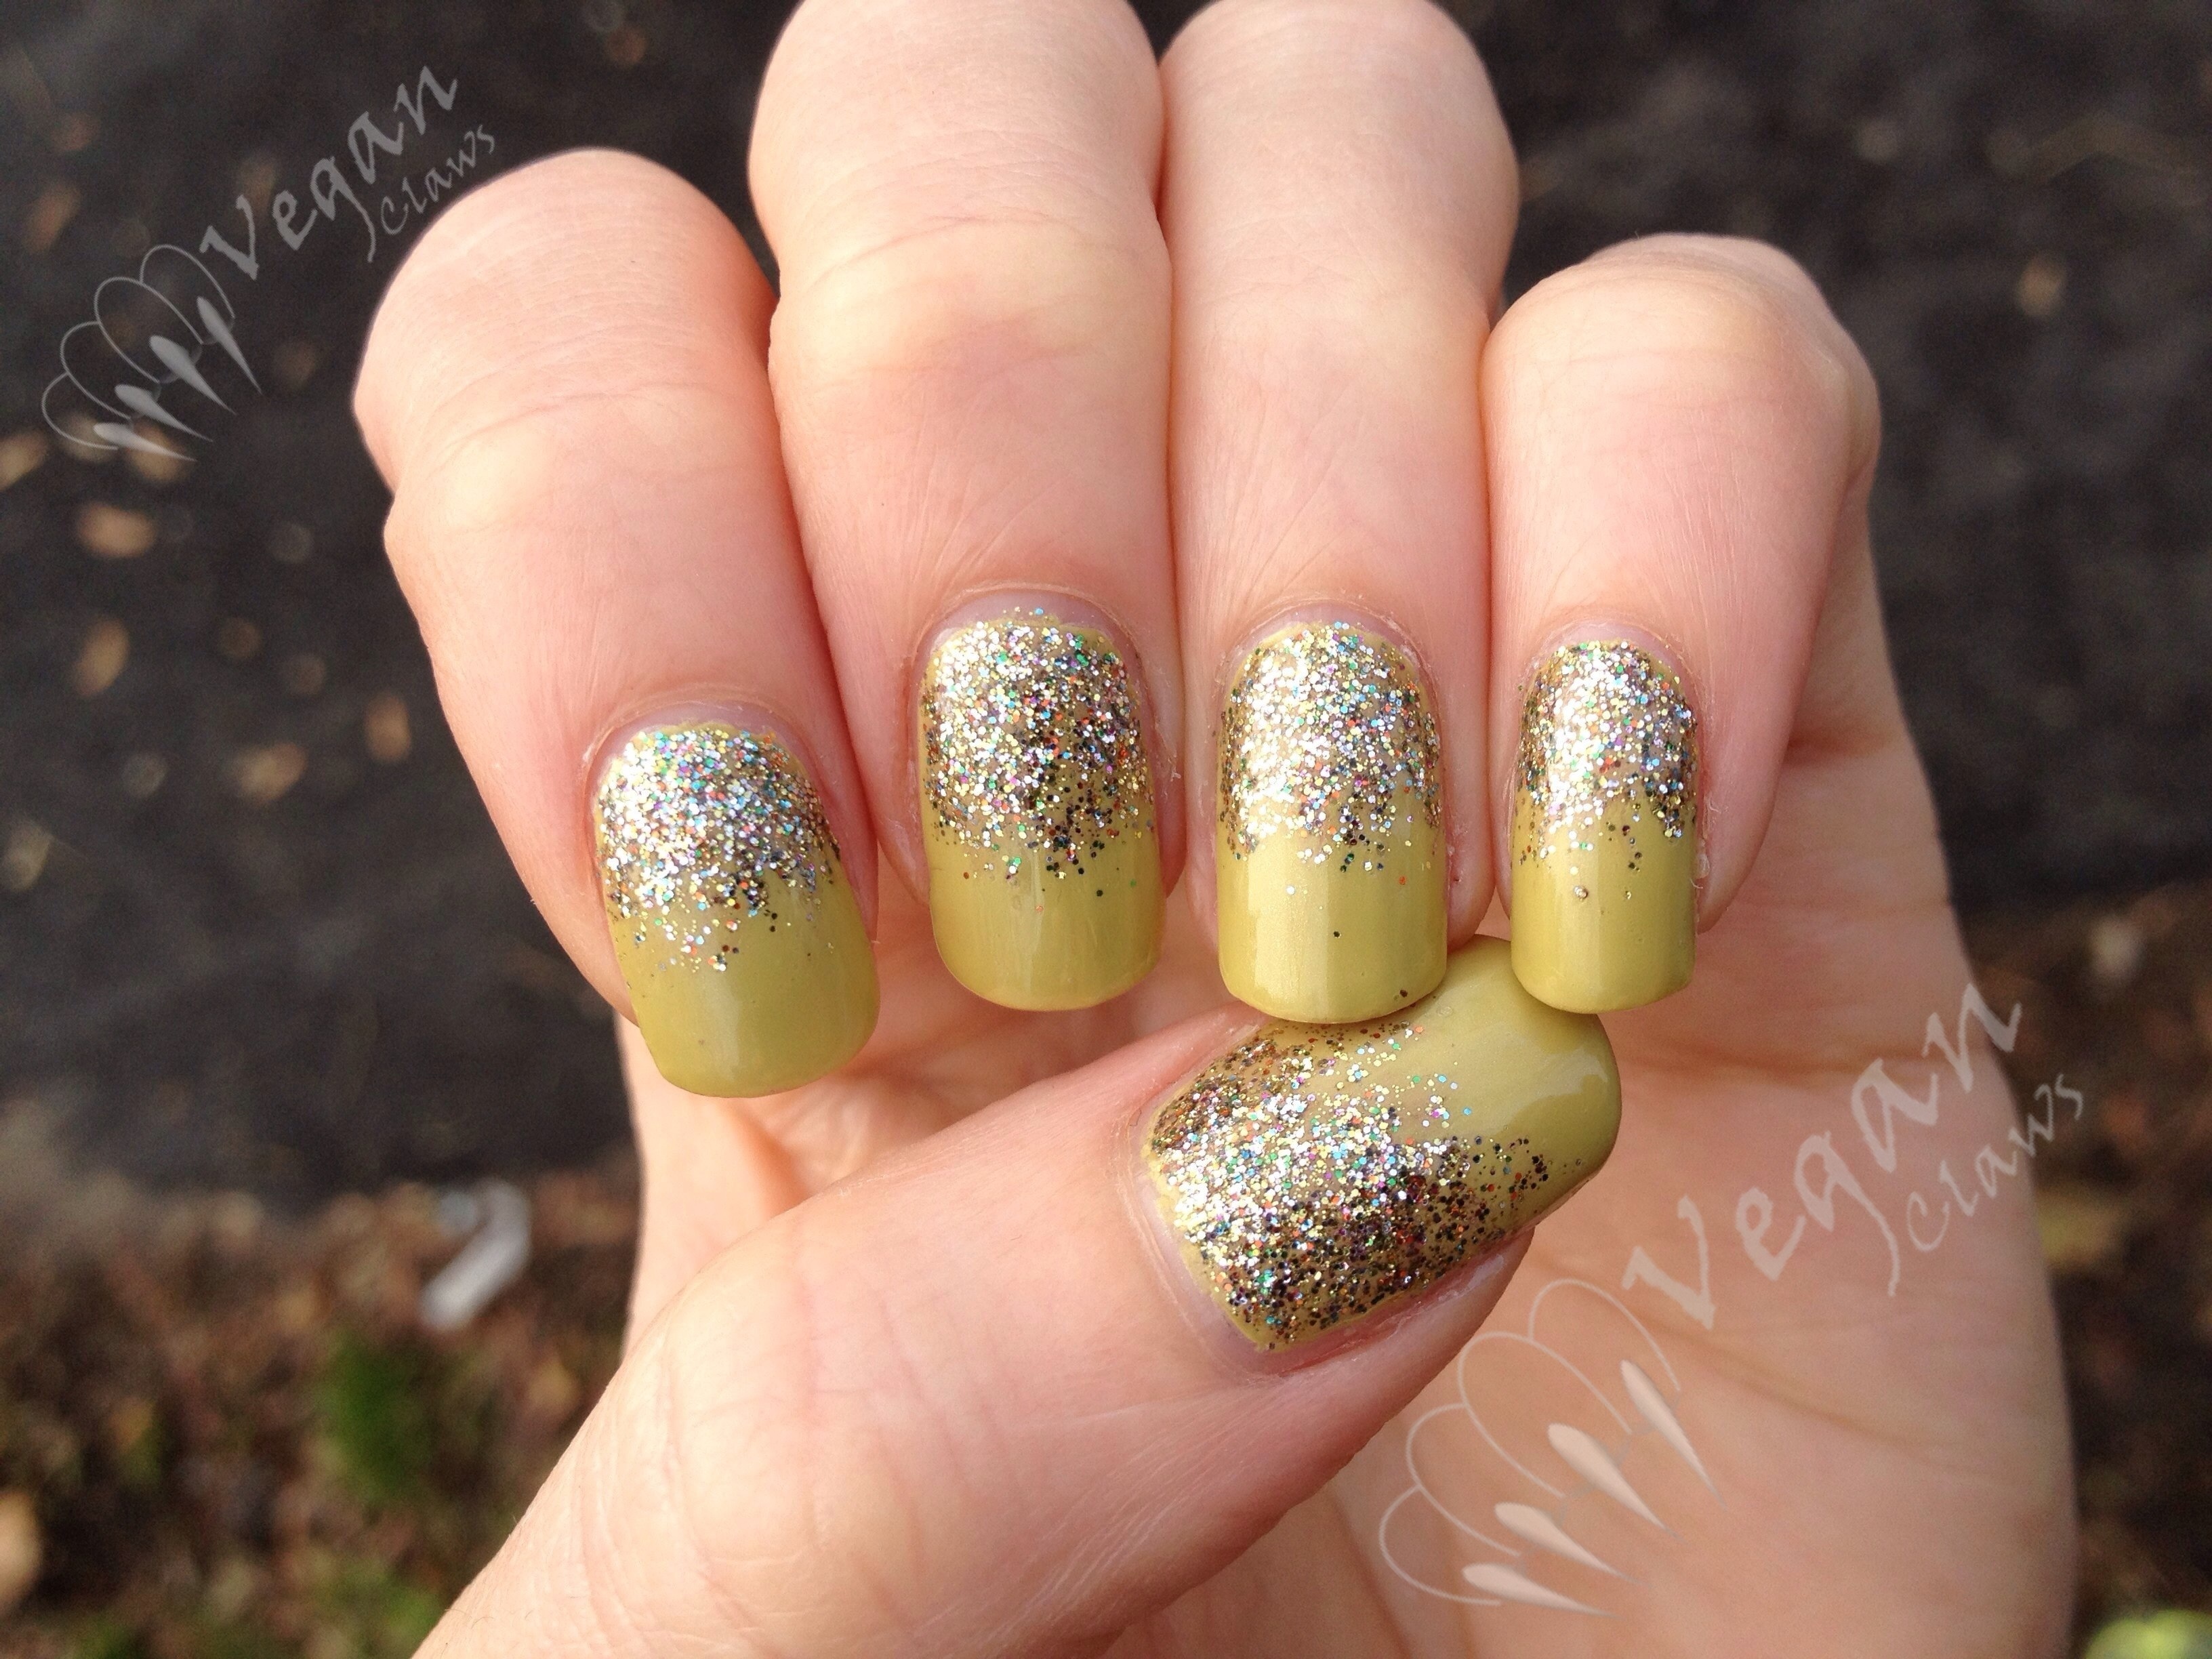
The sun had gone away so this next pic is under the Ott lite:

Authority Cosmetics Paradise

Here is one coat of I Heart You over Paradise, turning it a dusty periwinkle. Sorry for the little bald spots in the glitter; I didn’t notice until I took the photos!

Authority Cosmetics Paradise with I Heart You

Authority Cosmetics Paradise with I Heart You

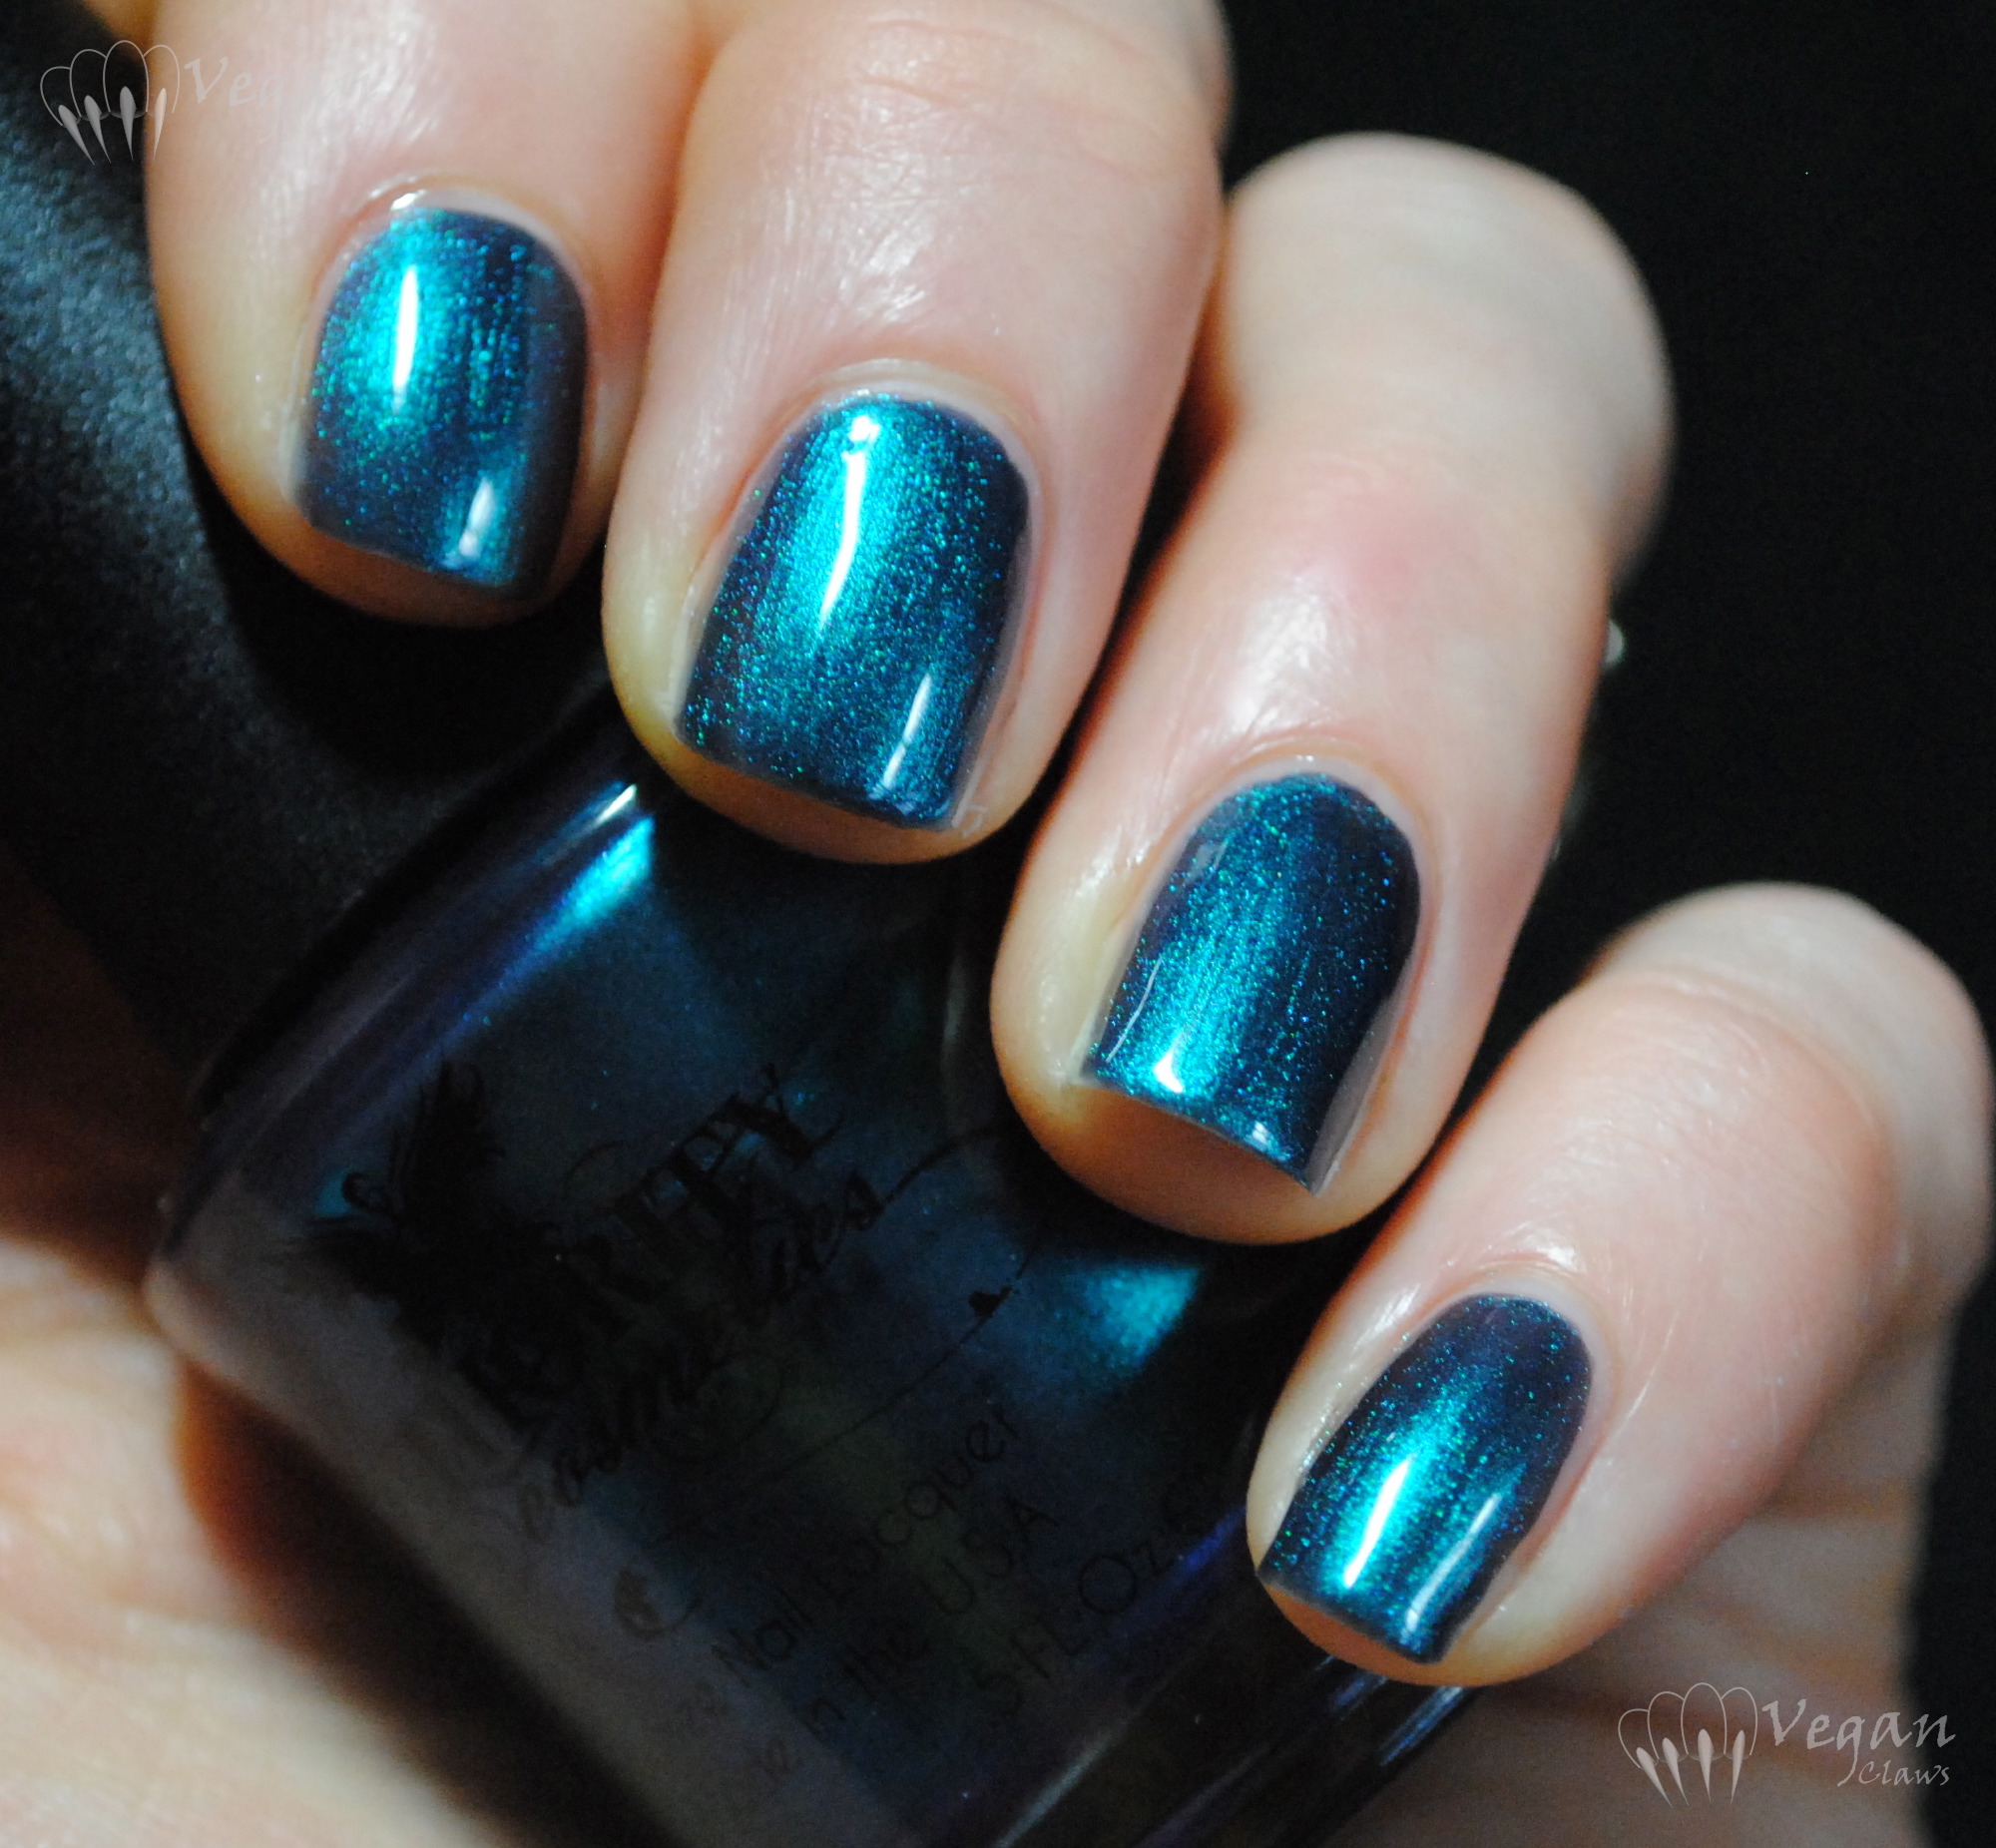
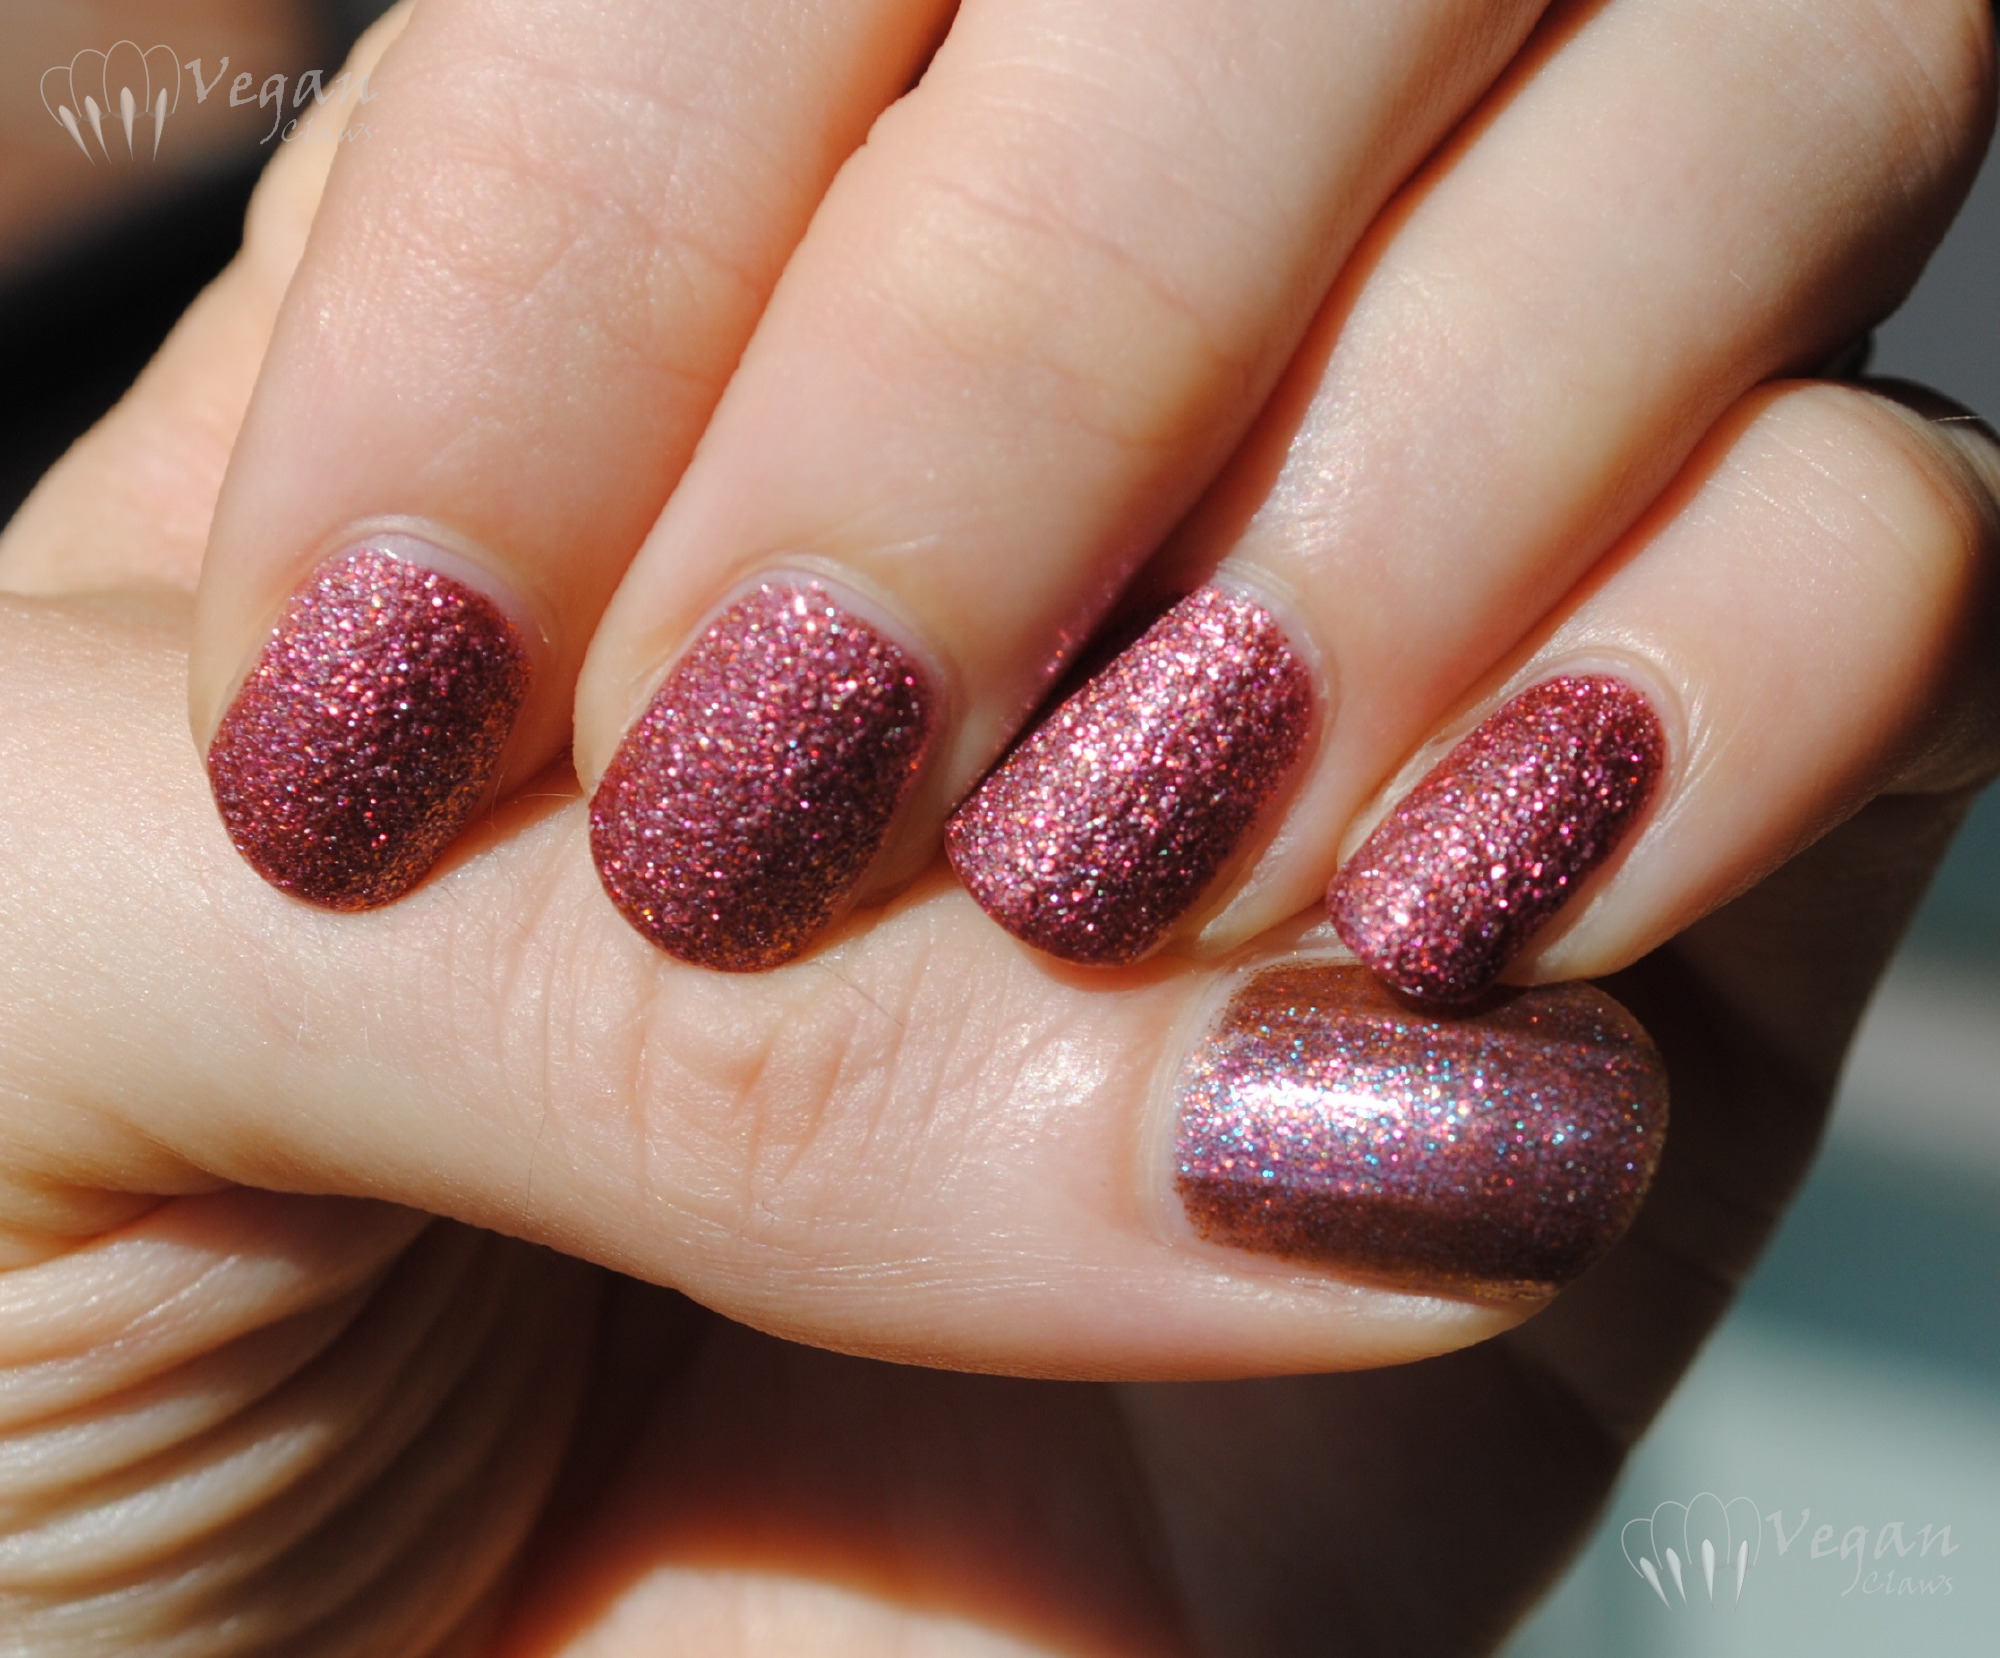
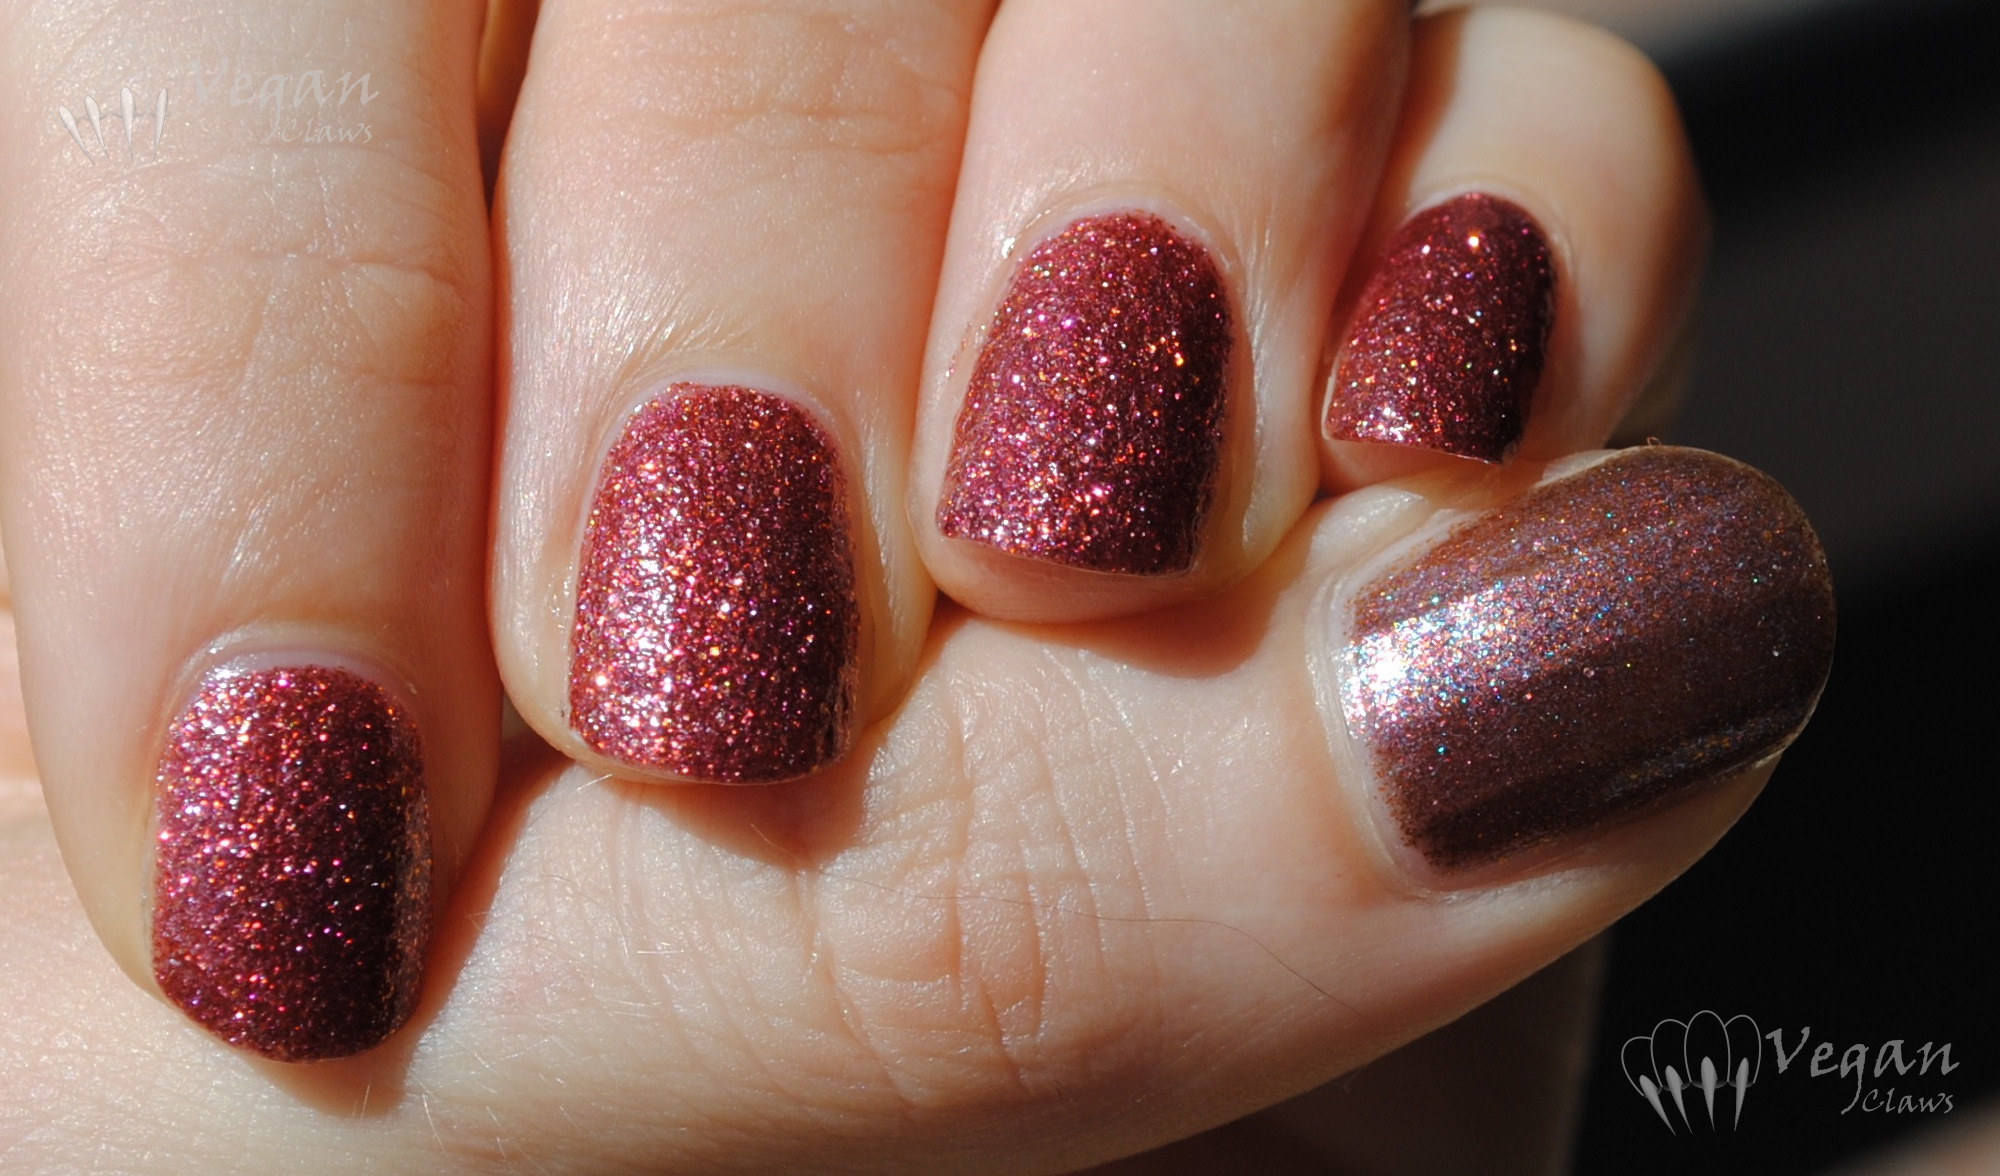
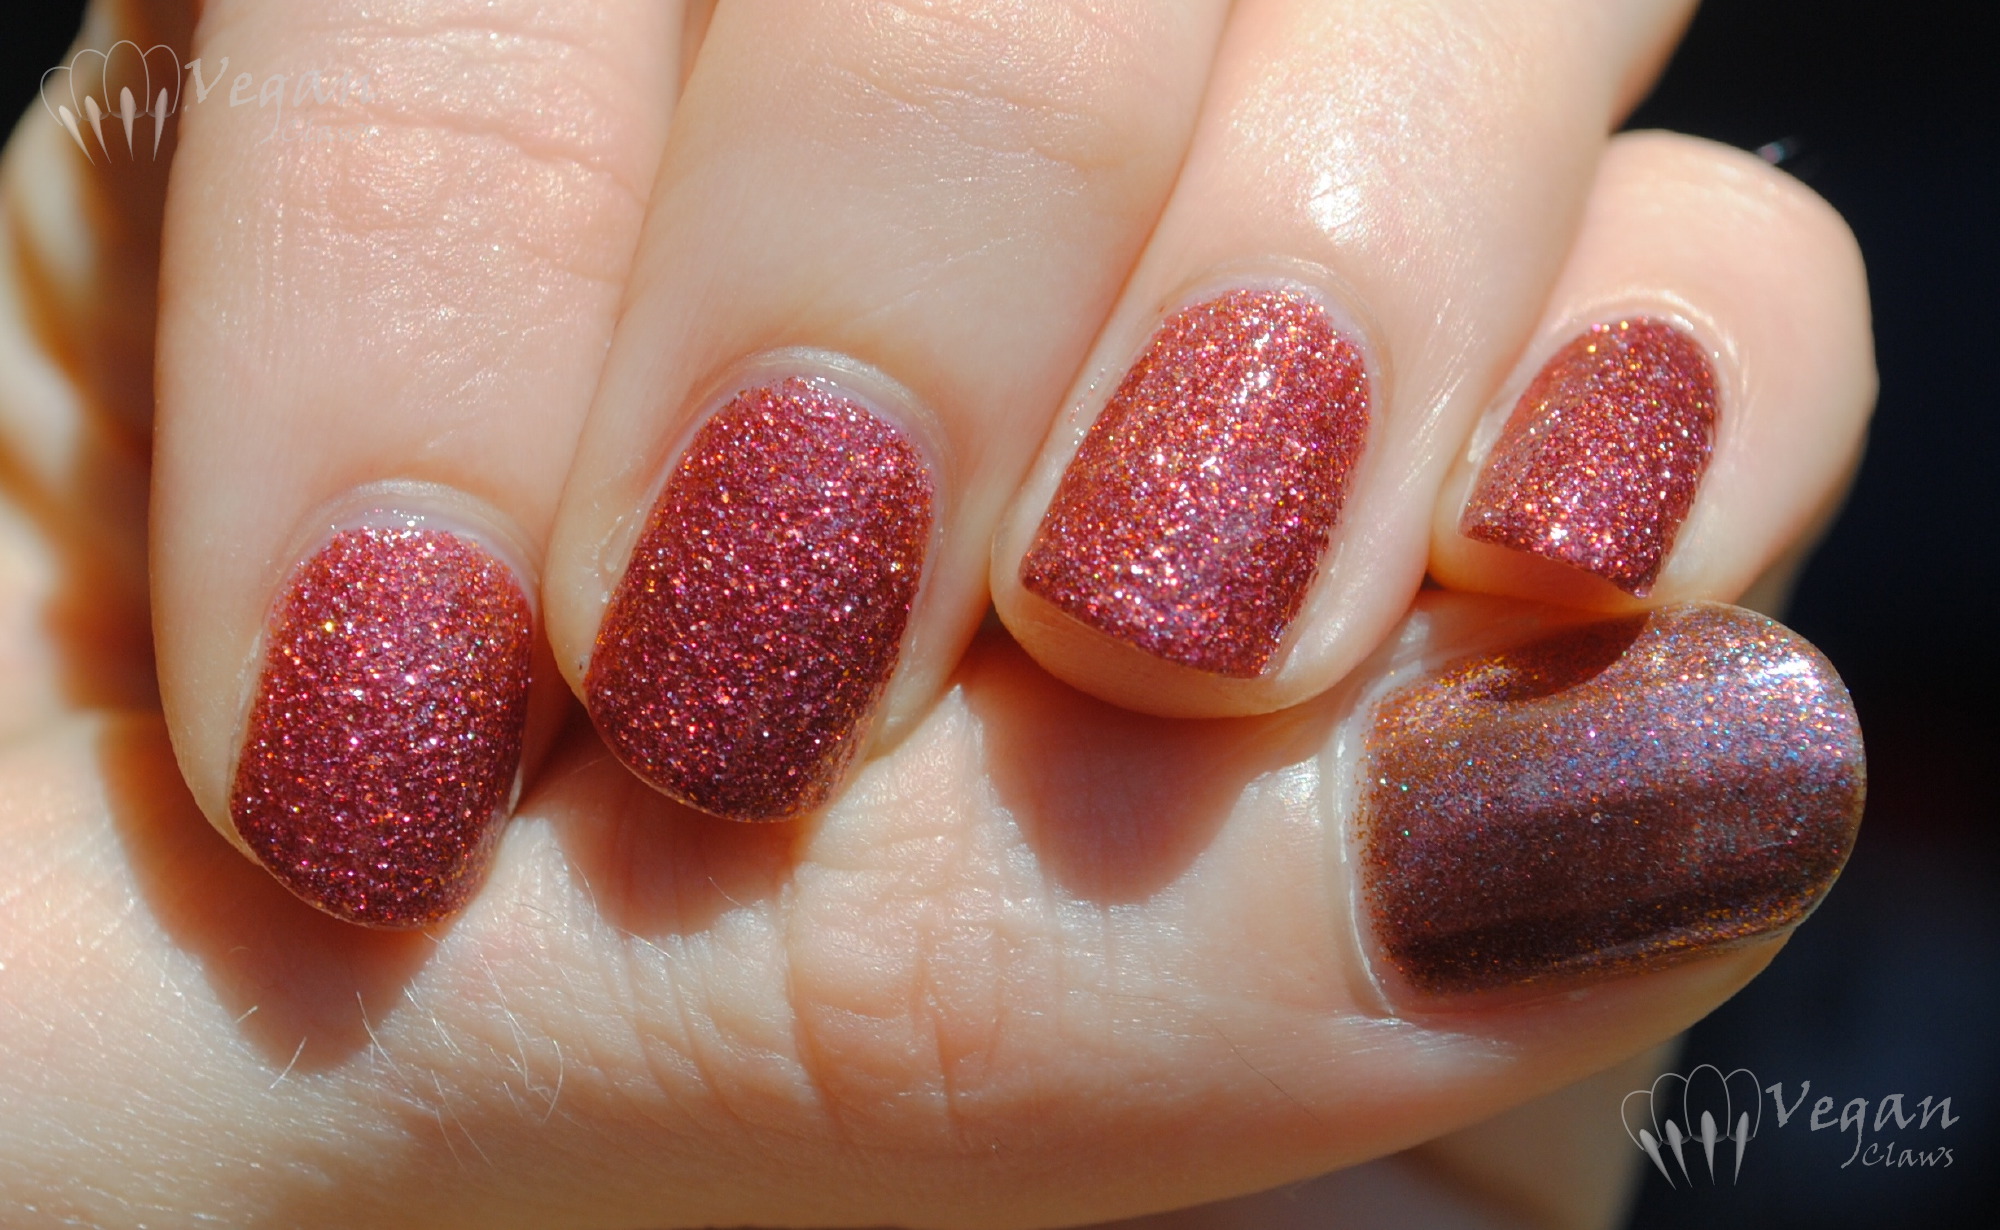
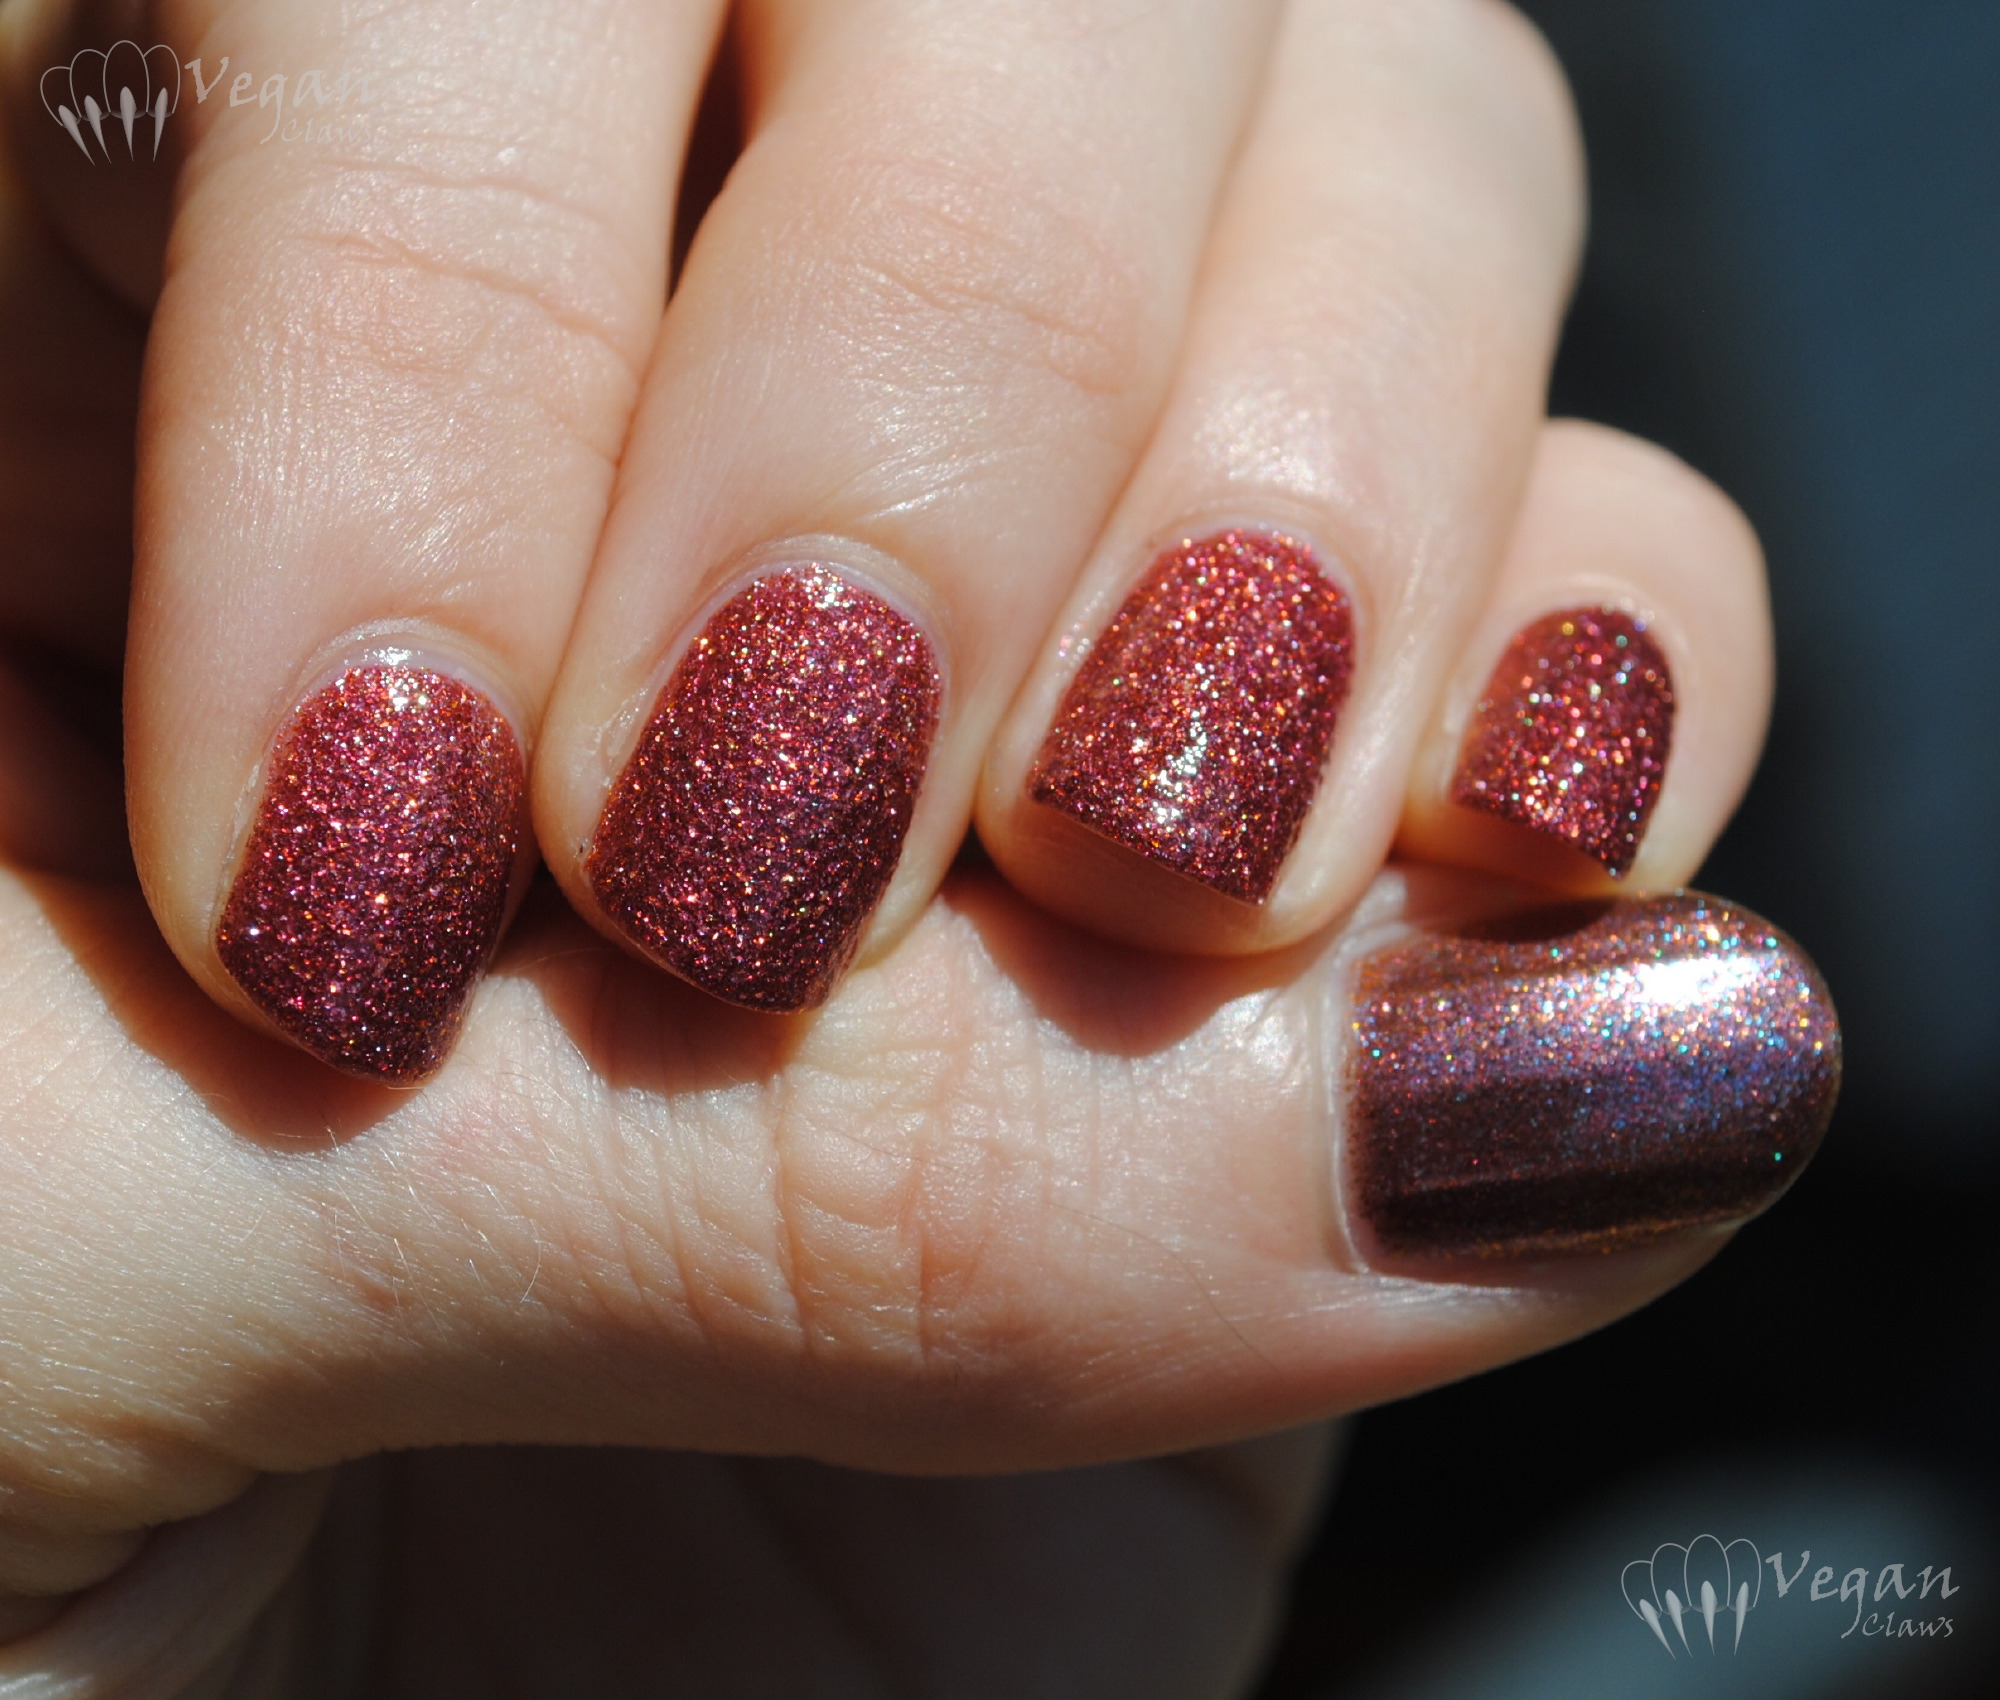
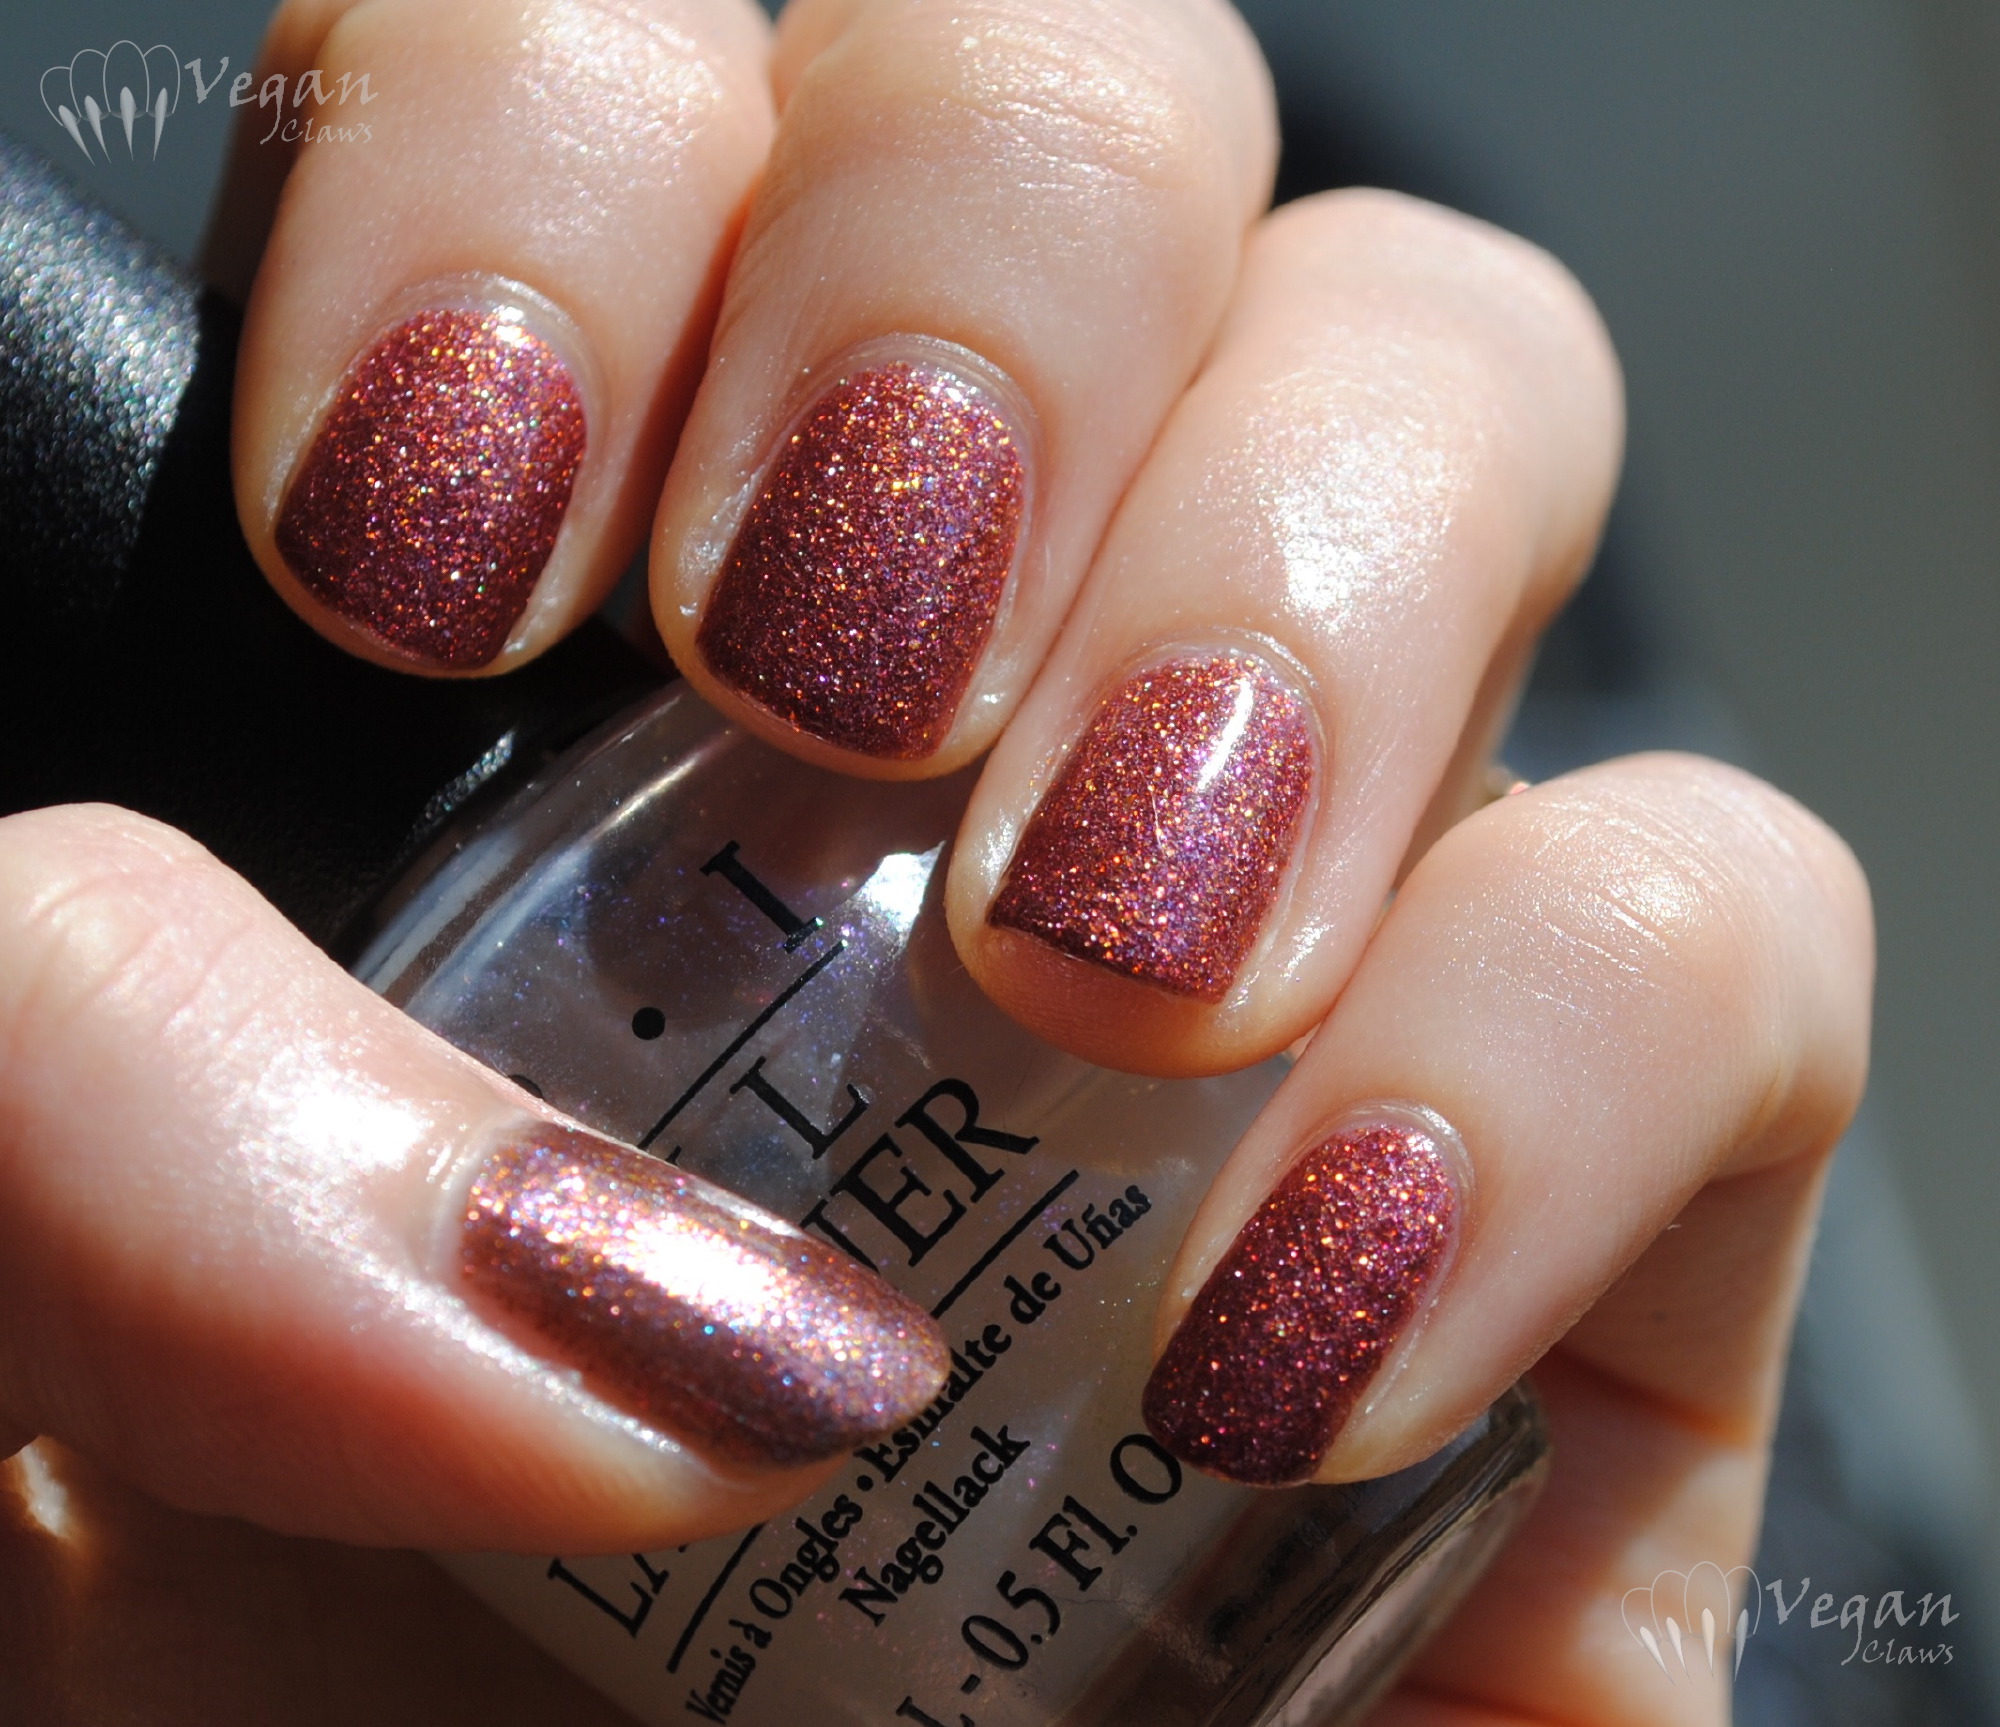
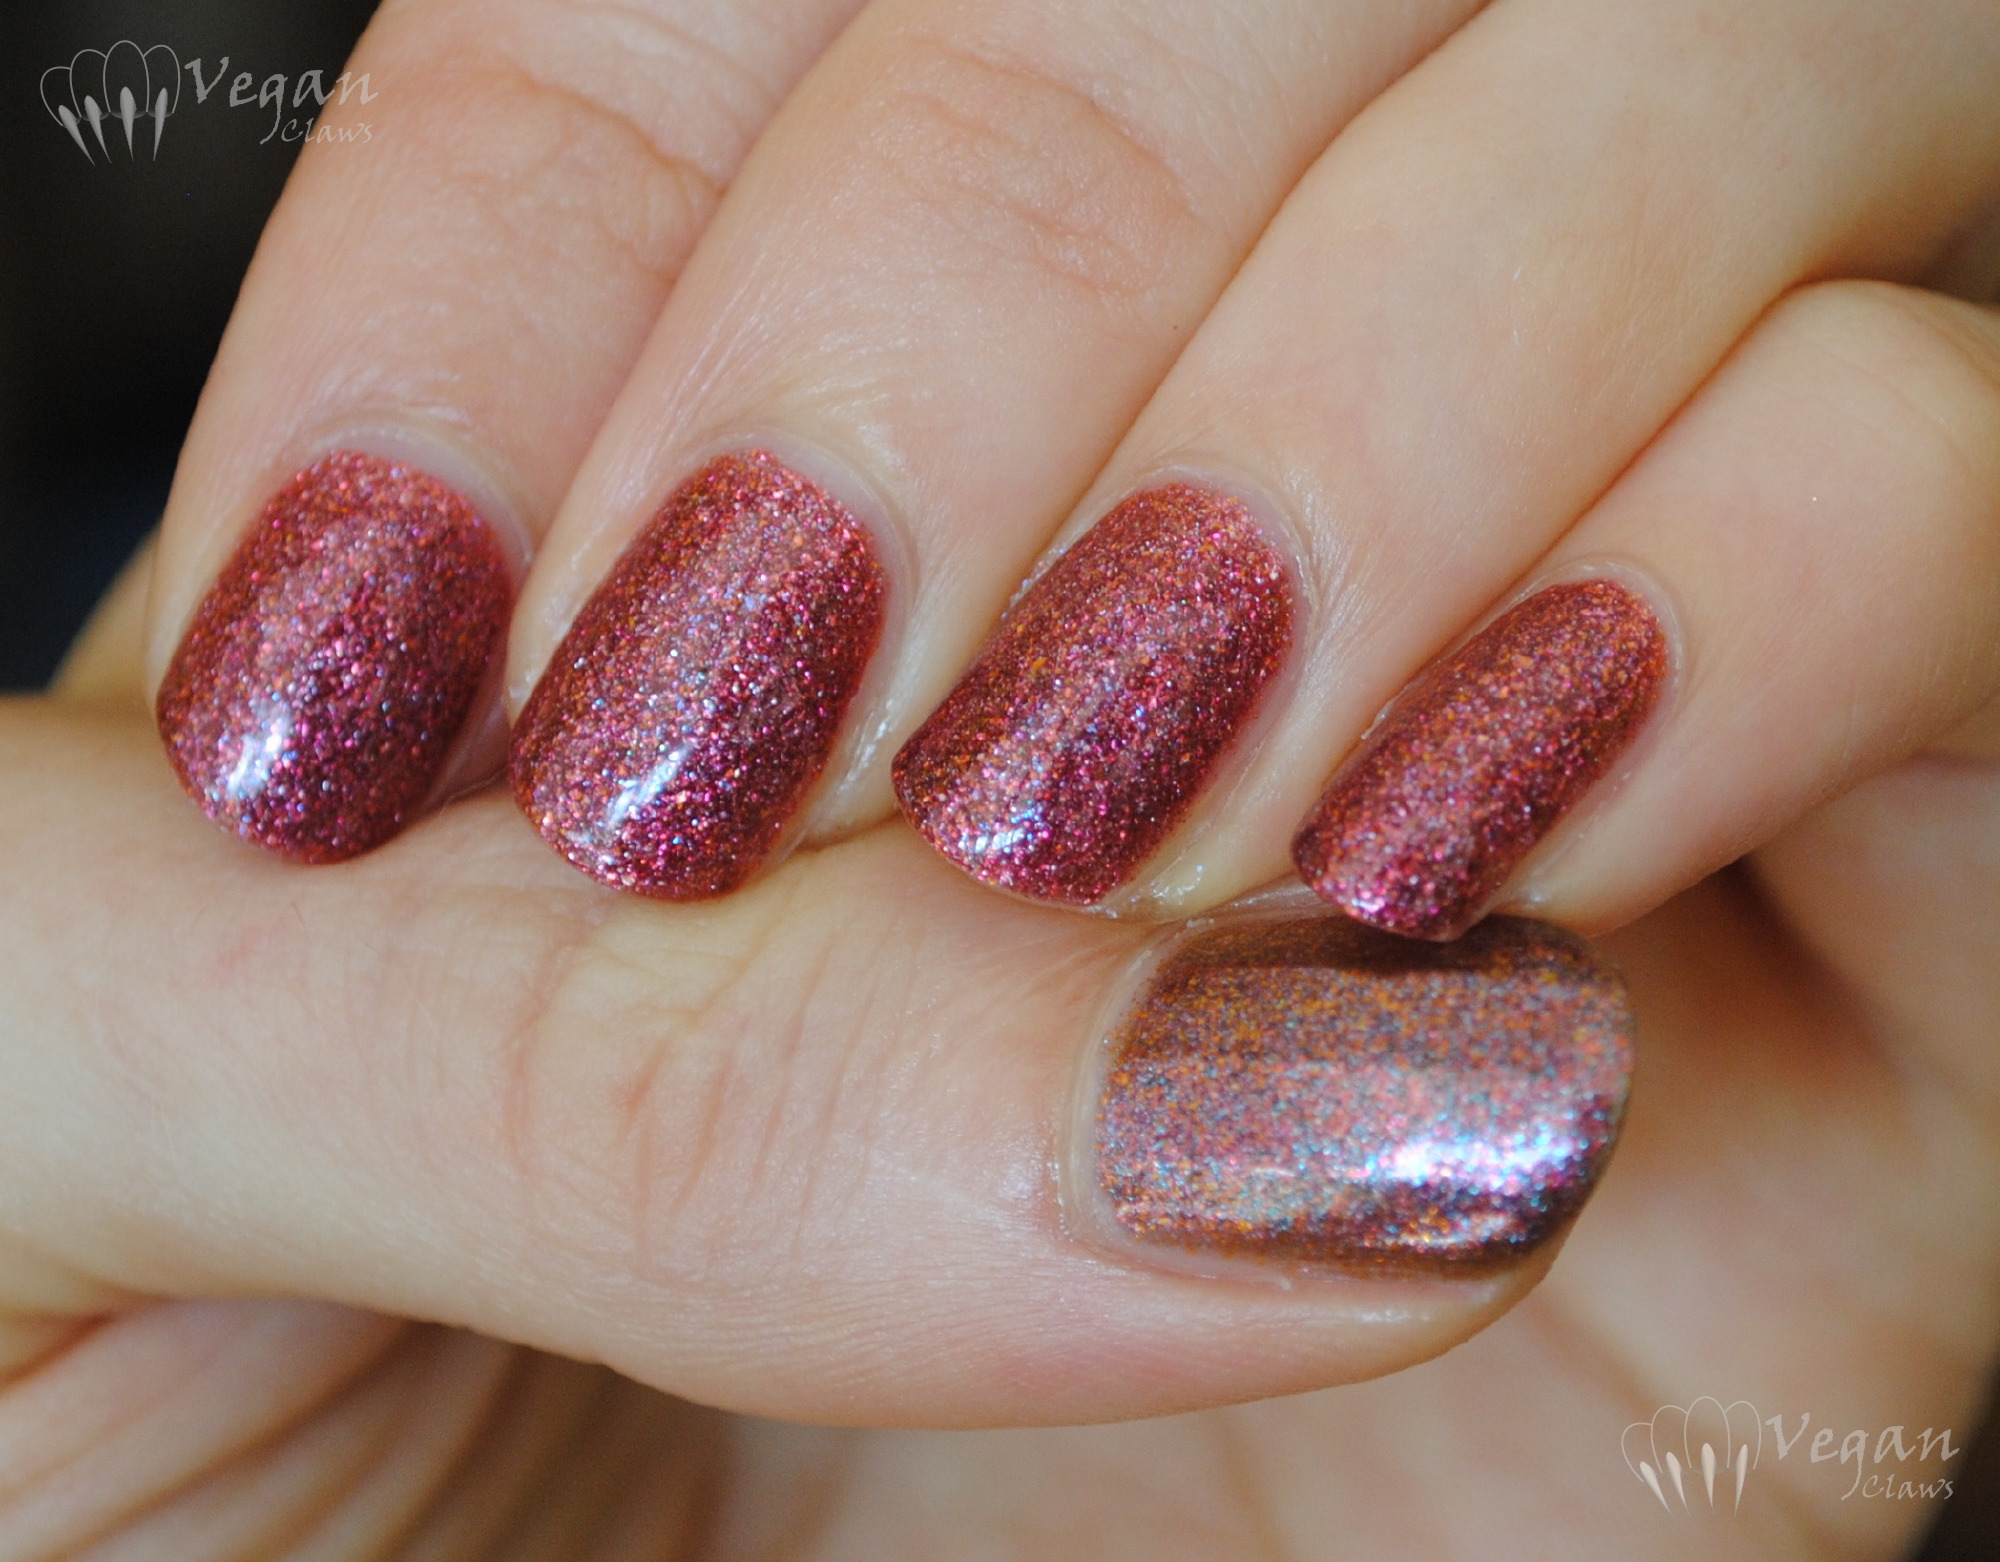
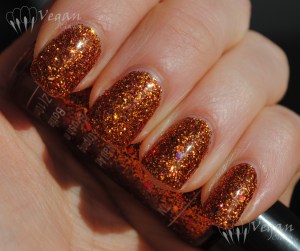
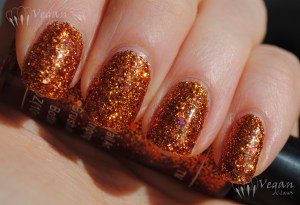
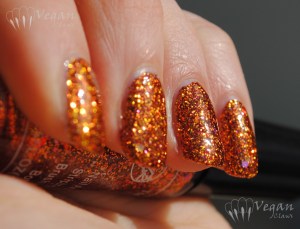
Last but certainly not least, the duochrome, Emerald Sky. This is a shimmery green-teal-blue subtle duochrome in a smoky, slightly blue-purple base! (These first photos in natural light are a little too blue, and the later ones under Ott and halogen light are more colour accurate.)

Authority Cosmetics Emerald Sky

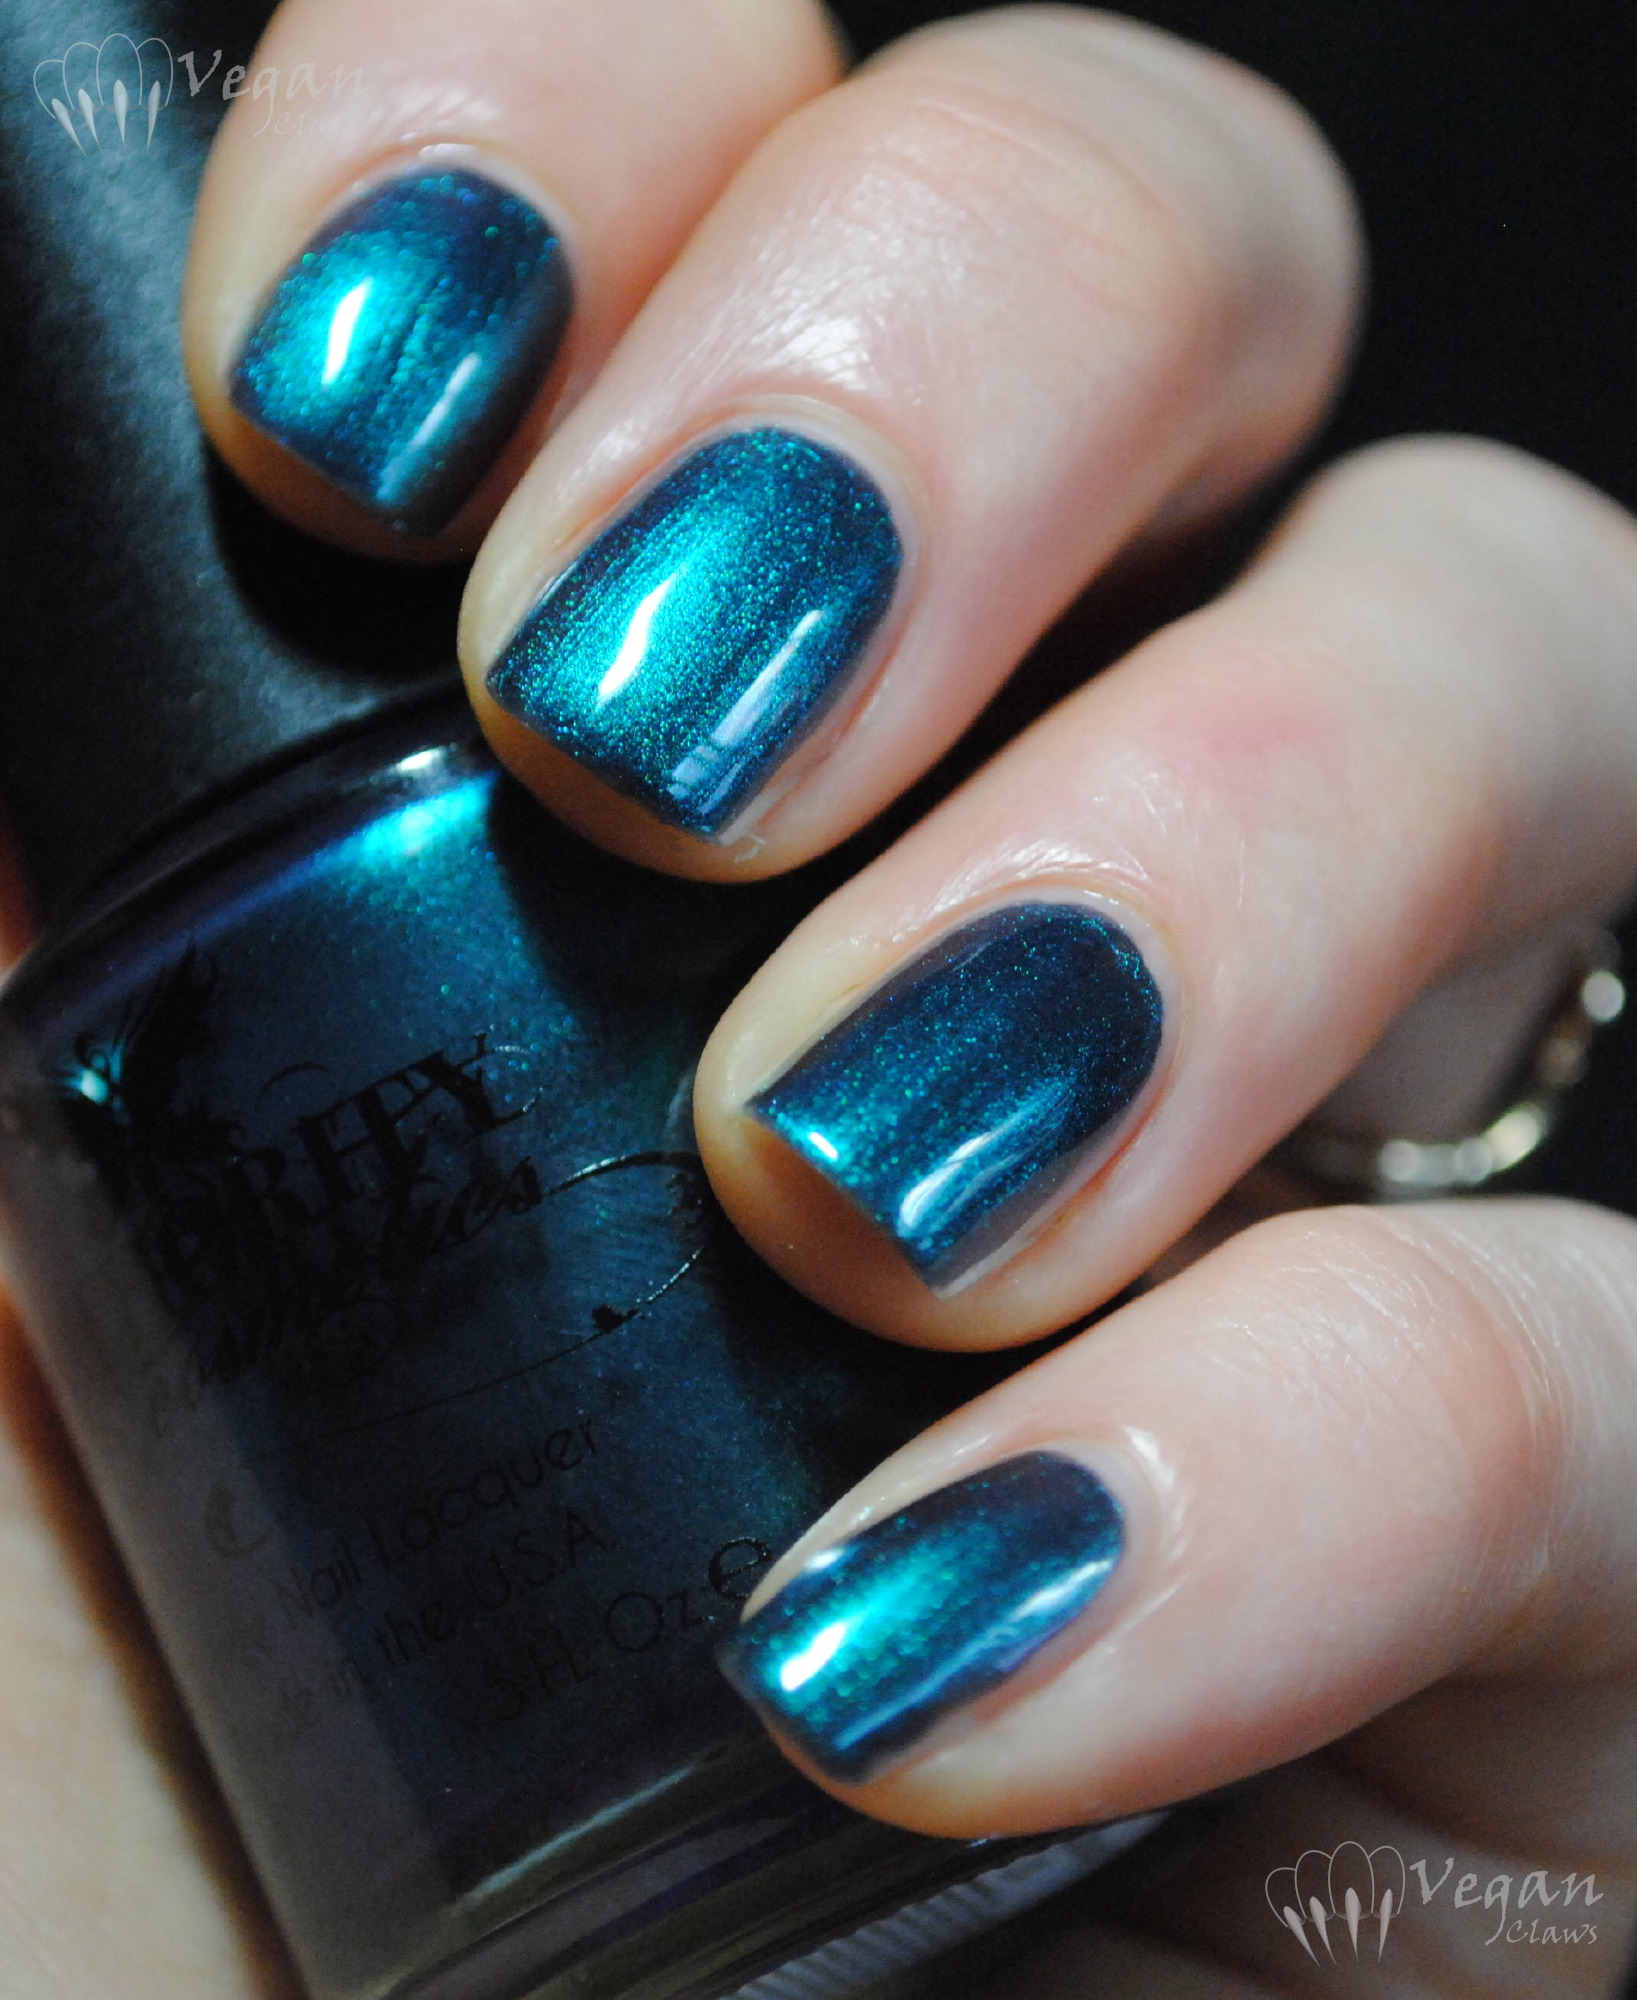
The base is sheer to let the shimmer show through, and the formula is thinner than the other polishes. It builds to a nice glowy colour in just two coats though, which is what is shown here.

Authority Cosmetics Emerald Sky

Authority Cosmetics Emerald Sky

Under Ott Lite:

Authority Cosmetics Emerald Sky

With flash:

Authority Cosmetics Emerald Sky

Here it is again under Ott lite, with a layer of I Heart You on the ring finger:

Authority Cosmetics Emerald Sky with I Heart You

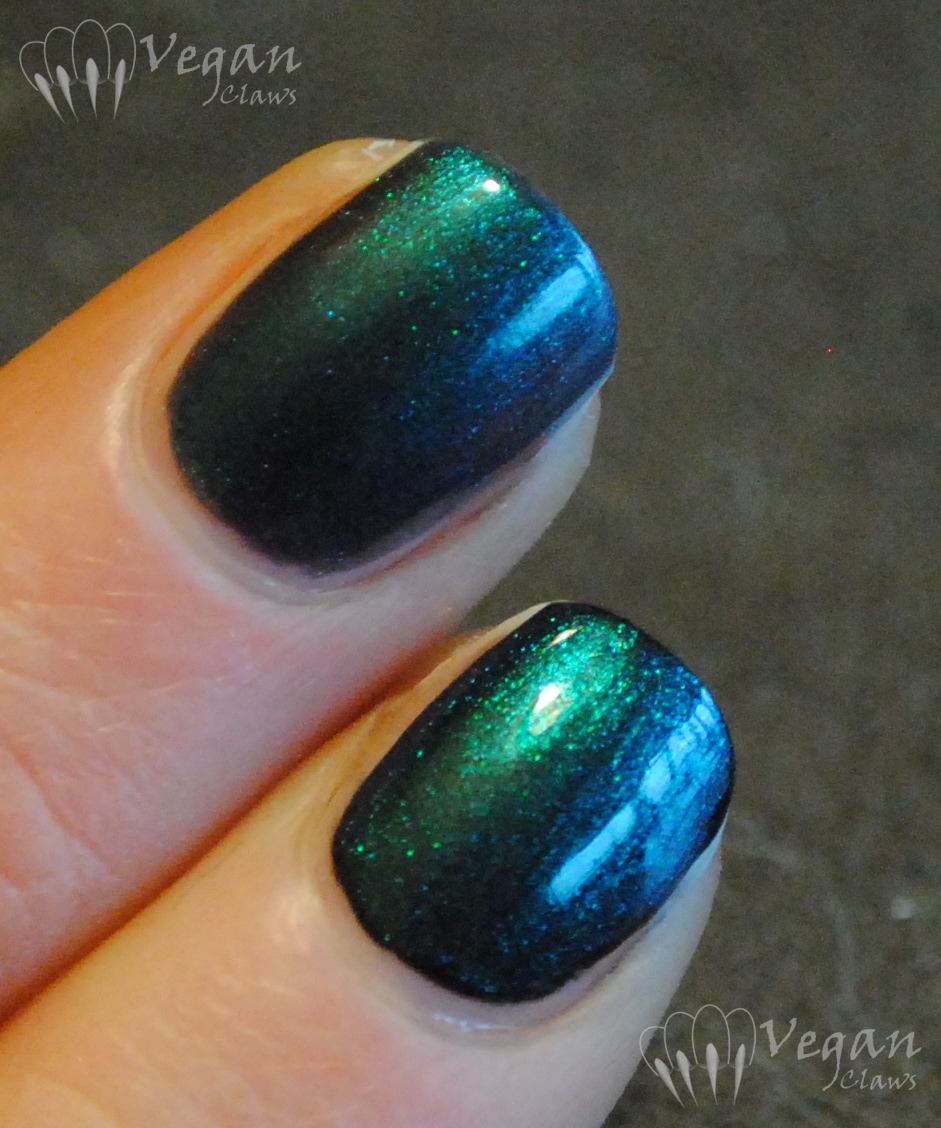
I also did a comparison with one coat over black versus two coats alone (bottom to top in the photos).

Authority Cosmetics Emerald Sky alone and over black

Applying over black makes the look more opaque and dark, but doesn’t really change much about the colour shift. At an extreme angle, you can see the shimmer shifts more to blue.

Authority Cosmetics Emerald Sky alone and over black

This last photo is under halogen light.

Authority Cosmetics Emerald Sky alone and over black

Authority Cosmetics is available on their website here. They have just 10 colours so far, but if they’re all like the ones I’ve reviewed here, the quality is great! I have to say I am impressed with these! πŸ™‚

Disclosure: The polishes in this post were provided for review. Opinions expressed are my own honest opinions.

Kunimitsu Chocolate Point Siamese and Cinnamon Raisin

Kunimitsu Nail Potions is a new-to-me indie brand sold on Etsy, that I just recently learned makes vegan-only polishes (and lip glosses too!). A bunch of the polishes are inspired by cats, and the brand name is in memory of one of the creator’s cats. All these photos are taken with flash and under the Ott lite, since it was dark out.

Kunimitsu Chocolate Point Siamese and Cinnamon Raisin

These two polishes are Chocolate Point Siamese and Cinnamon Raisin (the ring finger accent). I thought they complemented each other really well, having the same base colour but with different glitters.

Kunimitsu Chocolate Point Siamese and Cinnamon Raisin

Chocolate Point Siamese is a nude beige slightly shimmery base with brown and holo light blue medium hex glitter, very small brown glitter, and tiny gold sparkles. Cinnamon Raisin has the same base and the two sizes of brown glitter, but also purple and lilac medium hexes and small gold hexes. They both seem to have some holo microglitter in there too, but it’s sort of hard to tell! But there are tiny little flashes of holo-looking sparkle sometimes.

Kunimitsu Chocolate Point Siamese and Cinnamon Raisin

Shown are two coats of each polish, and I found they covered well and the base was smooth. I did have to do some shaking and tilting of the bottle to get out a good amount of glitter, and do some dabbing to distribute it where I wanted it.

Kunimitsu Chocolate Point Siamese and Cinnamon Raisin

Drying time was very good! All photos do include a layer of topcoat. Overall I’m really impressed with these and looking forward to trying the others I got!

Don’t you love the awkward hand pose clutching two mini bottles? Haha πŸ˜€

Kunimitsu Chocolate Point Siamese and Cinnamon Raisin

Nicole by OPI Cinna-man of My Dreams

Breaking the silence with a texture polish! This is Nicole by OPI Cinna-man of My Dreams (what’s with all the stupid “man of my dreams” names? They already had “snow-man of my dreams” in one of the winter collections, sheesh! heheh). Anyway, this is a great polish!

Nicole by OPI Cinna-man of My Dreams

It’s a sparkly multicoloured texture, with predominantly brick red and burgundy tones and little sparks that appear orange and blue in the light. Very complex and deep polish!

Nicole by OPI Cinna-man of My Dreams

Shown are two coats; it has a great formula. As usual any of the photos can be clicked on to see the full size versions that show the sparkly detail of the texture!

Nicole by OPI Cinna-man of My Dreams

Nicole by OPI Cinna-man of My Dreams

Here it is with topcoat. I added a third coat before the topcoat because I had a bit of tip wear from already having the polish on for a while.

Nicole by OPI Cinna-man of My Dreams

I did an accent thumb nail in Nicole by OPI Just Busta Mauve since they seem like such complementary polishes!

Nicole by OPI Cinna-man of My Dreams and Just Busta Mauve

Nicole by OPI Cinna-man of My Dreams and Just Busta Mauve

With topcoat over Cinna-man:

Nicole by OPI Cinna-man of My Dreams and Just Busta Mauve with OPI I Juggle Men

Nicole by OPI Cinna-man of My Dreams and Just Busta Mauve with OPI I Juggle Men

Nicole by OPI Cinna-man of My Dreams and Just Busta Mauve with OPI I Juggle Men

Busta Mauve is kind of like the foily fleck version of Cinna-man, but it does have a lot more blue and purple in it. That, and the fact that the texture “ate” my first coat of topcoat pretty well, inspired me to add OPI I Juggle Men overtop.

Nicole by OPI Cinna-man of My Dreams and Just Busta Mauve with OPI I Juggle Men

Love this combo!!

Nicole by OPI Cinna-man of My Dreams and Just Busta Mauve with OPI I Juggle Men

More From the Vault

My apologies for the lack of posts! Things have just been super busy lately! So I thought I’d post another group of photos from several years ago that I just never got around to posting and don’t necessarily have the info on number of coats, formula etc. anymore.

OPI Fiercely Fiona with Nicole by OPI Brilliant Idea on the accent finger.

ffiona

ffiona2

ffiona3

ffiona4

A frankenpolish that I call Firecracker. The ingredients for this are Martha Stewart glitter in fire opal (which does bleed colour into the base, but not too much) and some of the LA Girl Glitter Addict polishes in orange, fuchsia, and red.

firecracker

firecracker2

firecracker3

firecracker4

firecracker5

OPI Absolutely Alice with half moons in Nubar Night Sparkle.

opi_aa_shade

opi_aa_sun

OPI and Apple Pie, a classic “ugly” shade, under the Ott Lite.

opi_applepie

Zoya Evvie, Katherine, and Rekha

These three polishes are from Zoya’s fall 2012 Designer and Gloss collections, although all three were part of last spring’s New York Fashion Week limited edition releases as well, and that’s when I got them.

Zoya Evvie with No Miss Peacock

Evvie is a dark, dusty grey-leaning green creme. It was originally released in the Peter Som collaboration trio. This is a great colour; I loved wearing it. Shown are two coats plus top coat, and the formula was good.

Zoya Evvie with No Miss Peacock

On my index finger, I have a coat of No Miss Peacock Glitter over Evvie. Peacock is a green and blue glitter polish with small rectangular shaped glitters, almost like bar glitter cut in half.

Zoya Evvie with No Miss Peacock

Next is Katherine, a deep plum/eggplant purple jelly that was also originally from the Peter Som trio.

Zoya Katherine

It’s a very transparent sort of jelly; this first photo is three coats over a ridge filling base coat. At the time I swatched this I had a fiberglass wrap on my index finger, and it still shows a bit through the polish. Gloss is a good name for the collection Katherine comes from – there’s no top coat here, the shine is all Katherine.

Zoya Katherine

These other two photos show four coats of Katherine. She has a very nice jelly formula, and will make great jelly sandwiches. I decided to leave my index and its wrap out of the last photo. πŸ˜‰

Zoya Katherine

And finally, Rekha, a red semi-jelly shade that was originally from Zoya’s Bibhu Mohapatra collaboration trio. I believe it was named after the designer’s mother, and recreates the shade of red nail polish that she wore.

Zoya Rekha

Only two coats are needed, but I’m wearing three in these photos because I applied the polish before going to bed and didn’t use a quick-dry top coat, so unsurprisingly by the time I took photos in the morning there were some little scratches on the surface.

Zoya Rekha

Rekha seems to me a very neutral shade of red, neither cool nor warm, and is a great version of a classic colour. Here she is in the shade:

Zoya Rekha

OPI Don’t Talk Bach to Me and Glow Up Already, and a franken

I’m trying something new today! I downloaded an app to add watermarks to photos on my phone, so that I can actually post pictures I’ve taken with my phone straight from my phone without having to forego the watermark (stupid WordPress app doesn’t allow access to the blog’s media library, which is another related problem). It’s kind of neat because with this app the size, orientation and placement of the watermark can also be changed unlike the software I normally use on my laptop. Only thing I don’t like is that there’s no option that I can see to change the name of the image file, so the photos just have numbers for names and that can only be changed using the full WordPress site…

20121122-154829.jpg

Anyway, here’s a mani! πŸ™‚ This is OPI Don’t Talk Bach to Me from the Germany collection, with a glitter gradient of OPI Glow Up Already from the Burlesque collection, and Poshe topcoat over everything. Photos in natural overcast light.

20121122-154924.jpg

I used two coats of Don’t Talk Bach to Me, a light yellow-green with a creme base and some slight shimmer, and I found the formula kind of thick. I’ll probably add some thinner before using it again.

20121122-155027.jpg

Glow Up Already is a dense fine glitter in a lot of colours, especially gold, green, and orange, with an overall look of golden lime green.

The next day, I added two coats of a frankenpolish that I made which contains teal square glitter, yellow, copper and champagne gold hex glitter, and gold glass flecks. Under my Ott light:

20121125-100733.jpg

The main polishes I used were Kleancolor Tiara Gold, LA Girl Glitter Addict in Flashy, NYX salon formula 24K Glitter, and Wet n Wild The Gold and the Beautiful. Overcast natural light:

20121125-100756.jpg

The teal square glitter was from Glitter Unique, if I recall correctly. This last photo is in partially sunny natural light:

20121125-100822.jpg

I’m really happy with how this franken turned out! πŸ™‚

China Glaze Cast a Spell and Make a Spectacle

Happy Halloween! These two polishes are from China Glaze’s Halloween collection, Wicked.

China Glaze Cast a Spell

This is Cast a Spell, a blackened green with golden shimmer flecks.

China Glaze Cast a Spell

It has a great formula; shown are two coats that glided on super-smoothly.

China Glaze Cast a Spell

China Glaze Cast a Spell

And this is Make a Spectacle, one generous coat over Cast a Spell. Make a Spectacle has a ton of iridescent hex and small glitter as well as golden glass flecks in a clear base.

China Glaze Make a Spectacle over Cast a Spell

China Glaze Make a Spectacle over Cast a Spell

China Glaze Make a Spectacle over Cast a Spell

And here is Make a Spectacle on its own, 3 coats. Pardon the orangey stained nails underneath!

China Glaze Make a Spectacle

I absolutely love Make a Spectacle; I think I’m going to have to get a back-up bottle, especially considering it’s one of those thick glitter-packed polishes that tends to get used up quickly!

China Glaze Make a Spectacle

China Glaze Make a Spectacle

Hope you’re having a great Halloween! πŸ˜€

Gosh Fossil Grey and SpaRitual Conglomerate

Today I have a rock-like mani to show you: Gosh Fossil Grey with an accent nail of Sparitual Conglomerate.

Gosh Fossil Grey and SpaRitual Conglomerate

This is two coats of Fossil Grey, which had a slightly thick but good formula. It’s a warm/yellow leaning grey pearl base with silvery shimmer that gives an almost speckled effect.

Gosh Fossil Grey and SpaRitual Conglomerate

On the ring finger I applied one generous coat of Sparitual Conglomerate, from their recent fall collection, over Fossil Grey. It also had a nice formula, and it wasn’t too difficult to get a good density of the black and white hex glitters on the nail.

Gosh Fossil Grey and SpaRitual Conglomerate

I love Conglomerate; it’s quite unique with its deep charcoal grey base, its dense, fine gold shimmer throughout, and its scattered black and white hexes!

Gosh Fossil Grey and SpaRitual Conglomerate

On its own, Conglomerate is opaque in two coats. Glad I picked this one up, it’s really interesting and the gold shimmer makes it very wearable for me!

Gosh Fossil Grey and SpaRitual Conglomerate

China Glaze Fast Track

China Glaze Fast Track is a taupey-beige nude with heavy golden shimmer flakes. It was released last spring in the Hunger Games collection.

China Glaze Fast Track

Shown are two thick coats. In the sun photos, there’s also a layer of topcoat. As evidenced by the sideways watermark, these pics were also taken using my phone, haha!

China Glaze Fast Track

I found the formula a little thick but didn’t have any problems with application.

China Glaze Fast Track

The sun photos didn’t quite catch all the tiny sparks of different colours, little flashes of orange and green, that are often reflected in the sparkle of this awesome polish!

Here it is in the shade:

China Glaze Fast Track

China Glaze Fast Track

As a bonus here is what I ended up doing to this mani after a couple of days, mainly because I didn’t want to take the time to remove Fast Track first, and then I just kept adding things, haha…

China Glaze Fast Track with

Over Fast Track is a coat of Orly Nite Owl, an opaque taupe with silver shimmer, then two layers of Glitter Gal Buckled Bronze, Nubar Petunia glitter on the tips, and Spoiled by Wet n Wild’s Trust Fund Baby over it all!

China Glaze Fast Track with

Cult Nails I Got Distracted

Today I’ve got another polish from Coco’s Untamed collection by Cult Nails. The polishes in this collection were all designed by Coco, the daughter of Cult Nails’ founder!

Cult Nails I Got Distracted

I Got Distracted is a black jelly with small holo glitter and medium green glitter. Maria of Cult Nails shared the family joke behind the name of this shade – “I got distracted” is Coco’s classic excuse for anything she was supposed to do but didn’t, used so often that it just had to make an appearance among the polish names.

Cult Nails I Got Distracted

Shown are two coats; the formula was fairly thick but I found it easy to apply using thick coats. I almost didn’t need the second coat, as this polish is quite pigmented. It dries gritty from all the glitter so a good thick topcoat is in order. In these sun photos, I had on two layers of Cult Nails topcoat: one that I applied right after the polish, and another the following morning. The sun photos were also taken with my phone, which probably has something to do with the reason that the watermark ended up going on sideways! haha!

Cult Nails I Got Distracted

The rest of the photos only have one layer of topcoat and were taken just after finishing the mani. In the shade:

Cult Nails I Got Distracted

And finally, a couple of photos that show off the glitter a bit better! Under the Ott Lite:

Cult Nails I Got Distracted

With flash:

Cult Nails I Got Distracted