A vegan nail polish blog. A celebration of colour and light, as well as of justice for nonhuman animals.

Posts tagged ‘shimmer’

Nicole by OPI Love Me, Love the Earth

Nicole by OPI Love Me, Love the Earth is an awesome shimmery brown polish with a lot of depth. This is an oldie (but they still sell it online at Aveyou, last time I checked), so it has the old formula that’s not “big 3 free”. I find the old formulas a little thin, but easy to control and fairly quick drying, and I used three coats here. Love this shade!

Nicole by OPI Love Me, Love the EarthNicole by OPI Love Me, Love the EarthNicole by OPI Love Me, Love the EarthNicole by OPI Love Me, Love the EarthNicole by OPI Love Me, Love the EarthNicole by OPI Love Me, Love the Earth

Some Cult Nails Swatches

How about a few random Cult Nails swatches?

Spontaneous, a dusty purple creme with small purple glitter. The formula was a little thinner and runnier than I expected; I used three coats for coverage and to even it out. Shown with Wicked Fast topcoat.

Cult Nails Spontaneous

Cult Nails Spontaneous

Cult Nails Spontaneous

Before topcoat, it dries a little matte and slightly textured:

Cult Nails Spontaneous

Blackout. It isn’t black, but a dark charcoal grey. If you look at it from up close in real life, you can see that it’s actually got a sheer jellyish base packed full of tiny little specks of pigment giving it a soft, smoky finish. It does look pretty much black in some lighting situations, although not quite as much as it does here in my photos.

Cult Nails Blackout

I used two coats although it was still just slightly patchy with its jelly base so I could have used a third.

Cult Nails Blackout

This photo is more true to colour, where you can tell that it’s grey and not black:

Cult Nails Blackout

Comparison with a couple of medium-dark greys to show how much darker it is: Kleancolor Concrete (1 thick coat), Blackout (2 coats), Misa Office Polish-tics (3 coats, it was a bit thin). I should have also compared it to a true black, ah well…

Cult Nails Blackout, Kleancolor Black, Kleancolor Concrete

Top to bottom: Kleancolor Concrete, Cult Nails Blackout, Misa Office Polish-tics

Evil Queen, a pink-toned red semi-jelly. I don’t usually like cool toned reds on me, but I really like this one!

Cult Nails Evil Queen

It was almost a one-coater, but I did two coats for the photos.

Cult Nails Evil Queen

Great formula, shiny and smooth!

Cult Nails Evil Queen

Cult Nails Evil Queen

Feelin’ Froggy, a cool/neutral green with green shimmer. This one is sheer to let the shimmer shine through and I needed three coats. It’s a little cooler toned in real life; I’d say the first photo is the most colour accurate.

Cult Nails Feelin' Froggy

Cult Nails Feelin' Froggy

Cult Nails Feelin' Froggy

OPI Goldeneye and Comparison

Happy solstice! 😀 I thought I would post a sunny colour to celebrate.

OPI Goldeneye

This is OPI Goldeneye, which I used in a couple of previous nail art manicures. I love gold polishes and this one is a great one, full of irregular foily flecks.

OPI Goldeneye

The swatch shows three coats; the polish is sheer but has a good formula.

OPI Goldeneye

I did a comparison of Goldeneye to a few other yellow gold polishes. First, here’s a bottle comparison of Goldeneye to Orly Glitz & Glamour. Goldeneye has more of an orange/copper tone to it than Glitz & Glamour.

OPI Goldeneye and Orly Glitz & Glamour

Top to bottom: OPI Goldeneye (3 coats), Orly Glitz & Glamour (2 coats), Sparitual Solstice (2 coats), Wet n Wild The Gold and The Beautiful (3 coats).

OPI Goldeneye, Orly Glitz & Glamour, Sparitual Solstice, Wet n Wild The Gold and the Beautiful

OPI Goldeneye, Orly Glitz & Glamour, Sparitual Solstice, Wet n Wild The Gold and the Beautiful

Glitz & Glamour and Solstice are yellower than Goldeneye and are dupes to one another; I’d guess they’re probably the exact same polish in fact, since Orly and Sparitual are made by the same company.

OPI Goldeneye, Orly Glitz & Glamour, Sparitual Solstice, Wet n Wild The Gold and the Beautiful

The Wet n Wild polish is the sheerest of these shades. Instead of a foil it’s more like sparse glass flecks. At three coats here, it’s still quite sheer. I like to use this one in frankens when I want to add some gold flecks!

OPI Goldeneye, Orly Glitz & Glamour, Sparitual Solstice, Wet n Wild The Gold and the Beautiful

Io, Saturnalia!

It’s the first day of Saturnalia! 😀 Thought I’d show the end result of my last mani for the holiday nail art challenge.

China Glaze Gold Fusion, No Miss Sand, and OPI Goldeneye, with Hanukkah and Saturnalia accent nails

The menorah actually lasted all 8 days of Hanukkah, and I “lit” another candle on it each night using my gel pens. I also kept the middle finger with the sun, although the nail had a break on the side so don’t mind its appearance!

China Glaze Gold Fusion, No Miss Sand, and OPI Goldeneye, with Hanukkah and Saturnalia accent nails

On the other fingers, I have China Glaze Gold Fusion, a golden magnetic polish that I used a wavy-lines magnet on. Overtop of that I added No Miss Sand Glitter, a gold glitter that’s actually in the shape of tiny rectangles. Then, over that, I added a very thin layer of OPI Goldeneye for a little bit more of a yellow-gold tint.

China Glaze Gold Fusion, No Miss Sand, and OPI Goldeneye, with Hanukkah and Saturnalia accent nails

Zoya Rory, Kimber, and Comparisons

Today I have another one of my straggling summer Zoya posts – the two pink foily polishes from the Surf collection! (Look at how long my nails were – I really liked this length/shape! ;))

Zoya Rory

First is Rory, an awesome cool-toned, lilac-leaning bubblegum pink foil polish! Quite unique, I love it! This was two coats. The formula was a little thick but easy to apply.

Zoya Rory

And next, Kimber, a darker red-toned warm fuchsia pink with golden shimmer.

Zoya Kimber

I’d say that Kimber’s finish is somewhere between foil and glass-fleck, definitely not a true foil like Rory.

Zoya Kimber

This is also two coats of Kimber, whose formula was similar to Rory’s, although slightly thinner. Neither had any issues with application.

Zoya Kimber

And now, some nail wheel comparisons of any and all polishes I had that were remotely similar! The first photo is indoors near my Ott light, the second in direct sun; neither is that great lighting-wise but I hope each can make up for the other’s deficiencies in showing the colours! Kimber and Rory are directly across from one another at the point where the two wheels are closest to each other.

Left wheel, clockwise: Soulstice Kauai, Milani Photo Flash, Milani In a Flash, Kleancolor Metallic Pink, Manglaze Lesbihonest, Milani Golden Girl, Milani Gold Digger, Milani Pink Out Loud, Zoya Kimber, China Glaze Strawberry Fields, Essence Glamorous Life, China Glaze Endurance, Zoya Starla, LA Colors Coral Reef.

Left wheel, clockwise: Soulstice Kauai, Milani Photo Flash, Milani In a Flash, Kleancolor Metallic Pink, Manglaze Lesbihonest, Milani Golden Girl, Milani Gold Digger, Milani Pink Out Loud, Zoya Kimber, China Glaze Strawberry Fields, Essence Glamorous Life, China Glaze Endurance, Zoya Starla, LA Colors Coral Reef.
Right wheel, counterclockwise from top: LA Girl Rockstar Scandal, China Glaze No Way José, Orly Rose Radiance, LA Girl Pink Steel, Zoya Rory, Pop Beauty Ruby Metal, Orly Preamp, LA Girl Color Addict Euphoria, Milani Gold Violetta.

As you can see, Rory is unique even among the other pink foils I have, and Kimber is fairly similar to China Glaze Strawberry Fields. Strawberry Fields is a bit lighter and less red though, and its shimmer is less dense.

Left wheel, clockwise: Soulstice Kauai, Milani Photo Flash, Milani In a Flash, Kleancolor Metallic Pink, Manglaze Lesbihonest, Milani Golden Girl, Milani Gold Digger, Milani Pink Out Loud, Zoya Kimber, China Glaze Strawberry Fields, Essence Glamorous Life, China Glaze Endurance, Zoya Starla, LA Colors Coral Reef.

Left wheel, clockwise: Soulstice Kauai, Milani Photo Flash, Milani In a Flash, Kleancolor Metallic Pink, Manglaze Lesbihonest, Milani Golden Girl, Milani Gold Digger, Milani Pink Out Loud, Zoya Kimber, China Glaze Strawberry Fields, Essence Glamorous Life, China Glaze Endurance, Zoya Starla, LA Colors Coral Reef.
Right wheel, counterclockwise from top: LA Girl Rockstar Scandal, China Glaze No Way José, Orly Rose Radiance, LA Girl Pink Steel, Zoya Rory, Pop Beauty Ruby Metal, Orly Preamp, LA Girl Color Addict Euphoria, Milani Gold Violetta.

Holiday Nail Art Challenge Week 3: Decorations!

It’s the third and final week of Nail Polish Canada’s holiday nail art challenge, and the theme for the week is “Trim the Tree – Holiday Decorations”! My partner and I like to celebrate the ancient Roman holiday of Saturnalia at this time of year. Did you know that decorating trees and hanging wreaths and holly, along with a fair number of other modern-day Christmas traditions, originally came from Saturnalia celebrations? 😀

Since yesterday was the first day of Hanukkah, I also “threw caution to the wind” and added a menorah to my holiday nail design. Well, both are festivals of light after all, although the ancient Romans and Jews were at war off and on between 66-136 CE and the Jews didn’t exactly come out on top in those conflicts… :/ Anyway, I hope you can all forgive this atheist’s multi-cultural multi-faith holiday mani. 😉

I’m a bit late in posting this; I did the design and took the photos last night, and meant to post earlier today, so by now there should be another candle lit on my menorah!

Saturnalia and Hanukkah decorations mani

The sun is a major symbol of Saturnalia, which was celebrated around the winter solstice (the dates and length of the celebration varied what with changes of the ancient calendar) when the days are the shortest in the northern hemisphere. Sun symbols were one of the main ornaments used to decorate trees, and so I wanted to have the sun figure prominently in my mani.

Saturnalia and Hanukkah decorations mani

This web page compiles a few modern-day celebrants’ comments about Saturnalia, and I thought I’d post an excerpt that has to do with decorations:

“Many of the decorations involved greenery – swathes, garlands, wreaths, etc – being hung over doorways and windows, and ornamenting stairs. Ornaments in the trees included sun symbols, stars, and faces of the God Janus. Trees were not brought indoors (the Germans started that tradition), but decorated where they grew.

Food was also a primary decoration – gilded cakes in a variety of shapes were quite popular, and children and birds vied for the privilege of denuding the trees of their treats. The commonest shapes were fertility symbols, suns and moons and stars, baby shapes, and herd animal shapes (although, to be honest, it’s hard to tell if some of those ancient cookie cutters are supposed to be goats or deer). I would imagine coins were also a popular decoration/gift.”

Saturnalia and Hanukkah decorations mani


“People were just as likely to be ornamented as the trees. Wearing greenery and jewelry of a sacred nature was apparently common, based on descriptions, drawings, and the like from the era. Although the emphasis was on Saturn, Sol Invictus got a fair share of the revelry as well.”

Saturnalia and Hanukkah decorations mani


“Gold, because the sun is yellow, is always a sure choice for a good Saturnalia decoration. For modern Saturnalia, those golden glass ball ornaments are ideal, as are gold sun faces, gold stars, and gilded anythings. Gilding nuts and pine cones and nestling them among the swags and wreaths of greenery would be a lovely way of acknowledging the ancient roots of this ceremony.”

Saturnalia and Hanukkah decorations mani


“Indoor trees are not ancient Roman, but if you have plants growing indoors, decorating them would certainly be in the spirit of the holidays. If you just have to have the now-traditional indoor tree, try decorating it in gold ornaments with a solar theme. Swathe it in bright red or purple ribbons (2 colors quite in favor with the Romans, and looks great with the gold ornaments). Top the tree with a sun, rather than a star, for after all, this is a solar celebration.”

Items used for Saturnalia and Hanukkah decorations mani

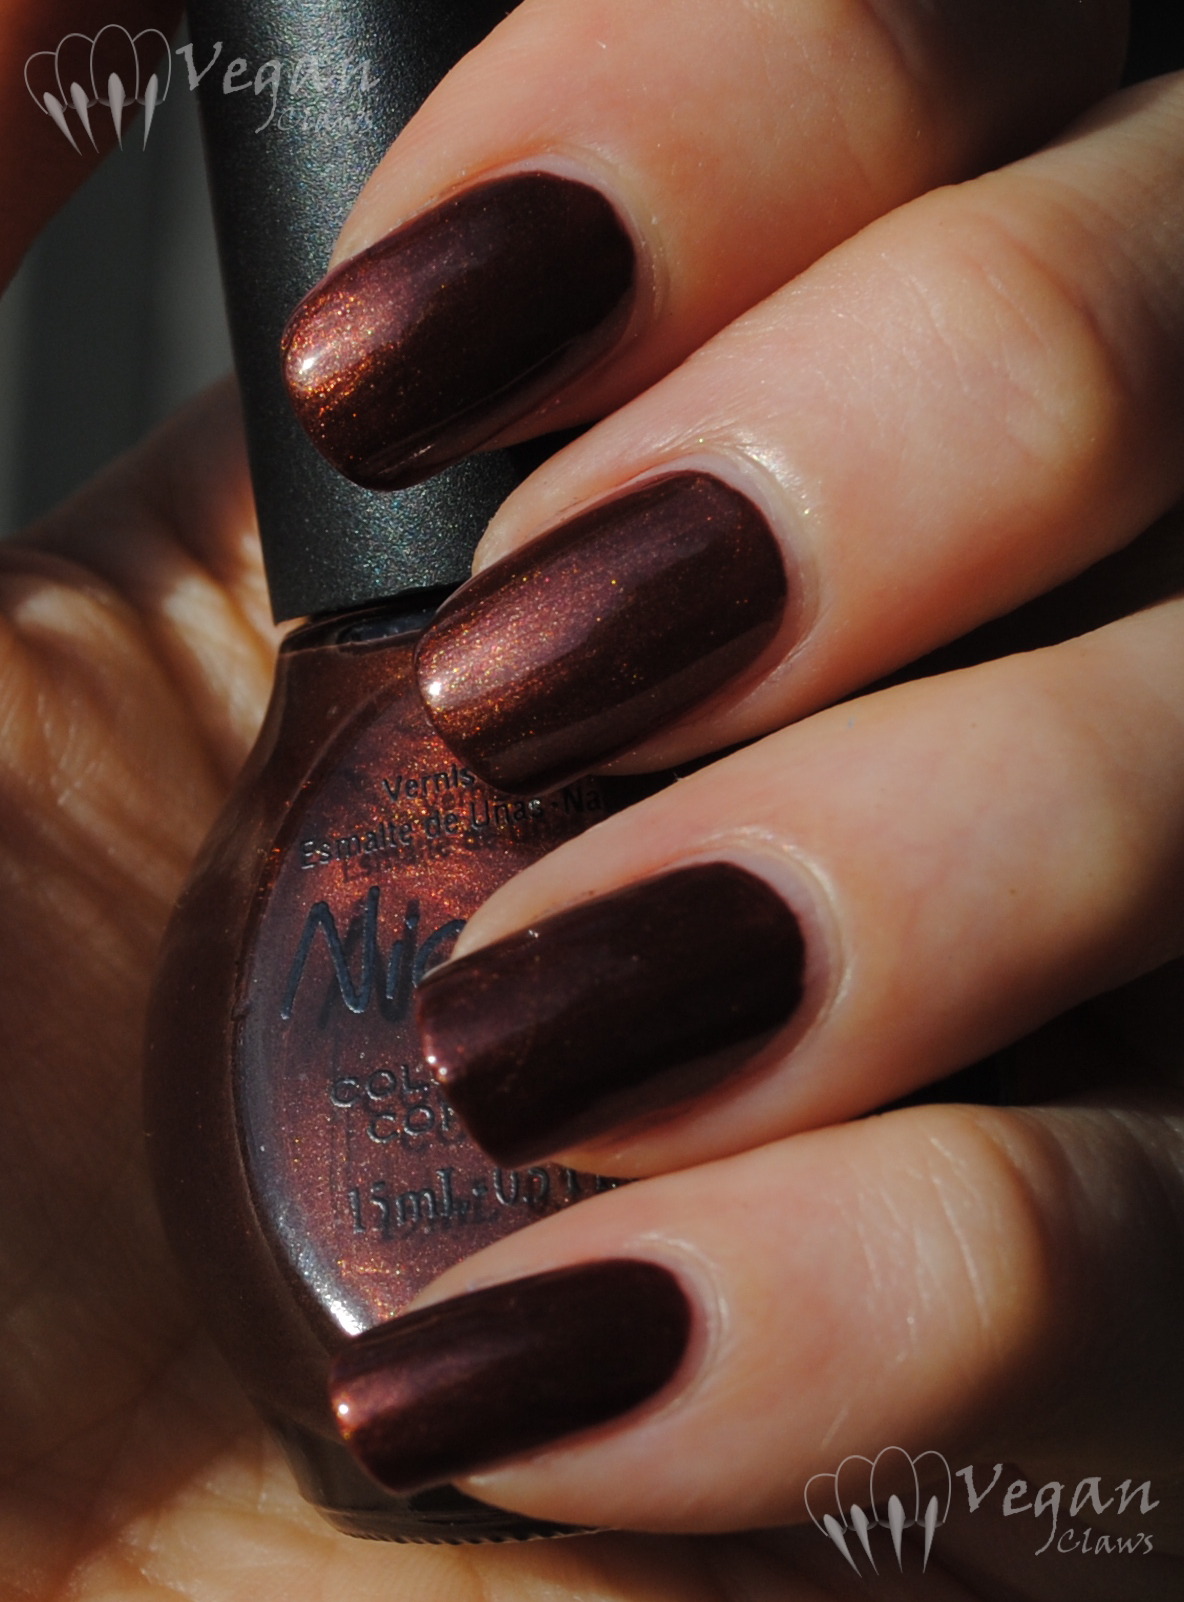
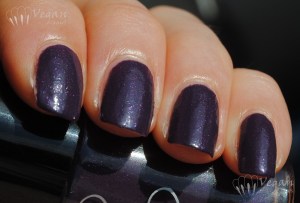
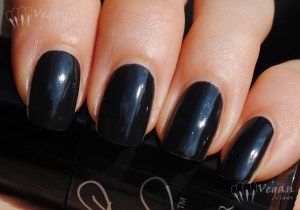
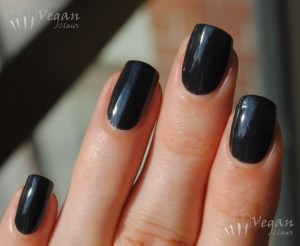
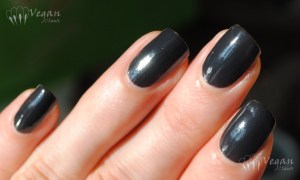
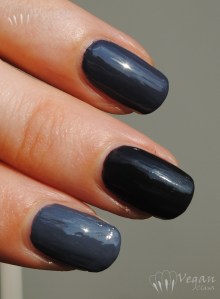
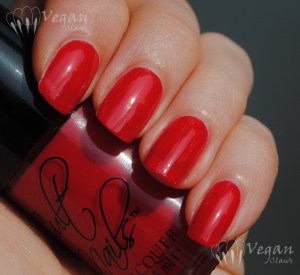
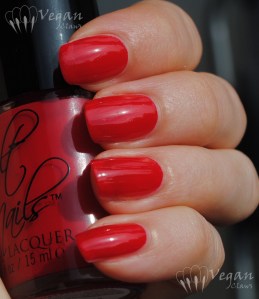
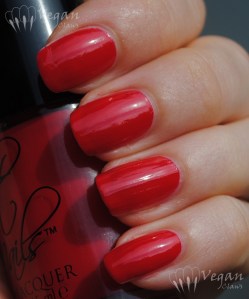
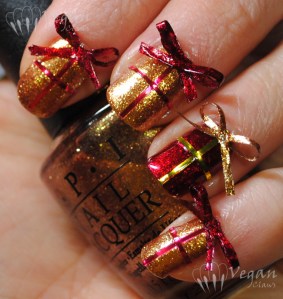
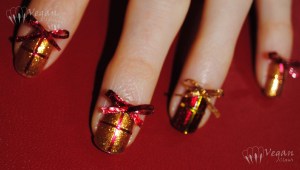
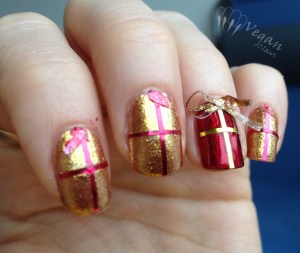
Here are the items I used for this mani. The base polish is Zoya Indigo, a shimmery navy blue with very fine, sparse holo particles. The boughs of holly were made with Zoya Rina and Kleancolor Metallic Red. The menorah was drawn using the orange Orly striping polish, which is called Lovey Dovey. The sun, the candles, and accents on the holly were done using some metallic gel pens. The sun’s face was done using the silver gel pen but then traced over with a regular blue fine felt-tipped pen, since the silver didn’t contrast well enough against the yellow.

I had a lot of fun doing this three-week holiday challenge! Be sure to visit the week 3 nail art challenge page here and vote for your favourite holiday decorations mani! Voting is open through December 12th. And whatever you celebrate at this time of year, I hope you have a wonderful holiday! 😀

Orly Synchro

This is a very picture heavy post, because this polish is quite the chameleon! Orly Synchro is from the Electronica collection released for early fall 2012.

Orly Synchro

It’s a duochrome shimmer that is kind of frosty. The colour ranges from coral to pink to purple to nearly blue, depending on the angle.

Orly Synchro

The formula was a bit thick and sticky; not the easiest to work with. Care also has to be taken to get the brush strokes straight.

Orly Synchro

It’s also pretty sheer, and this was three coats, the last one thick.

Orly Synchro

Totally worth it though! The colours are amazing! It makes me think of a sunset.

Orly Synchro

Orly Synchro

Orly Synchro

Orly Synchro

In the shade:

Orly Synchro

I also swatched it using one fairly thick coat over black (one coat of Kleancolor Black). The layer on my ring finger somehow ended up being thicker than the others, and it shows in the photos; the ring finger has more of a pinkish-purple tone while the other fingers show off the more blue side of the polish.

Orly Synchro over black

Orly Synchro over black

I found the trick to applying Synchro to be using a thick enough final coat that you have time to straighten out the brush strokes before it starts to get sticky.

Orly Synchro over black

I just love all the colours in this! And how it looks quite different over black versus on its own!

Orly Synchro over black

Orly Synchro over black

Orly Synchro over black

In the shade:

Orly Synchro over black

On my thumb in this last photo is one coat of Synchro over a light pink (Joe Fresh in the shade Blush):

Orly Synchro over black and pink (thumb)

China Glaze LOL

A quick post with a classic, but unfortunately hard to find, polish: China Glaze’s LOL from the OMG collection. It’s a gorgeous glowy purple linear holo. I can’t remember now if this was two or three coats…

China Glaze LOL

China Glaze LOL

China Glaze LOL

China Glaze LOL

China Glaze LOL

Holiday Nail Art Challenge Week 2: Gifts!

It’s week 2 of Nail Polish Canada’s Holiday Nail Art Challenge! The theme for this week is gifts! 😀

OPI Goldeneye and Kleancolor Metallic Red

And here is my gift manicure!

OPI Goldeneye and Kleancolor Metallic Red

The base for the gold gifts is OPI Goldeneye from their new James Bond collection. This is three coats of this yellow-gold foil, which is a little sheer, but has a great formula.

OPI Goldeneye and Kleancolor Metallic Red

The base for the red accent nail gift is Kleancolor Metallic Red, which is a very pigmented red foil with an excellent formula. One coat was nearly enough, but I used two for good measure.

OPI Goldeneye and Kleancolor Metallic Red

The ribbon wrapping around the gifts is striping tape, and the bows are homemade. I used a plastic mylar wrapper that a package of nail wheels came in, and cut out very thin strips. I twisted the strips into bows and glued them together using basecoat (cutting out and gluing the strips was the hard part – it took a while to get them half decent!).

OPI Goldeneye and Kleancolor Metallic Red

Once they were ready, I painted the red bows with Metallic Red, and the gold one with Goldeneye layered over Soulstice Spa Venice, an opaque gold foil, since Goldeneye is sheer. I fixed them into place on my nails using topcoat.

OPI Goldeneye and Kleancolor Metallic Red

I’m really happy with how these turned out! I hope you all like them too. Unfortunately, with the bows it’s a one-day-only manicure though; this is what I woke up to this morning:

Gifts - unwrapped!

Gifts – unwrapped!

Don’t forget to visit the contest’s week 2 page here and vote for your favourite! Voting for this week is open through to Wednesday, December 5. 🙂

And since the best gift of all is seeing your loved ones happy and healthy, here are some pics of three of my boys checking things out while I was photographing the mani! From left, Thor (his nose, anyway!), Fred, and Julius! <3<3<3

Picture Polish Voodoo and Comparison

Picture Polish Voodoo is a gorgeous deep plum/burgundy base with golden glass fleck shimmer, giving an overall brownish-burgundy look.

Picture Polish Voodoo

The burgundy base is a little sheer, so that the golden glass flecks shining through it often appear like red sparkles. As you can see in the bottle in the following shot, they’re definitely gold though!

Picture Polish Voodoo

The formula was a little thick but not difficult to work with. These photos show two thick coats of the polish.

Picture Polish Voodoo

I love it!

Picture Polish Voodoo

I did a comparison of Voodoo to China Glaze Midtown Magic, which I previously reviewed here. From top to bottom, the photo shows Midtown Magic, Voodoo, Midtown Magic.

China Glaze Midtown Magic and Picture Polish Voodoo

The main difference is that Midtown Magic is darker, more blackened. The shimmer also has more red in Voodoo, due to it shining through its base. My favourite of the two is Voodoo since it’s not as blackened!